16
En
With u (Remote Interactive), you can use the following
special functions:
■ System On/Auto Power On
When you start playback on a component connected via
u, if the AV receiver is on Standby, it will automati-
cally turn on and select that component as the input
source.
■ Direct Change
When playback is started on a component connected via
u, the AV receiver automatically selects that compo-
nent as the input source.
■ Remote Control
You can use the AV receiver’s remote controller to con-
trol your other u-capable Onkyo components, point-
ing the remote controller at the AV receiver’s remote
control sensor instead of the component. You must enter
the appropriate remote control code first (➔ 41).
Note
•Use only u cables for u connections. u cables are supplied
with Onkyo players (DVD, CD, etc.).
• Some components have two u jacks. You can connect either
one to the AV receiver. The other jack is for connecting addi-
tional u-capable components.
• Connect only Onkyo components to u jacks. Connecting other
manufacturer’s components may cause a malfunction.
• Some components may not support all u functions. Refer to
the manuals supplied with your other Onkyo components.
This section explains how to connect the supplied indoor FM antenna and AM loop antenna.
The AV receiver won’t pick up any radio signals without any antenna connected, so you must connect the antenna to use
the tuner.
Note
• Once your AV receiver is ready for use, you’ll need to tune into a radio station and position the antenna to achieve the best possible
reception.
• Keep the AM loop antenna as far away as possible from your AV receiver, TV, speaker cables, and power cords.
Tip
• If you cannot achieve good reception with the supplied indoor FM antenna, try a commercially available outdoor FM antenna instead.
• If you cannot achieve good reception with the supplied indoor AM loop antenna, try using it with a commercially available outdoor AM
antenna.
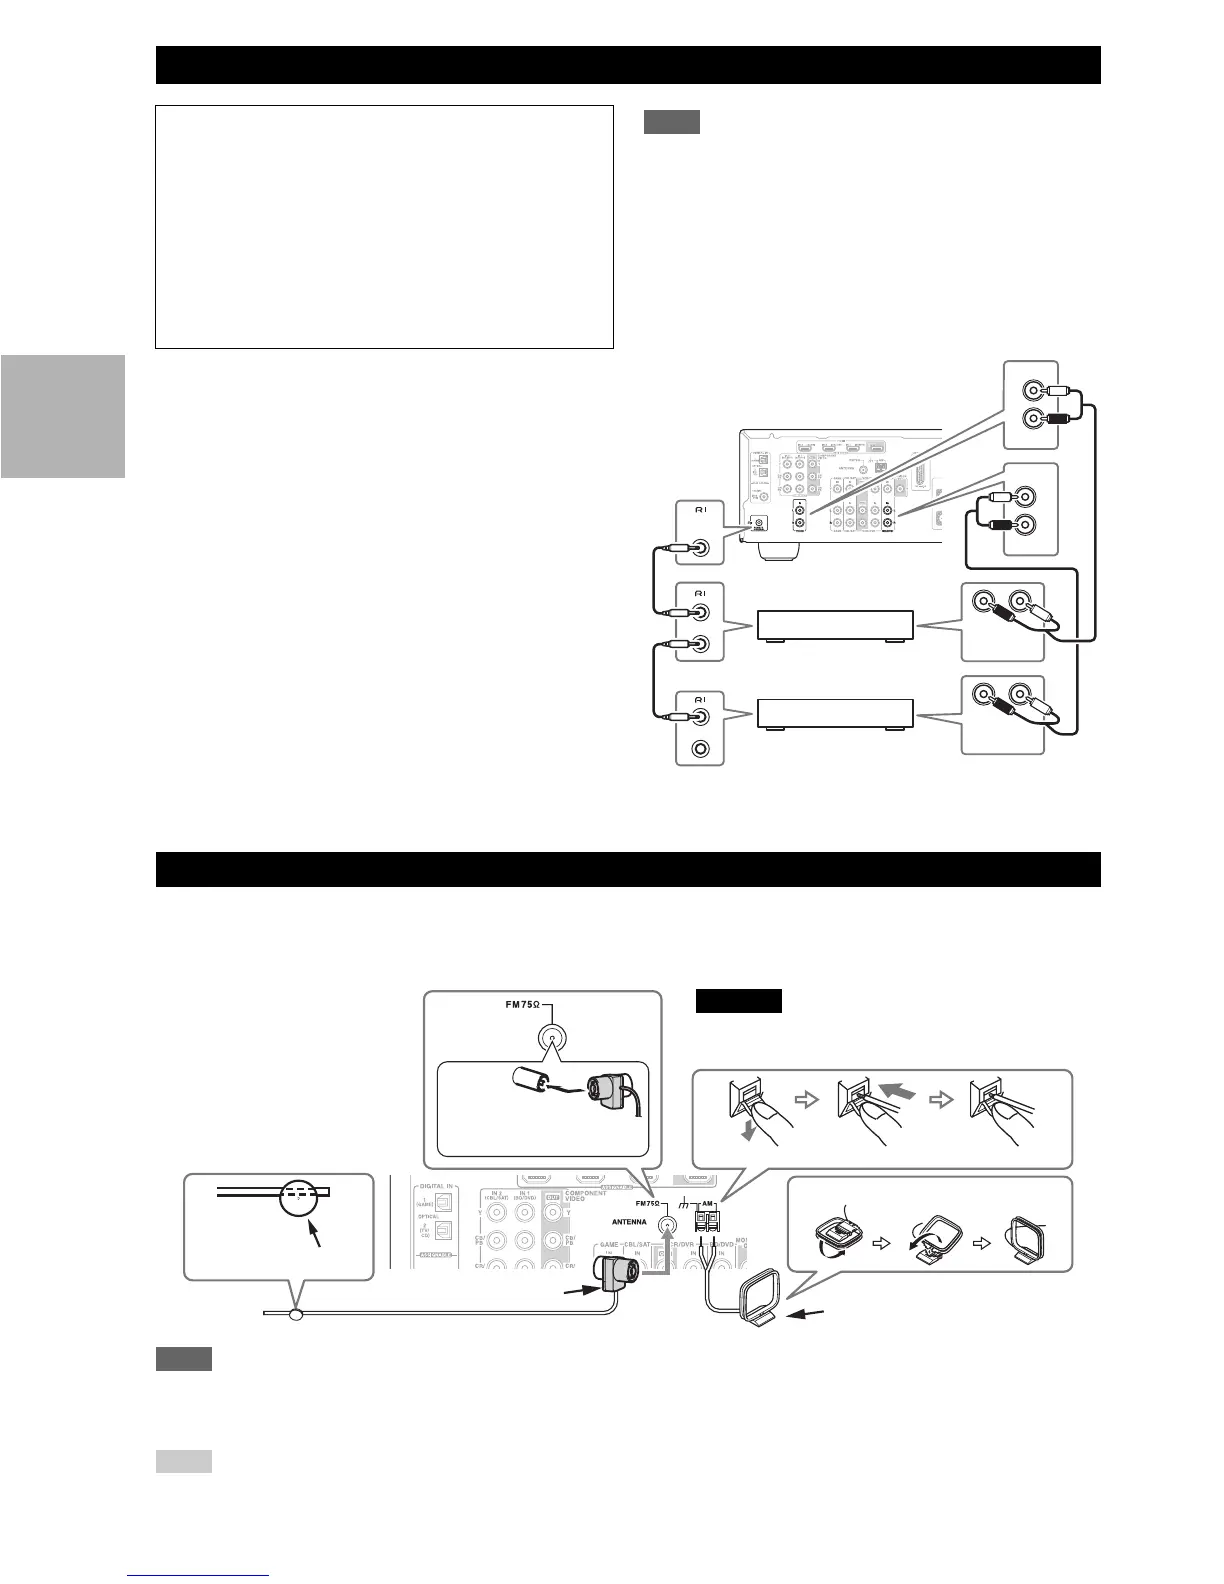
Connecting Onkyo u Components
Step 1:
Make sure that each Onkyo component is connected
with an analog audio cable (connection C in the hookup
examples) (➔ 15).
Step 2:
Make the u connection (see illustration below).
Step 3:
If you’re using an RI Dock, or cassette tape deck,
change the Input Display (➔ 20).
LR
IN
BD/DVD
L
R
IN
TV/CD
L
R
REMOTE
CONTROL
ANALOG
AUDIO OUT
LR
ANALOG
AUDIO OUT
e.g., CD player
e.g., DVD player
Connecting Antenna
Thumbtacks, etc.
Insert the plug fully
into the jack.
Push. Insert wire. Release.
Assembling the AM loop antenna
Indoor FM antenna (supplied)
AM loop antenna (supplied)
Caution
• Be careful that you don’t injure yourself when
using thumbtacks.
 Loading...