© Optoma
Issue 2.1 July 25, 2018
57
6.3.6 Standard Splicing
The following figure illustrates how to setup two units in the standard configuration mode.
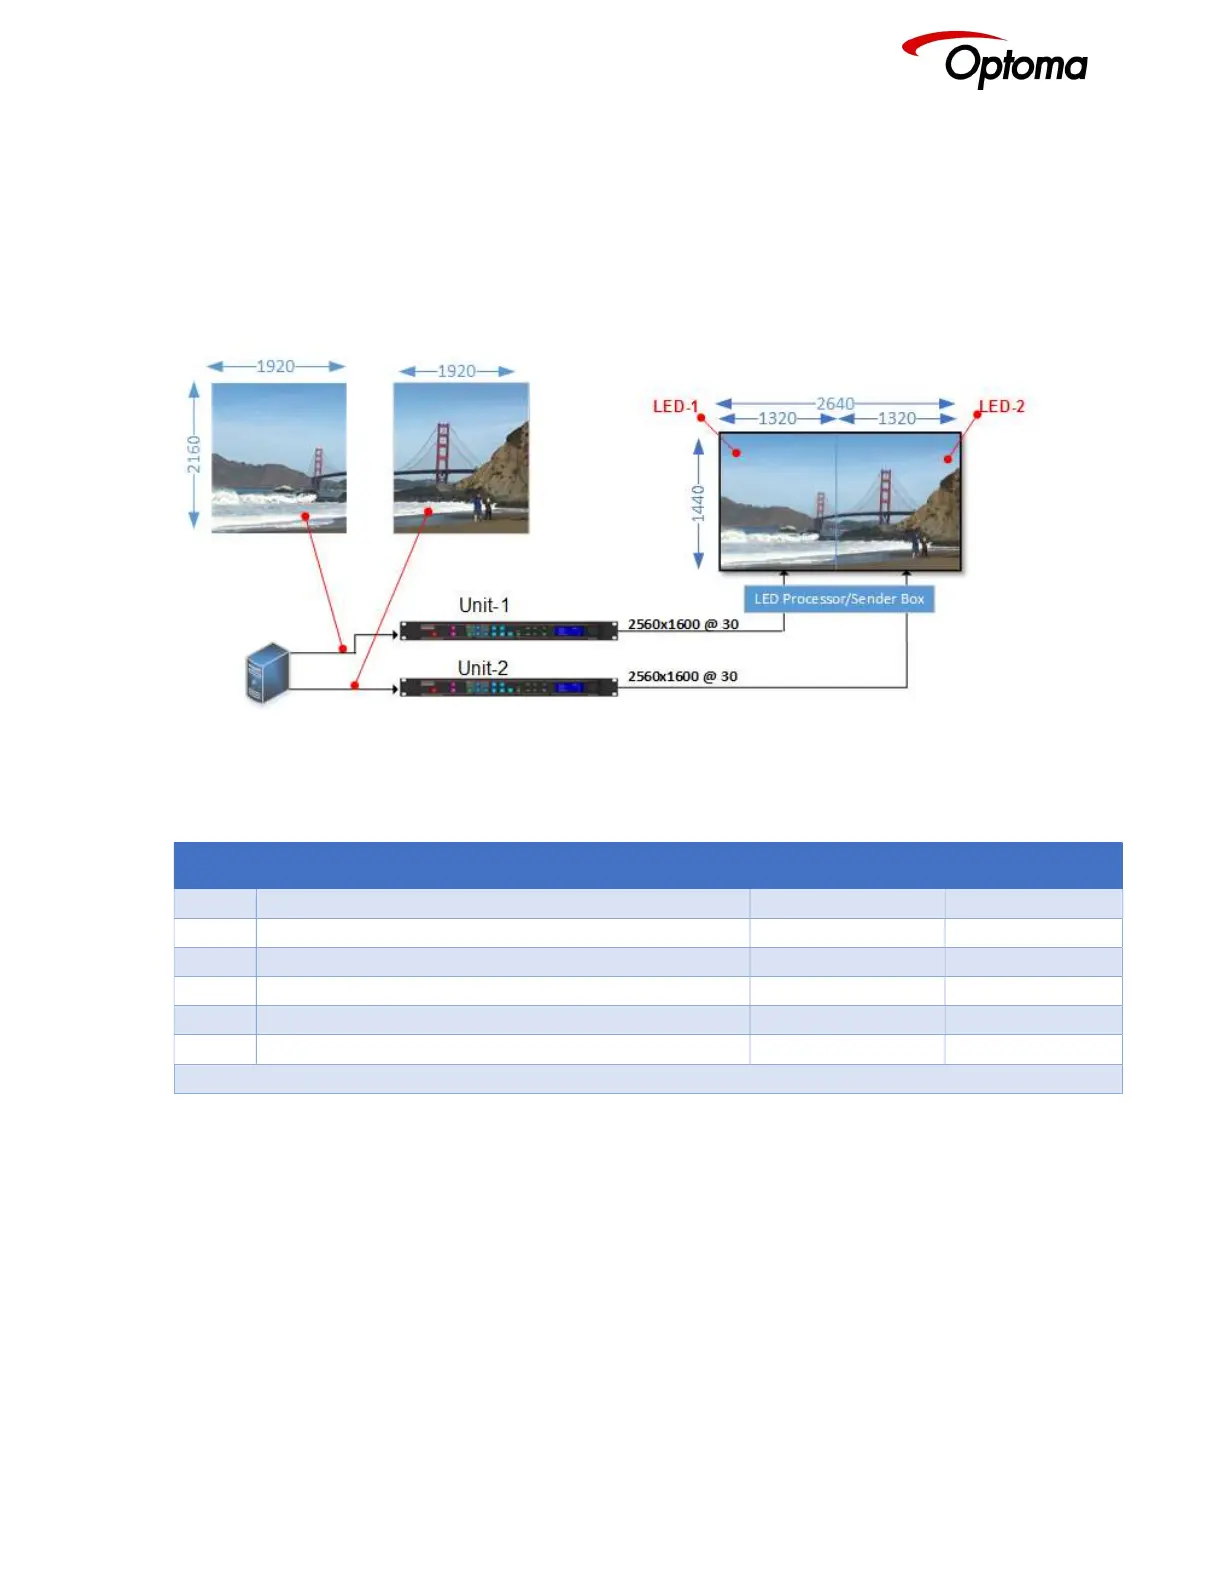
6.3.6.1 Standard Splicing - 2x1 Example (pre-split source)
The following figure illustrates how to setup two units in the standard configuration mode. In the first
example, the input image is pre-split at the source, so the Splicing Zoom feature is turned Off
Figure 6: Standard Splicing - 2x1 example (pre-split source)
STEP MENU ITEM TO MODIFY Unit-1 Unit-2
1 Output>Display Type>I/O Lock Source Source
2 LED Screen Size> Splicing Zoom Off* Off*
3 LED Screen Size> Splicing Width 1* 1*
4 LED Screen Size> H-Pos 1* 1*
5 LED Screen Size> Right Edge 1320 1320
6 LED Screen Size> Bottom Edge 1440 1440
* Some steps are skipped, because the values are the same as the default settings after factory reset
 Loading...