© Optoma
Issue 2.1 July 25, 2018
60
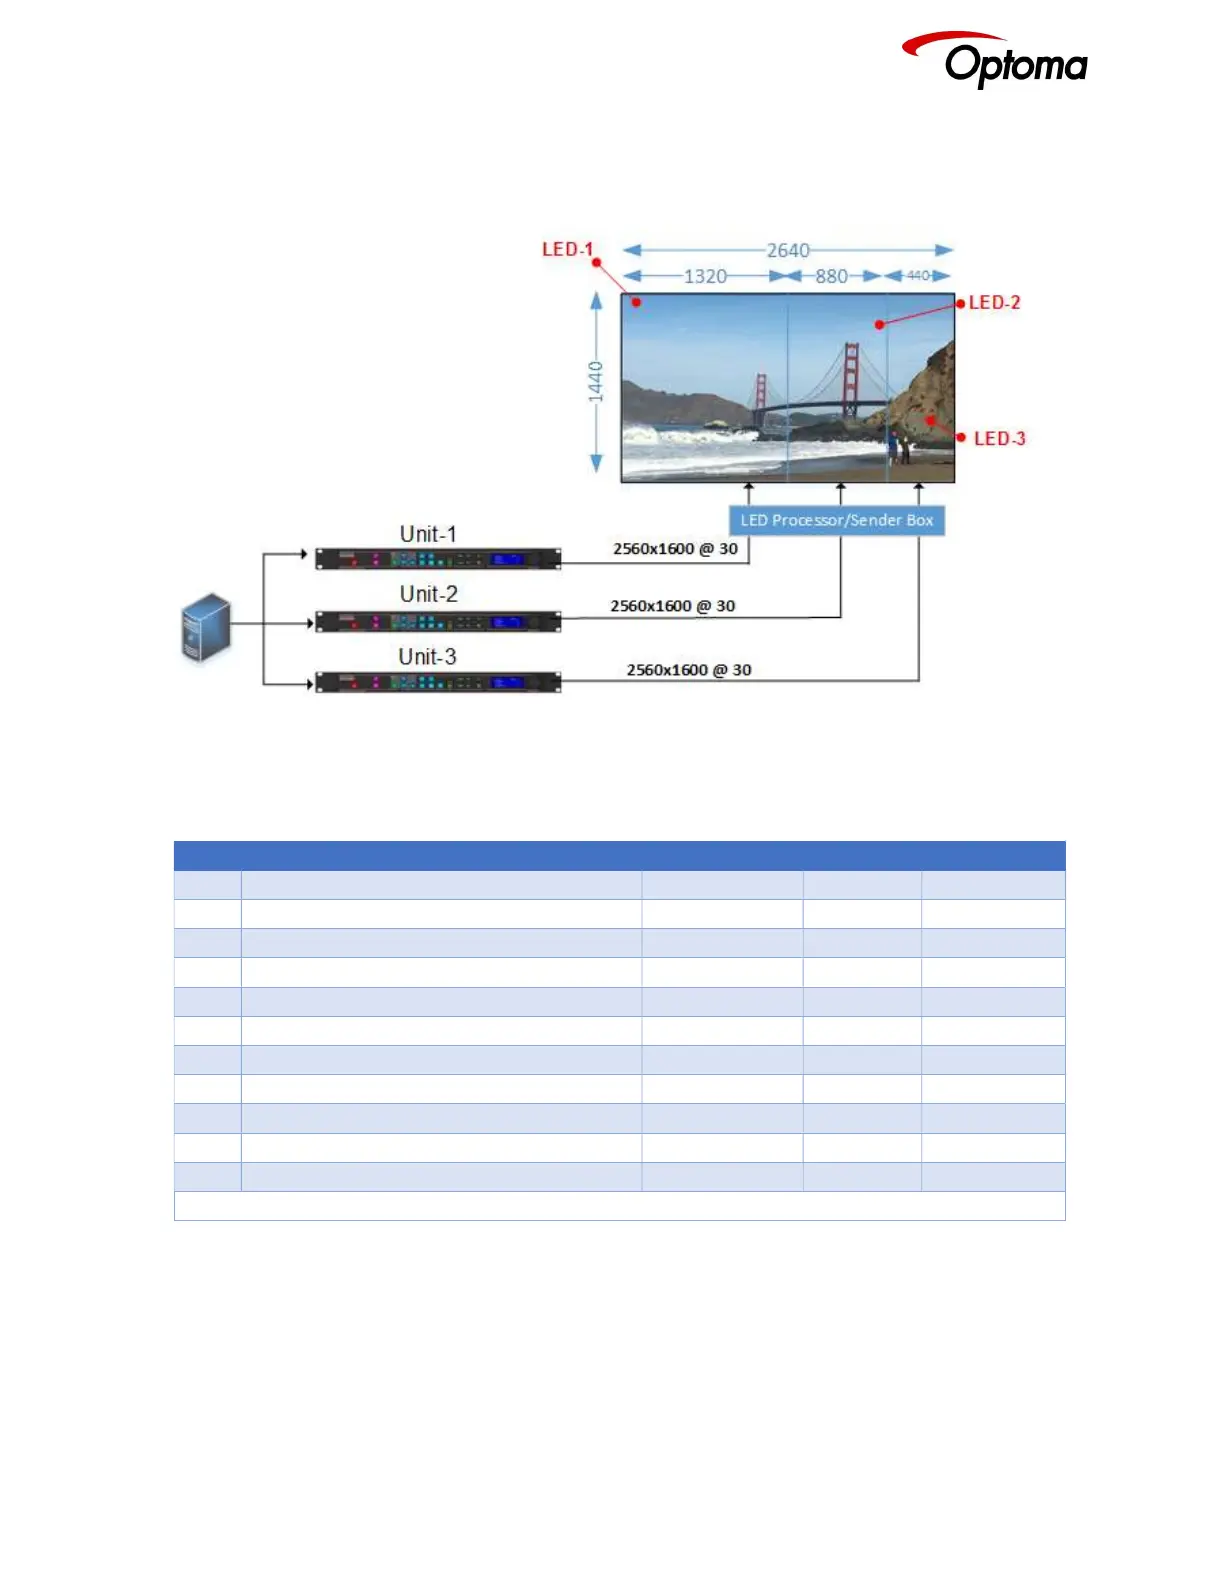
6.3.7.2 Advanced Splicing – 3x1 Example
Figure 9: Advanced Splicing - 3x1 example
STEP MENU ITEM TO MODIFY Unit-1 Unit-2 Unit-3
1 Output>Display Type>Output Mode 2560x1600 2560x1600 2560x1600
2 Output>Display Type> Frame Rate 30Hz 30Hz 30Hz
3 Output>Display Type>I/O Lock Source Source Source
4 LED Screen Size> Splicing Zoom On On On
5 LED Screen Size> Splicing Width 3 3 3
6 LED Screen Size> H-Pos 1* 2 3
7 LED Screen Size> Right Edge 1320 880 440
8 LED Screen Size> Bottom Edge 1440 1440 1440
10 LED Screen Size> Splicing Advanced Advanced Advanced
12 LED Screen Size> Advanced Splicing> Wall Width 2640 2640 2640
13 LED Screen Size> Advanced Splicing> Hor. Offset 0* 1320 2200
* Some steps are skipped, because the values are the same as the default settings after factory reset
 Loading...