Installation
−
13
−
Hexagonal socket head screw set (supplied)
Model
Nominal
thread size
Tightening torque
Maximum applicable
plate thickness
*
BLE23
M5 3.8 N·m (33 lb-in) 5 mm (0.20 in.)
BLE46
M6 6.4 N·m (56 lb-in) 8 mm (0.31 in.)
BLE512
M8 15.5 N·m (137 lb-in) 12 mm (0.47 in.)
*
The gures in the table apply when the supplied hexagonal socket head screw set is used.
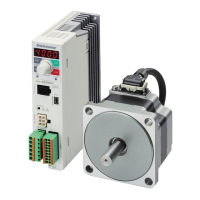
Installing the driver
The driver can be installed in two different ways. Refer to p.20 for the specic installation methods.
•
Use screws (M4: not supplied) to afx the driver through the mounting holes (two locations) provided at the back
of the driver.
•
Afx the driver on a DIN rail using the accessory DIN-rail mounting plate (sold separately).
6.3 Installing the combination parallel shaft gearhead
Mounting hole dimensions [unit: mm (in.)].
Model ØA ØB C ØD
ØB
C
4×ØD
ØA
BLE23
70 (2.76) 24 (0.94) 10 (0.39) 4.5 (0.177)
BLE46
94 (3.70) 34 (1.34) 13 (0.51) 6.5 (0.256)
BLE512
104 (4.09) 40 (1.57) 18 (0.71) 8.5 (0.335)
ØB indicates the external dimensions of the product.
Drill holes with a minimum diameter of ØB +1 mm (0.04 in.).
Removing/Installing the gearhead
To replace the gearhead or change the cable outlet direction, remove the screws assembling the gearhead. The
gearhead can be removed and the motor cable position changed to a desired 90° direction.
1.
Remove the hexagonal socket head screws (2 pcs.) assembling
the motor and gearhead and detach the motor from the
gearhead.
Hexagonal
socket head
screw
Assembly screws
Model Nominal thread size Tightening torque
BLE23
BLE46
M2.6 0.4 N·m (3.5 lb-in)
BLE512
M3 0.6 N·m (5.3 lb-in)
2.
Using the pilot sections of the motor and gearhead as guides,
install the gearhead to the motor and tighten the hexagonal
socket head screws.
At this time, the motor cable position can be changed to a desired 90°
direction.
When installing the gearhead, slowly rotate it clockwise/
counterclockwise to prevent the pinion of the motor output shaft from
contacting the side panel or gear of the gearhead.
Also conrm that no gaps remain between the motor ange surface and
the end face of the gearhead’s pilot section.
Change the cable
position to a desired
90° direction.
Note
•
Do not forcibly assemble the motor and gearhead. Also, do not let metal objects or other foreign
matter enter the gearhead. The pinion or gear of the motor output shaft may be damaged,
resulting in noise or shorter service life.
•
Do not allow dust to attach to the pilot sections of the motor and gearhead. Also, assemble the
motor and gearhead carefully by not pinching the O-ring at the motor’s pilot section. If the O-ring
is crushed or severed, grease may leak from the gearhead.
•
The hexagonal socket head screws assembling the motor and gearhead are afxing the motor
and gearhead only temporarily. When installing the gearhead, be sure to use the supplied
hexagonal socket head screws (4 pcs.).
 Loading...