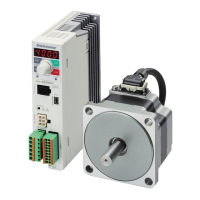
Installation
−
20
−
z
Combination type
hollow shaft at gearhead
Model
Distance from gearhead mounting surface and
permissible radial load
*
[N (lb.)]
Permissible
axial load
[N (lb.)]
Gear ratio 10 mm (0.39 in.) 20 mm (0.79 in.)
BLE23
5, 10 450 (101) [410 (92)] 370 (83) [330 (74)]
200 (45)
15 to 200 500 (112) [460 (103)] 400 (90) [370 (83)]
BLE46
5, 10 800 (180) [730 (164)] 660 (148) [600 (135)]
400 (90)
15 to 200 1200 (270) [1100 (240)] 1000 (220) [910 (200)]
BLE512
5, 10 900 (200) [820 (184)] 770 (173) [700 (157)]
500 (112)15, 20 1300 (290) [1200 (270)] 1110 (240) [1020 (220)]
30 to 200 1500 (330) [1400 (310)] 1280 (280) [1200 (270)]
*
The values assume a rated speed of 3000 r/min or below. The values in [ ] are based on a rated speed of 4000 r/min.
z
Round shaft type
Model
Distance from tip of motor output shaft and
permissible radial load [N (lb.)]
Permissible axial load
[N (lb.)]
10 mm (0.39 in.) 20 mm (0.79 in.)
BLE23
80 (18) 100 (22)
Not to exceed one-half the
motor’s dead weight
*
BLE46
110 (24) 130 (29)
BLE512
150 (33) 170 (38)
*
Minimize the axial load. If a axial load must be applied, do not let it exceed one-half the motor’s mass.
6.8 Installing the driver
The driver is designed so that heat is dissipated via air convection and conduction
through the enclosure. Install the driver to a at metal plate offering excellent
vibration resistance.
When two or more drivers are to be installed side by side, provide 20 mm
(0.79 in.) and 25 mm (0.98 in.) clearances in the horizontal and vertical
directions, respectively.
35 (1.38)
150 (5.91)
25 (0.98) or more
20 (0.79)
or more
Unit: mm (in.)
Note
•
Install the driver in an enclosure whose pollution degree is 2 or
above or protection class is IP54 or better.
•
Be sure to install (position) the driver vertically. Do not block the
radiation openings.
•
Do not install any equipment that generates a large amount of
heat or noise near the driver.
•
If the ambient temperature of the driver exceeds 50 °C (122 °F),
revise the ventilation condition or force-cool the area around the
driver using a fan.
Installing with screws
Install the driver perpendicularly (vertical position) and afx the
driver through the mounting holes using two screws (M4: not
supplied).
Mounting hole
(at the back)
Mounting hole
 Loading...