B.2.3 Discharge Current Calibration
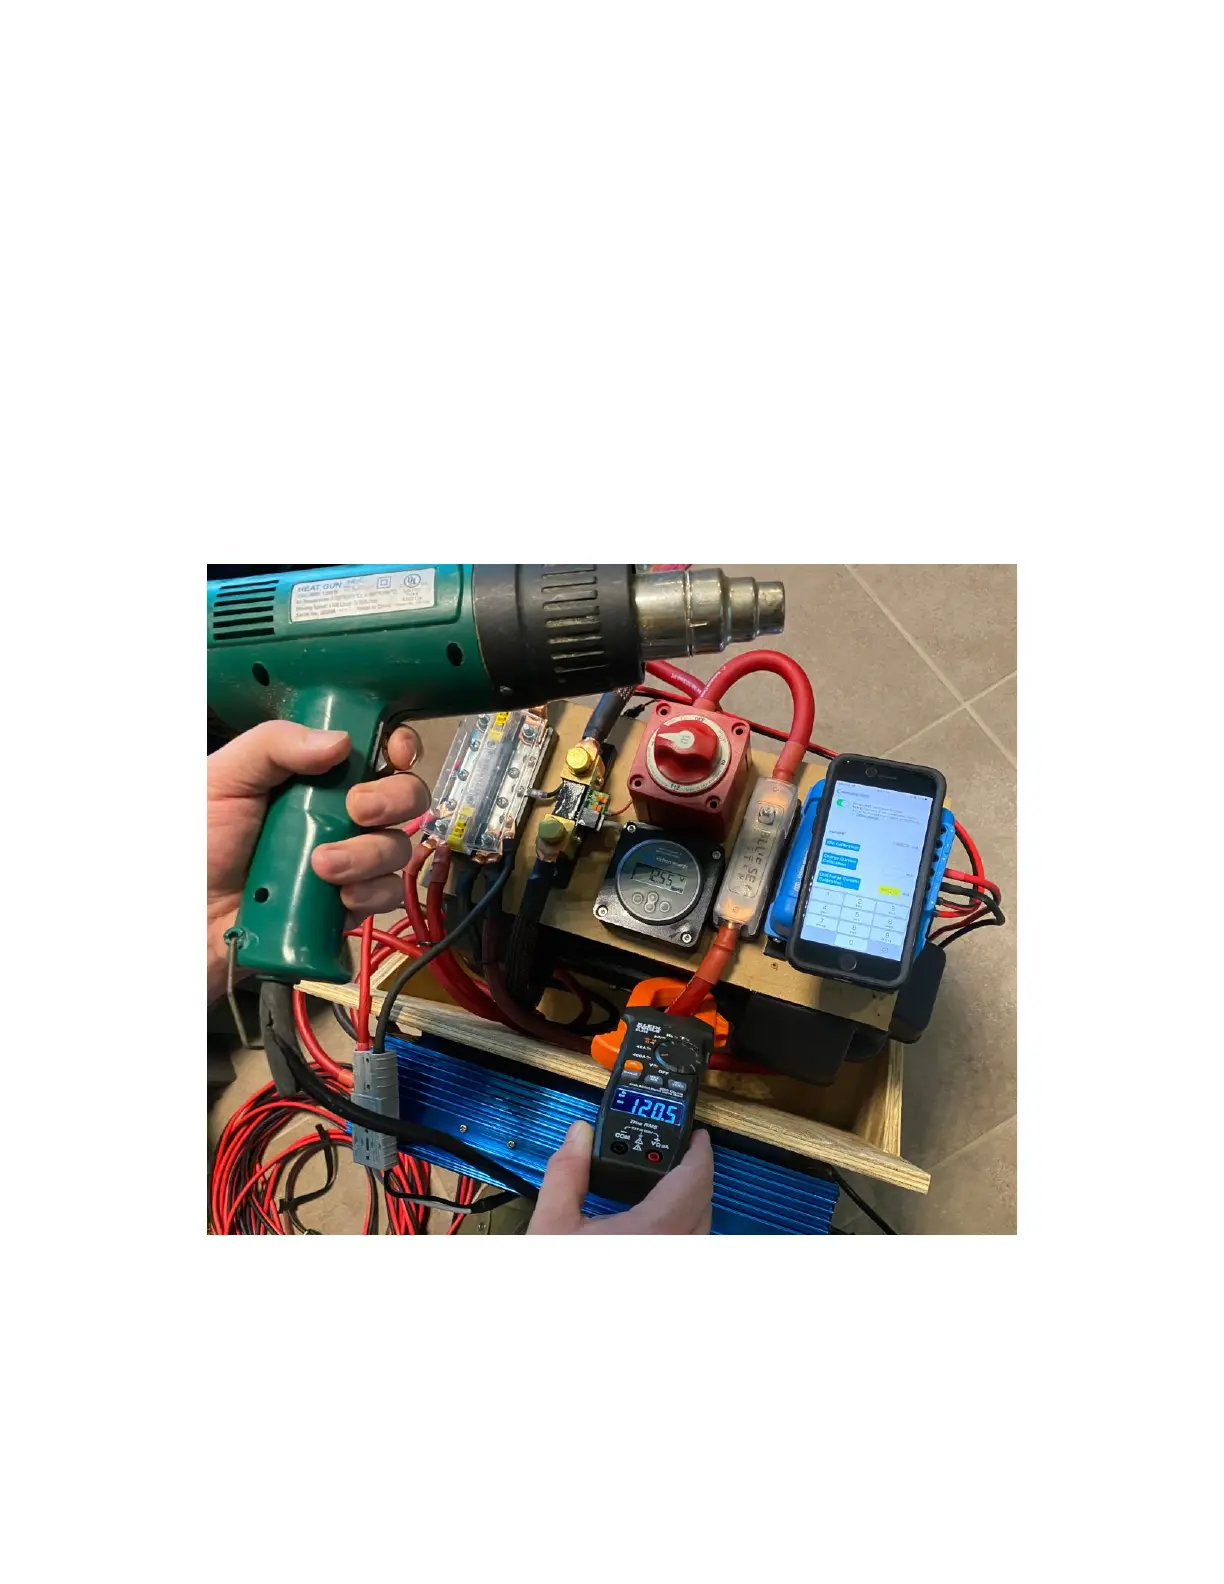
Connect a large non-inductive load to the battery. An AC inverter and a heater or heat gun works great for
this. For the 12V 4-cell BMS, a 1500 watt heat gun is perfect. Make sure that all chargers and MPPT
controllers are unplugged or disabled. Get the load connected, but don’t turn it on yet.
Next, get the phone app ready. Navigate to the same screen (Current Cal.), and put the cursor into the
discharge current text box (see image below).
Turn on the clamp meter. Select DC current at the appropriate range (For the meter shown below, which has
ranges for 40A or 400A, the 400A range was selected). Turn on the load for a few seconds, and ensure that
the current is displayed on the meter, and on the iPhone app. Make sure that the current is in the right range
(100-120 amps is ideal). Ensure that the BMS doesn’t go into discharge current protection, and ensure that
the inverter doesn’t go into protection either (most will beep incessantly if the load was too high). Turn the
load off. If all of this looks OK, proceed below.
Now, on to the actual discharge current calibration. Make absolutely sure these steps are followed exactly.
1. Turn the load on
2. Read the current on the clamp meter.
3. Convert this number to milliamps (multiply the current in amps by 1000). For example, if it reads 120.5
amps, then the current in milliamps is 120500.