41
3. Basic operations
3-4-4. PinP adjustments
Adjusting the PinP position and size
While the PinP menu is selected, adjust the X and Y coordinates using the positioner in the positioner area,
and adjust the size using the rotary encoder [Z]. Alternatively, the settings can be performed on the menus.
1
Press the [FUNC] button to light its indicator, and press the [PinP] button to display the PinP menu.
2
Turn [F1] to display the Position sub menu.
3
Either operate the positioner and the rotary encoder [Z] or turn [F2], [F3] and [F4] to set the X and Y
coordinates and the size using the X-Pos, Y-Pos and Size items.
<Men
u display>
Position
X-Pos Y-Pos Size
4/6 0.00 0.00 100.00
−50.00
|
+50.00
−50.00
|
+50.00
0.00
|
100.00
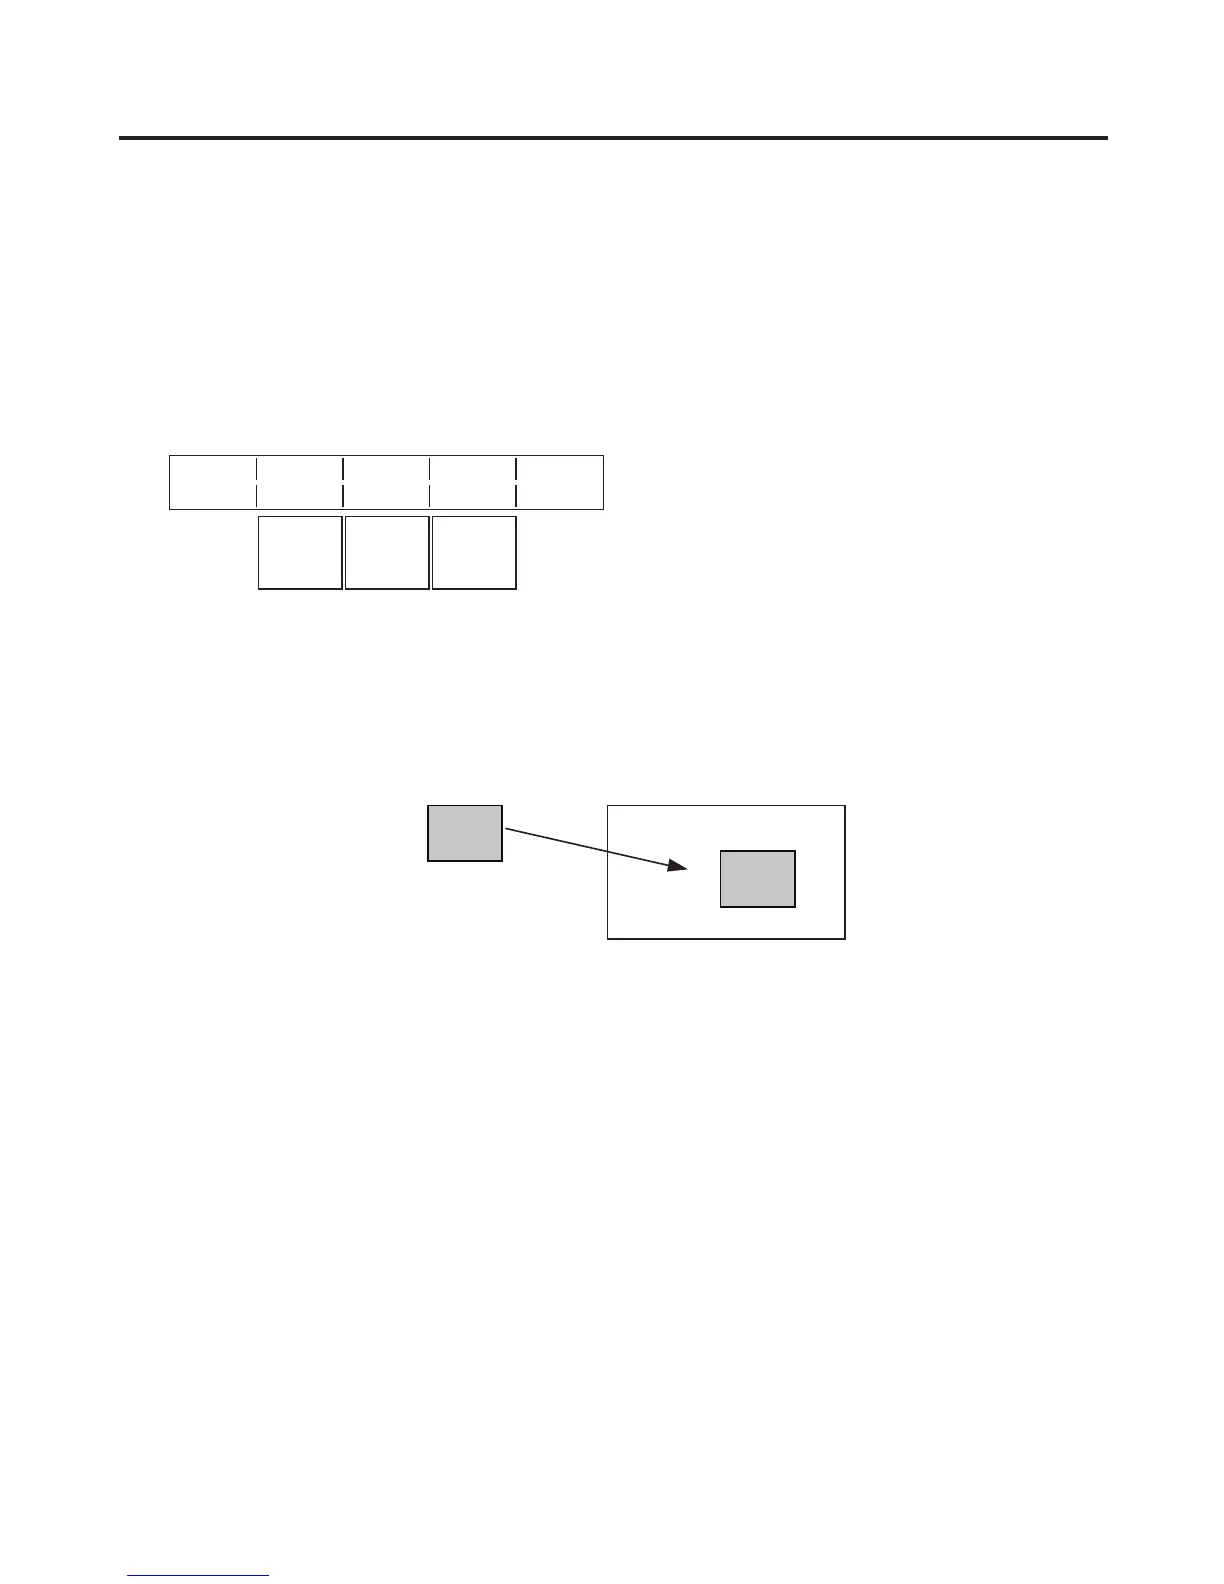
Select the dot by dot mode
When the system is set to the HD mode and an SD format image is to be used for the PinP material, the
images can be combined in the dot by dot mode (actual-size images).
In this mode, the SD format image will not be up-converted so image deterioration can be prevented.
Furthermore, since the images are handled in their actual size, the PinP size is fixed.
On the IN/OUT menu, turn [F1] to display the Input menu, and select D by D using the Mode item.
PinP material
PinP combined image
Adjusting the density
The step below is taken to adjust the PinP transparency (density).
On the PinP sub men
u, turn [F2] to set the Density item.
 Loading...