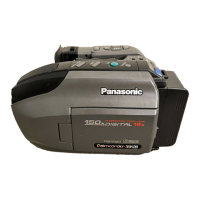
Do you have a question about the Panasonic Digital Palmcorder PalmSight PV-DV100-K and is the answer not in the manual?
Lists the components included with the camcorder.
Lists critical warnings for safe operation and handling.
Precautions regarding the camcorder's use and placement.
Instructions on how to clean and care for the camcorder.
Step-by-step instructions for inserting the battery and cassette.
Basic steps for recording video content.
Steps for playing back recordings using the LCD monitor.
Instructions for charging the battery pack using the AC adaptor.
Steps to insert and remove the battery pack.
Important notes on battery maintenance and safety precautions.
Instructions for connecting and using the AC adaptor.
Steps for inserting and ejecting video cassettes.
Table showing record/playback times for different cassette types.
How to use the erase protection tab on cassettes.
Instructions on how to use the optional light for scene illumination.
How to adjust the length of the shoulder strap.
Instructions for adjusting the hand strap and attaching the lens cap cord.
Step-by-step guide to setting the camcorder's date and time.
How to access and configure menu options.
Detailed explanation of the Camera mode menu options.
Detailed explanation of the VCR mode menu options.
Explanation of digital functions and adjustment settings in Camera mode.
Explanation of camera setup and display configuration options.
Explanation of VCR playback functions and record modes.
Explanation of VCR playback modes and remote control settings.
Explanation of basic indicators like battery and tape remaining.
Explanation of various detailed symbols shown on the monitor.
Displays for common warnings like TAPE NOT INSERTED or NEED HEAD CLEANING.
Displays for warnings like LOW BATTERY or INCOMPATIBLE DATA.
Steps to set power to camera and adjust vision.
Using the RECORD/PAUSE button to start and pause recording.
How to unlock, open, and use the LCD monitor for recording.
Instructions for rotating the LCD to record yourself.
How to check the last recorded scene.
Visually searching for scenes during taping to maintain continuity.
Jumping to a blank portion of tape to start recording.
Using the optional remote control for various functions.
How to control two camcorders with one remote.
Instructions for replacing the battery in the remote control.
Steps for playing back recordings using the LCD monitor.
How to adjust the volume and picture settings during playback.
Searching for scenes quickly and freezing the playback image.
Searching at different speeds and monitoring fast playback.
Advancing or reversing frame by frame and searching with the jog dial.
Searching for scenes using index marks.
Connecting to TVs with standard A/V jacks.
Connecting to TVs with S-Video jacks for better quality.
Using the D.E.I.S. feature in both recording and playback modes.
Using optical zoom and digital zoom for magnification.
Recording still images with audio and searching for them.
Adjusting white balance for optimal color reproduction.
Capturing still pictures along with audio.
Using auto exposure modes for various scene situations.
Description of various digital functions for enhancing recordings.
Manually adjusting focus and using macro focus for close-ups.
Creating smooth scene transitions with fades.
Compensating for subjects in shadow or backlight.
Using high speed shutter for motion and auto shutter settings.
Replacing original sound with new audio using microphones.
Setting an automatic edit stopping point for dubbing.
Tips for monitoring the tape copying process on a TV.
Performing digital-to-digital copying using the DV interface.
Requirements and steps for connecting the camcorder to a PC.
Step-by-step guide for installing the PHOTOVU LINK driver.
How to launch and access the PHOTOVU LINK software.
How to search and transfer images from the camcorder tape to the PC.
Instructions for cleaning the EVF.
Table showing colour temperature for reference.
Instructions for video head cleaning and tape operation cautions.
Checklist for common camcorder problems and their solutions.
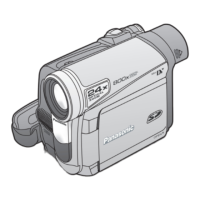
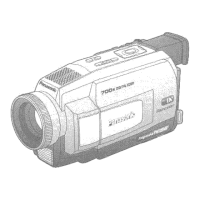
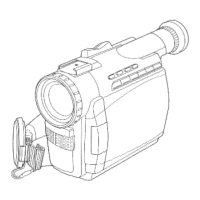
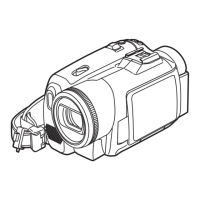
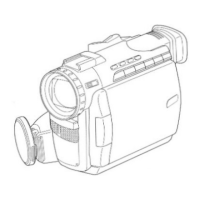
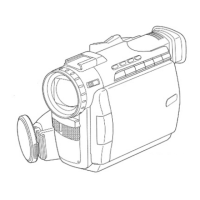
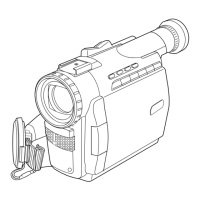
Identification of controls on the front and side of the camcorder.
Identification of controls on the rear of the camcorder and monitor.
Identification of controls on the underside and AC adaptor.
Identification of controls for optional accessories.
Details of the limited warranty terms and conditions.
How to obtain warranty service and contact details.
| Type | Digital Camcorder |
|---|---|
| Recording Media | MiniDV Tape |
| Image Sensor | 1/4 inch CCD |
| Optical Zoom | 10x |
| Digital Zoom | 20x |
| LCD Screen Size | 2.5 inches |
| Lens | Panasonic Lens |
| Focus | Auto/Manual |
| White Balance | Auto/Manual |
| LCD Screen | 2.5-inch color LCD |
| Viewfinder | Color viewfinder |
| Audio Recording | 12-bit/16-bit PCM Stereo |
| Microphone | Built-in stereo microphone |
| Input/Output Ports | IEEE 1394 (FireWire), S-Video, AV output |
| Battery | Lithium-ion battery (included) |
| Weight | Approx. 480g (with battery and tape) |