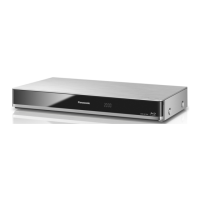
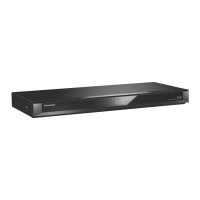
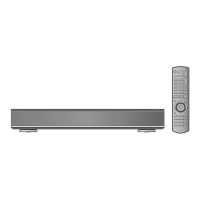
Pull to flip down the
front panel.
© Standby/on switch (i/I)
Press to switch the unit from on to standby
mode or vice versa. In standby mode, the unit
is still consuming a small amount of power.
@ Open/close disc tray
@ Disc tray
@ USB port
© SD card
slot
• When removing the SD card, press on the
centre of the card and pull it straight out.
m
• While writing to/reading from the media, do not switch the
unit to standby mode or remove the media. Such action
may result in loss of the media contents.
• When inserting the media, ensure that it is facing the right
way up.
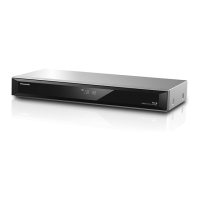
è □
COMMON INTERFACE EJECT
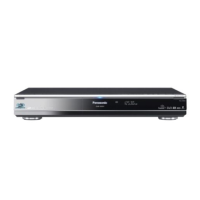
© Recording indicator
• The indicator will light up while recording.
• The indicator will blink while recording is
paused and before recording starts.
© Remote control signal sensor
• Angle: Approx. 20° up and down, 30° left and
right
• Distance: Within approx. 7 m in front of the
unit © Stop ® Start play
®
CI (Common Interface) slot (O 14)
© CI module eject button (O 14)
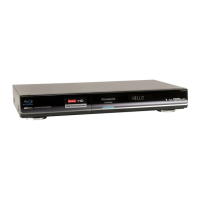
1 Drive (HDD, BD or SD) indicator
2 Disc indicator
3 Copying indicator
4 USB port indicator
5 SD card slot indicator
6 Timer recording indicator
• This indicator lights up when the timer
recording standby is activated.
7 Remote control signal indicator
8 Main display section indicator
- Current time
- Playback counter
- Various messages (O
113) 9 Playback indicator
 Loading...