3
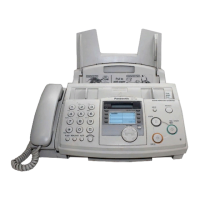
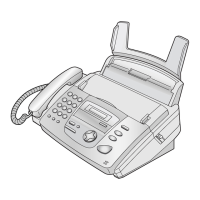
KX-FP365CX / KX-FM388CX
12.2. Error Messages-Display --------------------------------75
12.3. Error Messages-Report ---------------------------------77
12.3.1. Journal Report----------------------------------------77
12.3.2. Special Service Journal Report ------------------86
12.3.3. Communication Section----------------------------90
12.4. Remote Programming-----------------------------------99
12.4.1. Entering the Remote Programming Mode
and Changing Service Codes --------------------99
12.4.2. Program Mode Table------------------------------ 100
12.5. Troubleshooting Details------------------------------- 102
12.5.1. Outline ------------------------------------------------ 102
12.5.2. Starting Troubleshooting ------------------------- 102
12.5.3. Troubleshooting Items Table -------------------- 103
12.5.4. ADF (Auto Document Feed) Section --------- 105
12.5.5. Digital Board Section------------------------------ 118
12.5.6. Analog Board Section ---------------------------- 125
12.5.7. Digital Speakerphone ----------------------------- 127
12.5.8. Power Supply Board Section ------------------- 129
12.5.9. Operation Panel Section ------------------------- 132
12.5.10. Sensor Section ------------------------------------- 133
12.5.11. CIS (Contact Image Sensor) Section --------- 135
12.5.12. Thermal Head Section---------------------------- 136
12.6. Problem with PANA LINK (KX-FM388 only) ----- 137
13 Service Fixture & Tools-------------------------------------- 139
14 Disassembly and Assembly Instructions ------------- 140
14.1. Upper Cabinet Section -------------------------------- 141
14.1.1. How to Remove the Image Sensor (CIS)---- 141
14.1.2. How to Remove the Thermal Head ----------- 142
14.2. Back Cover Section------------------------------------ 143
14.2.1. How to Remove the Back Cover and
Platen Roller ---------------------------------------- 143
14.2.2. How to Remove the Pickup Roller------------- 144
14.2.3. How to Remove the Paper Exit Roller and
Cassette Lever ------------------------------------- 145
14.3. Lower Cabinet Section -------------------------------- 146
14.3.1. How to Remove the Bottom Frame ----------- 146
14.3.2. How to Remove the Digital, Analog,
Interface and Sensor Boards ------------------- 147
14.3.3. How to Remove the Power Supply Board
and AC cord----------------------------------------- 148
14.3.4. How to Remove the Gear Block and
Separation Roller ---------------------------------- 149
14.3.5. How to Remove the Component parts of
Gear Block------------------------------------------- 150
14.4. Operation Cover Section ----------------------------- 151
14.4.1. How to Remove the Operation Cover -------- 151
14.4.2. How to Remove the Operation Board,
LCD, MIC Board and Document Exit
Roller ------------------------------------------------- 152
14.4.3. How to Remove the Separation Rubber ----- 153
14.5. Installation Position of the Lead Wires ------------ 154
15 Maintenance----------------------------------------------------- 156
15.1. Maintenance Items and Component Locations - 156
15.1.1. Outline ------------------------------------------------ 156
15.1.2. Maintenance Check Items/Component
Locations--------------------------------------------- 156
15.2. Gear Section--------------------------------------------- 158
15.2.1. Gear Operation------------------------------------- 158
15.2.2. Mechanical Movements in the Main
Operations (transmitting documents,
receiving faxes and copying) ------------------- 160
15.3. Jams------------------------------------------------------- 163
15.3.1. Recording Paper Jams -------------------------- 163
15.3.2. Document Jams ----------------------------------- 164
15.4. Cleaning -------------------------------------------------- 165
15.4.1. Document feeder/scanner glass cleaning--- 165
15.4.2. Thermal Head Cleaning ------------------------- 166
16 Miscellaneous-------------------------------------------------- 167
16.1. Terminal Guide of the ICs Transistors and
Diodes ---------------------------------------------------- 167
16.1.1. Digital Board---------------------------------------- 167
16.1.2. Analog Board--------------------------------------- 167
16.1.3. Operation Board ----------------------------------- 167
16.1.4. Power Supply Board------------------------------ 168
16.1.5. Interface Board ------------------------------------ 168
16.2. How to Replace the Flat Package IC ------------- 169
16.2.1. Preparation------------------------------------------ 169
16.2.2. Flat Package IC Removal Procedure -------- 169
16.2.3. Flat Package IC Installation Procedure------ 169
16.2.4. Bridge Modification Procedure----------------- 169
16.3. Test Chart ------------------------------------------------ 170
16.3.1. ITU-T No.1 Test chart ---------------------------- 170
16.3.2. ITU-T No.2 Test Chart---------------------------- 171
16.3.3. Test Chart ------------------------------------------- 172
17 Schematic Diagram ------------------------------------------ 174
17.1. Digital Board (PCB1) ---------------------------------- 174
17.2. Analog Board (PCB2)--------------------------------- 178
17.3. Operation Board (PCB3) / MIC Board (PCB7) - 180
17.4. Power Supply Board (PCB4)------------------------ 181
17.5. Interface Board (PCB5)------------------------------- 182
17.6. Sensor Board (PCB6)--------------------------------- 182
18 Printed Circuit Board ---------------------------------------- 183
18.1. Digital Board (PCB1) ---------------------------------- 183
18.1.1. Bottom View ---------------------------------------- 183
18.1.2. Component View ---------------------------------- 184
18.2. Analog Board (PCB2)--------------------------------- 185
18.2.1. Bottom View ---------------------------------------- 185
18.2.2. Component View ---------------------------------- 186
18.3. Operation Board (PCB3) / MIC Board (PCB7) - 187
18.3.1. Bottom View ---------------------------------------- 187
18.3.2. Component View ---------------------------------- 188
18.4. Power Supply Board (PCB4)------------------------ 189
18.5. Interface Board (PCB5)------------------------------- 190
18.6. Sensor Board (PCB6)--------------------------------- 191
19 Appendix Information of Schematic Diagram ------- 192
20 Exploded View and Replacement Parts List --------- 193
20.1. Cabinet, Mechanical and Electrical Parts
Location -------------------------------------------------- 193
20.1.1. General Section ----------------------------------- 193
20.1.2. Operation Cover Section ------------------------ 194
20.1.3. Back Cover Section------------------------------- 195
20.1.4. Upper Cabinet Section--------------------------- 197
20.1.5. Lower Cabinet Section--------------------------- 198
20.1.6. Gear Block Section ------------------------------- 199
20.1.7. Screws ---------------------------------------------- 199
20.1.8. Accessories and Packing Materials ---------- 200
20.2. Replacement Parts List------------------------------- 201
20.2.1. Cabinet and Electrical Parts -------------------- 201
20.2.2. Digital Board Parts (KX-FP365CX) ---------- 202
20.2.3. Digital Board Parts (KX-FM388CX) ---------- 204
20.2.4. Analog Board Parts ------------------------------ 205
20.2.5. Operation Board Parts --------------------------- 206