50
KX-TG4732B/KX-TG4733B/KX-TG4734B/KX-TGA470B
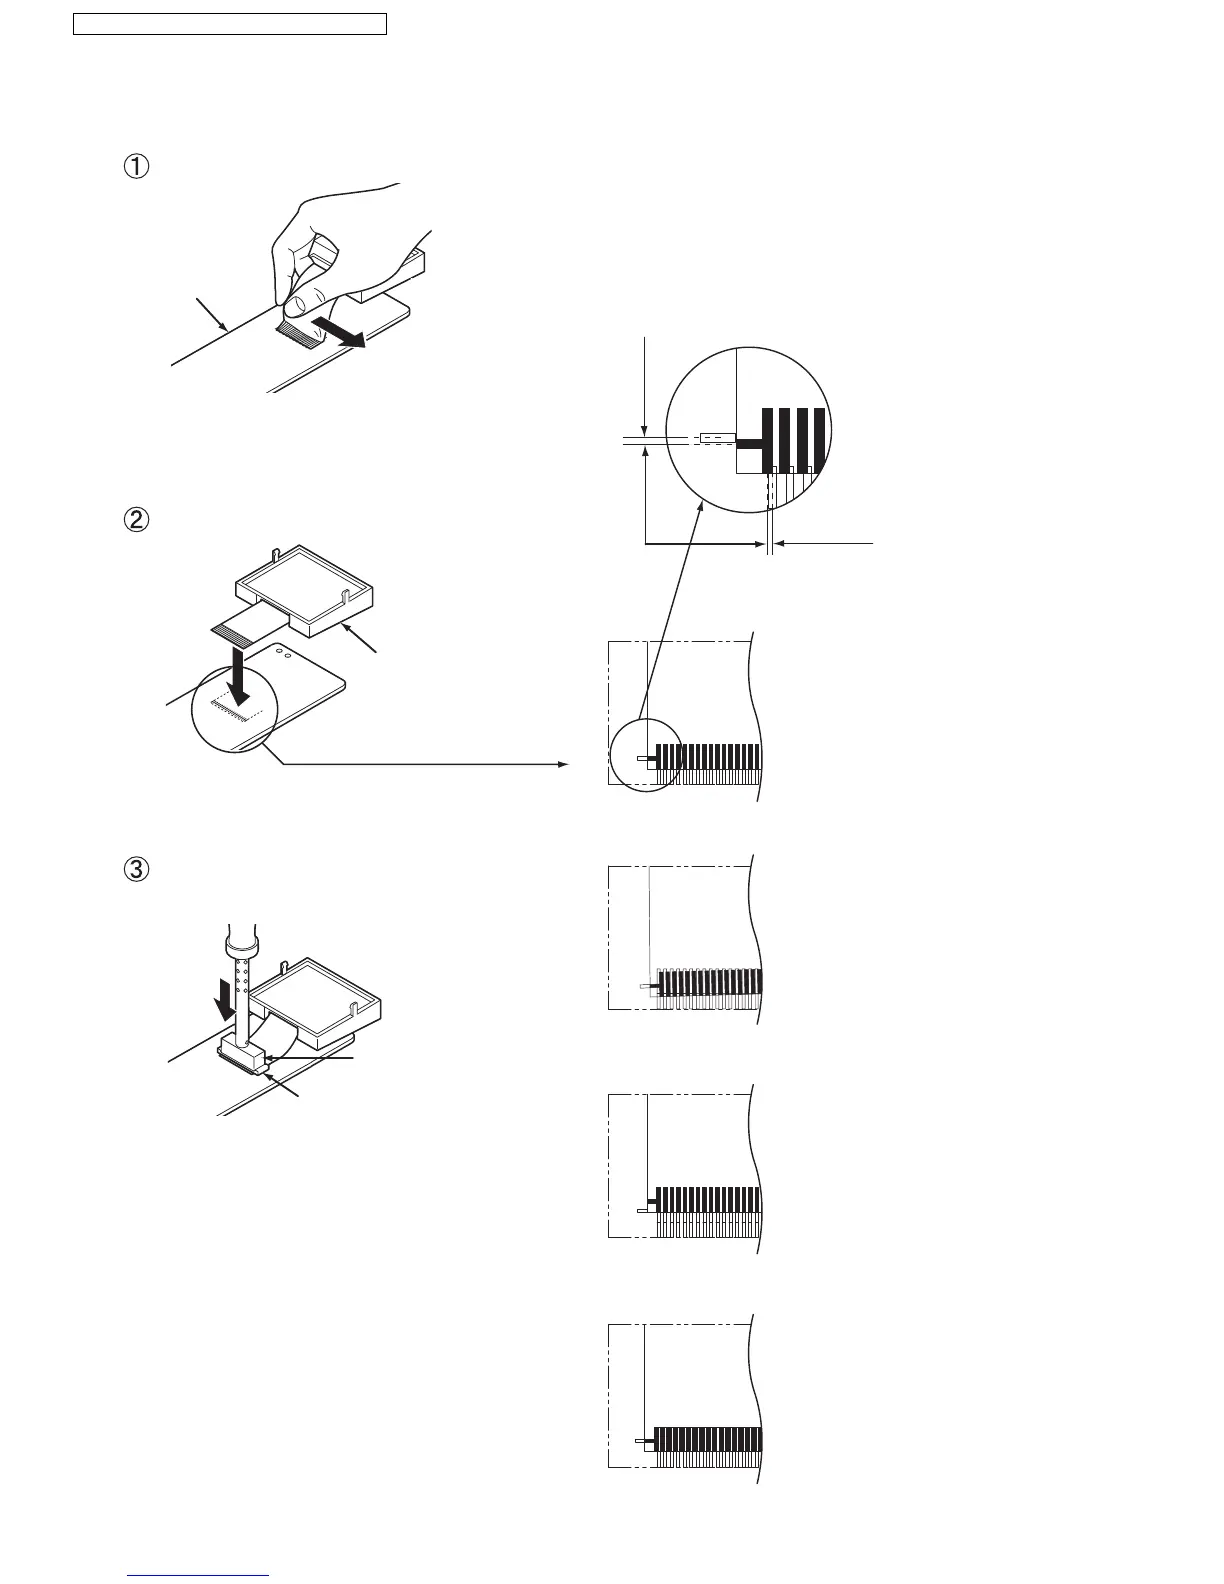
11.3. How to Replace the Handset LCD
Note:
The illustrations are simplified in this page.
They may differ from the actual product.
Peel off the FFC (Flexible Flat Cable) from
the LCD, in the direction of the arrow. Take
care to ensure that the foil on the P.C. board
is not damaged.
Fit the heatseal of a new LCD.
Rubber of Soldering Iron
(Part No. PQZZ430PRB)
Tip of Soldering Iron
(Part No. PQZZ430PIR)
Heatweld with the tip of the soldering
iron about 5 to 8 seconds
(in case of 60W soldering iron).
New LCD
0.2 mm
0.2 mm
P. C. board
If interval tolerance between center lines
is less than 0.2 mm, it is o.k.
Horizontal Interval
Tolerance
Vertical Interval
Tolerance
OK
NG
NG
NG
(Horizontal interval tolerance is
more than 0.2 mm.)
(Vertical interval tolerance is
more than 0.2 mm.)
(Inclined)
 Loading...