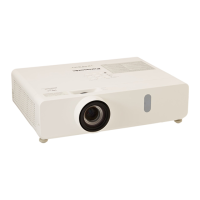
Replacement
ENGLISH -
63
Maintenance
cover (side); pull out the handle and take out
the side lter.
Replace the air lter units.2 )
Put new lters back into the position. Make sure
z
that the lters are fully inserted to the projector.
Resetting the Filter Counter
J
Be sure to reset the Filter counter after replacing the
lter.(
Æ
page 59 "
Filter counter reset
")
Attention
Turn off the power before you replace the air lter
z
unit.
When attaching the air lter unit, make sure that
z
the projector is stable, and work in an environment
that is safe, even in the event of the air lter unit
dropping.
Do not operate the projector with the lters
z
removed. Dust may accumulate on the optical
elements degrading picture quality.
Do not put anything into the air vents. Doing so
z
may result in malfunction of the projector.
Do not wash the lters with water or any other liquid
z
matter. Otherwise the lters may be damaged.
Attaching the Filter Cover to the Projector
J
The supplied lter cover is designed for preventing dust accumulation on the lter when mounting the projector on
the ceiling.
Turn over the projector.1 )
Remove the lter cover (bottom).2 )
(
Æ
page 62)
Attaching the lter cover to the projector.3 )
Push the cover as the picture shown.
z
Attach the projector to the ceiling mount 4 )
in accordance with the instruction
manuals which come with the ceiling
mount.
Attention
Please keep the lter cover (bottom) for later use.
z
If the Projector Mount Base ET-PKV100B is applied, the supplied lter cover is unnecessary.
z
J
Lamp unit
The lamp unit is a consumable component. You can check the total usage time using Lamp runtime in the
Information menu on page 60.
It is recommended to ask an authorized engineer to replace the lamp unit. Contact your dealer.
Consult your dealer to purchase a replacement lamp unit (ET-LAV100, dealt as a service component).
To Ceiling Mount
Filter Cover
(supplied)
Projector
 Loading...

