Ceiling mount bracket safeguards
f When installing the projector to a ceiling, be sure to use the specied optional Ceiling Mount Bracket.
Model No. of ceiling mount bracket:
ET-PKL100S (for low ceilings); ET-PKV400B (Projector mount bracket)
ET-PKL100H (for high ceilings); ET-PKV400B (Projector mount bracket)
f When installing the projector, attach the drop-prevention kit included with the Ceiling Mount Bracket.
f Ask a qualied technician to do the installation work such as mounting the projector on the ceiling.
f Panasonic takes no responsibility for any damage to the projector resulting from use of a ceiling mount bracket
not manufactured by Panasonic or the inappropriate choice of location for installation, even if the warranty
period of the projector has not expired.
f Unused products must be removed promptly by a qualied technician.
f Use a torque screwdriver or Allen torque wrench to tighten bolts to their specied tightening torques. Do not use
electric screwdrivers or impact screwdrivers.
f Read the Installation Instructions for the Ceiling Mount Bracket for details.
f The model numbers of accessories and optional accessories are subject to change without prior notice.
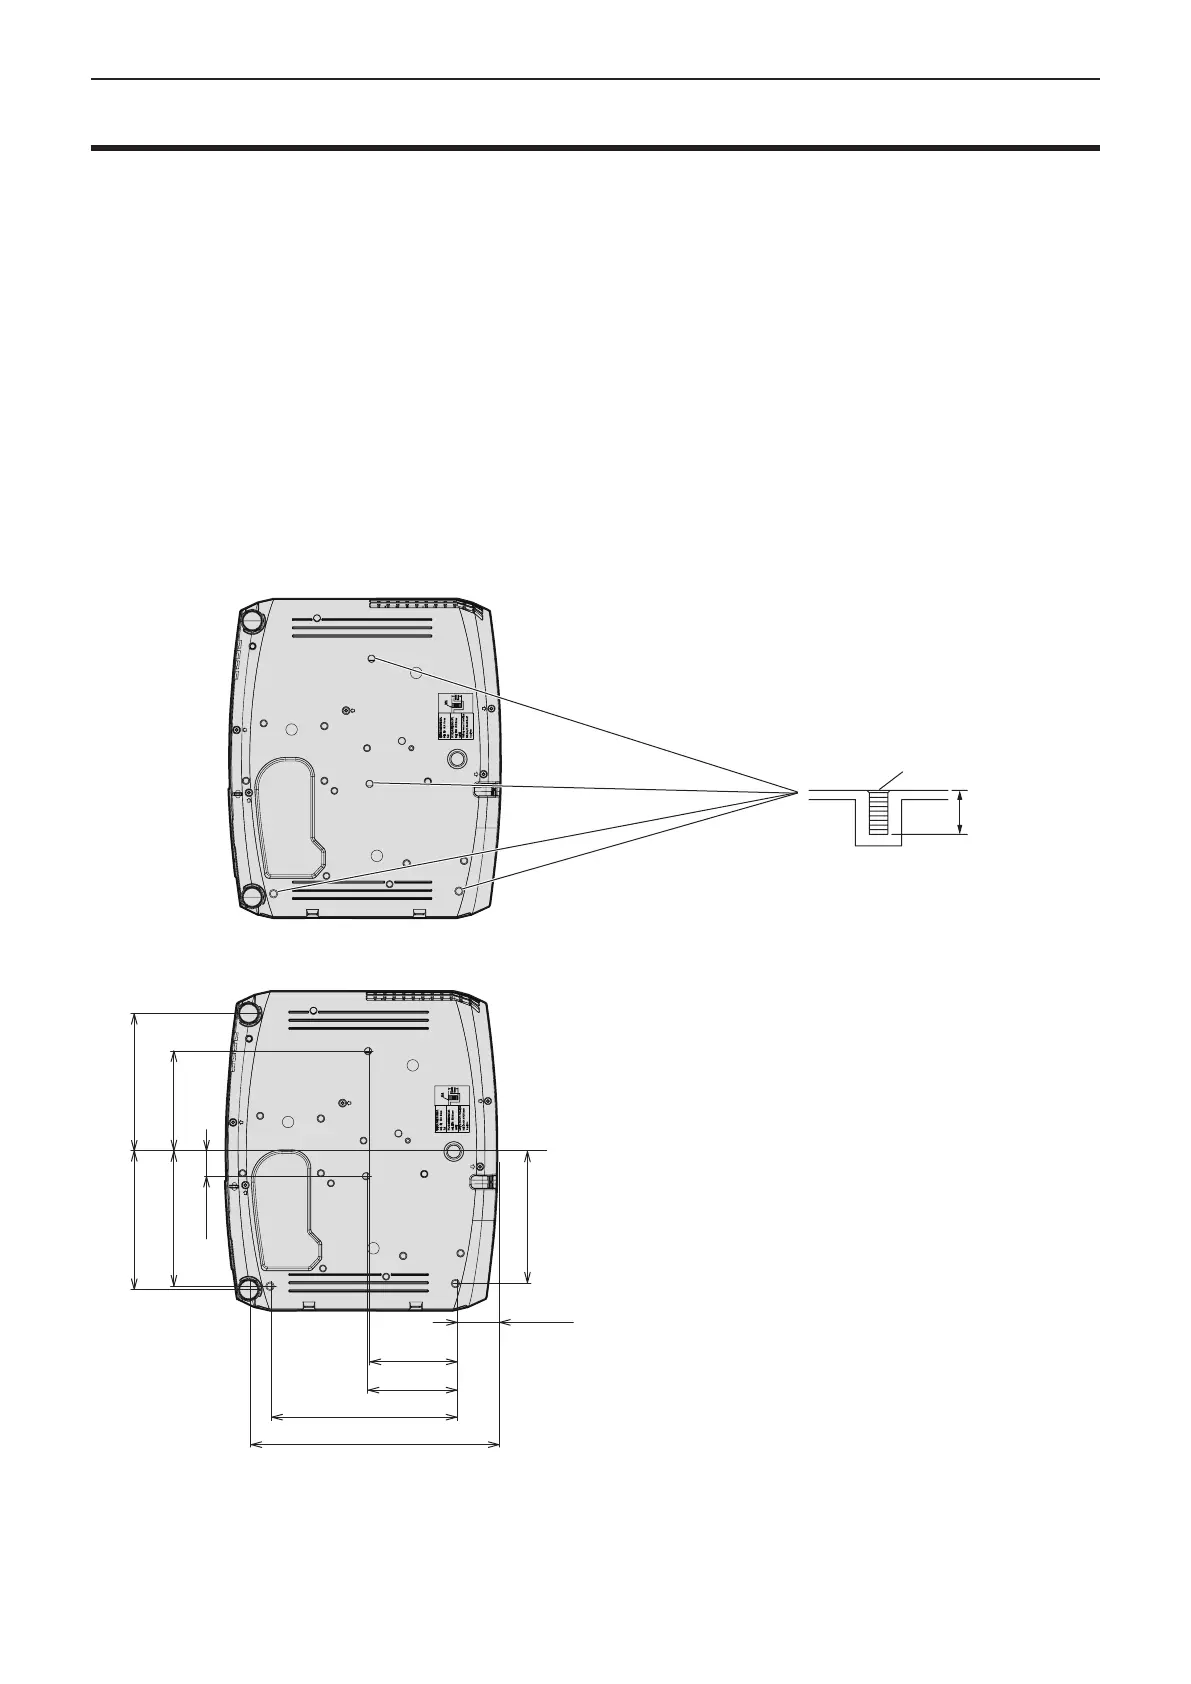
r Screw hole specications for ceiling mount (Bottom view)
168.5 (6-5/8") 168.5 (6-5/8")
122.3 (4-13/16")
164.2 (6-15/32")
161 (6-11/32")
30.2 (1-3/16")
303 (11-15/16")
226 (8-15/16")
109 (4-5/16")
106.5 (4-3/16")
51 (2-8")
M4 × 0.7
8 mm (5/16")
Torque: (M4) 1.25 ± 0.2 N·m
Unit: mm (inch)
ENGLISH - 129
Chapter 7 Appendix - Ceiling mount bracket safeguards

 Loading...