60
Caution: During assembly, ensure that Front Shield Unit is
properly located & fully catched onto Bottom Chassis.
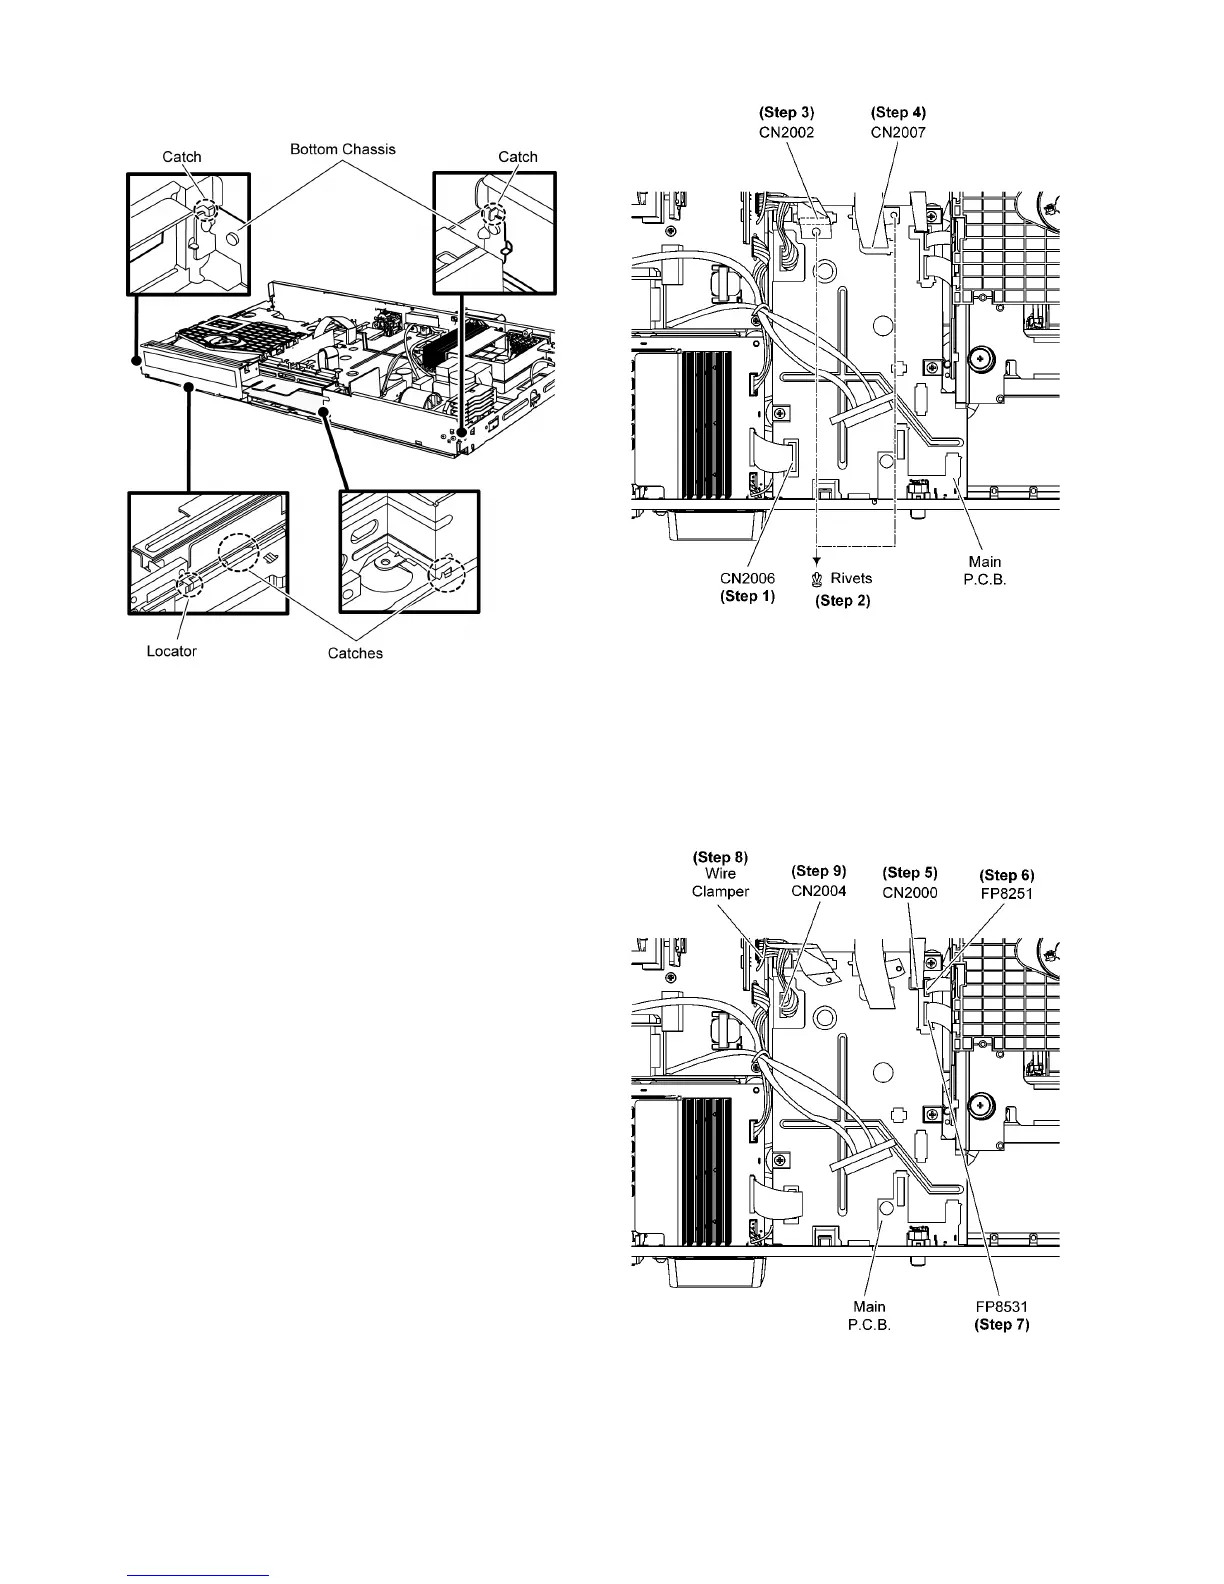
8.18. Disassembly of Main P.C.B.
• Refer to “Disassembly of Top Cabinet”
• Refer to (Step 1) to (Step 2) of item 8.5.
Step 1 Detach 18P FFC at the connector (CN2006) on Main
P. C.B ..
Step 2 Remove 2 rivets.
Cauntion:Keep the rivets in safe place, place it back during
assembling.
Step 3 Detach 22P FFC at the connector (CN2002) on Main
P. C.B ..
Step 4 Detach 15P FFC at the connector (CN2007) on Main
P. C.B ..
Step 5 Detach 8P FFC at the connector (CN2000) on Main
P. C. B ..
Step 6 Detach 7P FFC at the connector (FP8251) on Main
P. C. B ..
Step 7 Detach 24P FPC at the connector (FP8531) on Main
P. C. B ..
Step 8 Lift up the wire clamper.
Step 9 Detach 10P Cable at the connector (CN2004) on Main
P. C. B ..
Step 10 Detach 10P wire at the connector (FP9001) on Main
P. C. B ..