77
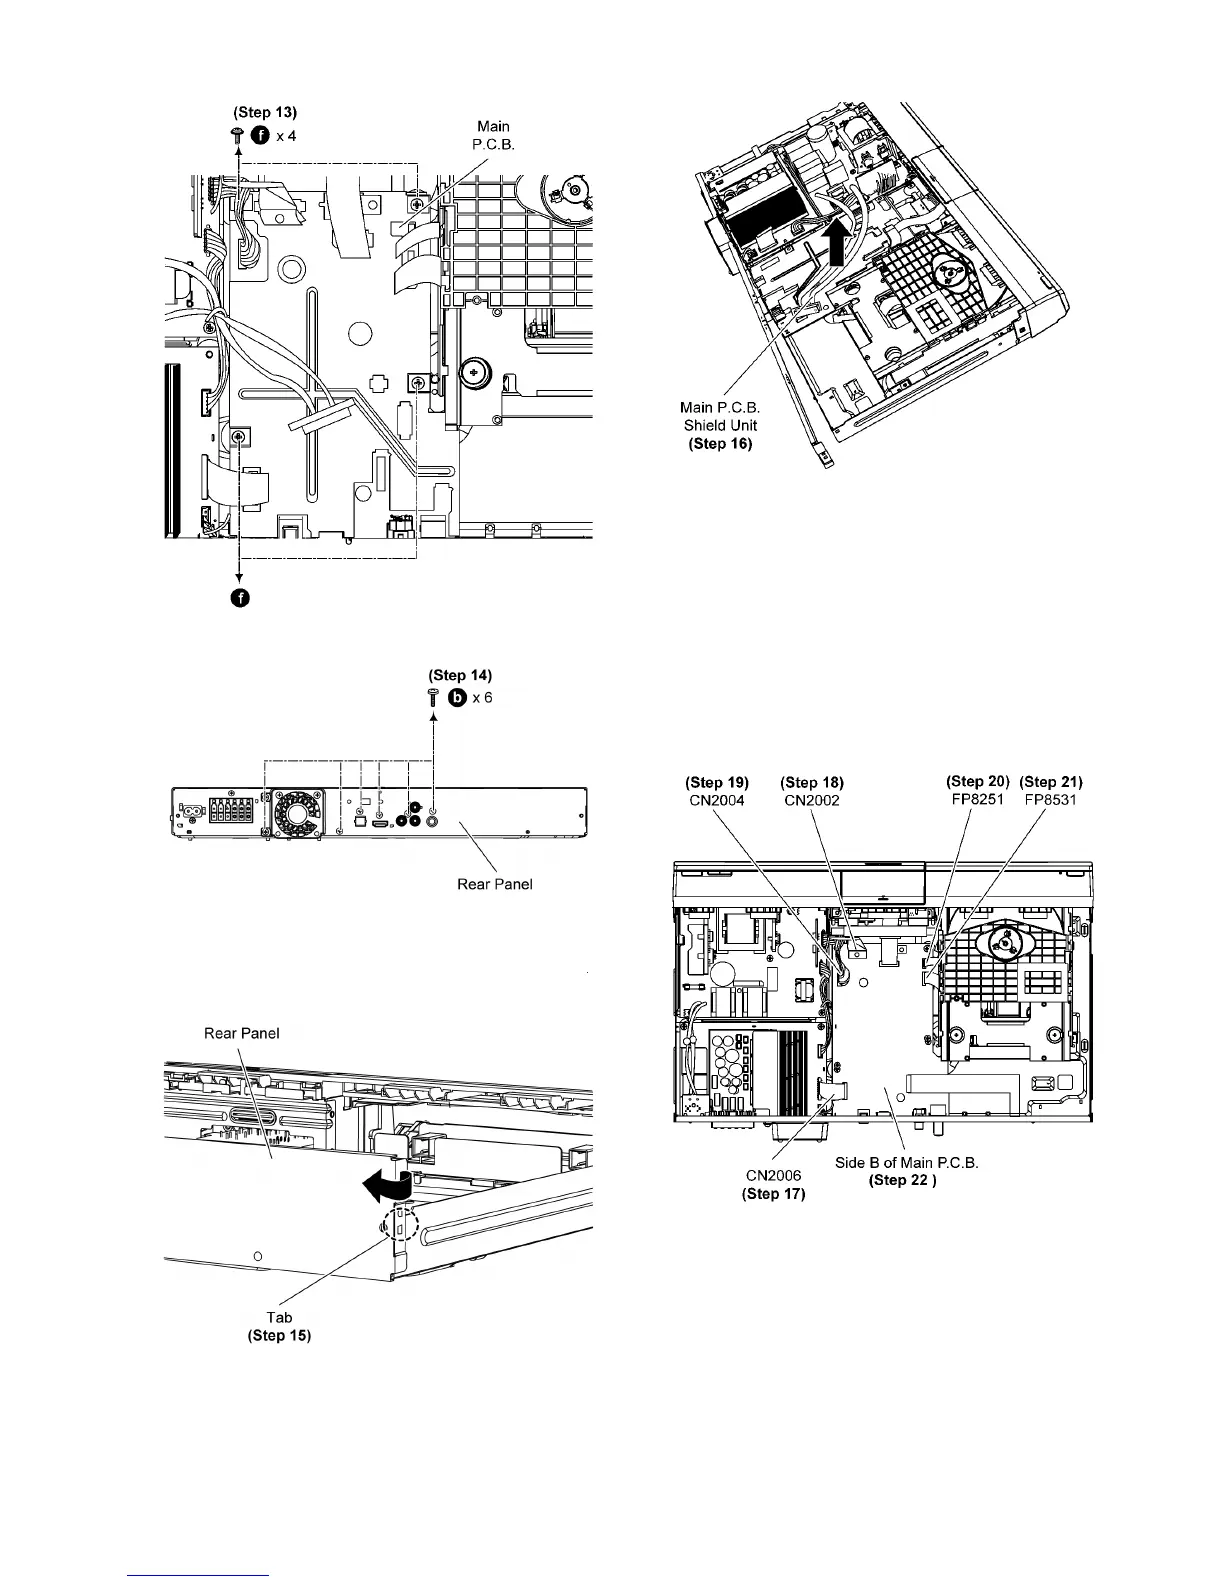
Step 14 Remove 6 screws.
Step 15 Release the tab of the right side of the Rear Panel in
the direction of arrow.
Step 16 Lift up to remove Main P.C.B. Shield Unit.
Step 17 Connect 18P FFC to the connector (CN2006) on Main
P. C .B . .
Step 18 Connect 22P FFC to the connector (CN2002) on Main
P. C .B . .
Step 19 Connect 10P Cable wire to the connector (CN2004) on
Main P.C.B..
Step 20 Connect 7P FFC to the connector (FP8251) on Main
P. C .B . .
Step 21 Connect 24P FFC to the connector (FP8531) on Main
P. C .B . .
Step 22 Side B of Main P.C.B. can be checked & repaired at its
original position.
10.1.2. Checking & Repairing of Side A of
Main P.C.B.
• Refer to (Step 1) to (Step 19) of item 10.1.1.
Step 1 Remove DVD Mechanism Unit (DLS6E).
Step 2 Lift up the Main P.C.B..
Step 3 Flip the Main P.C.B. according to diagram shown.