79
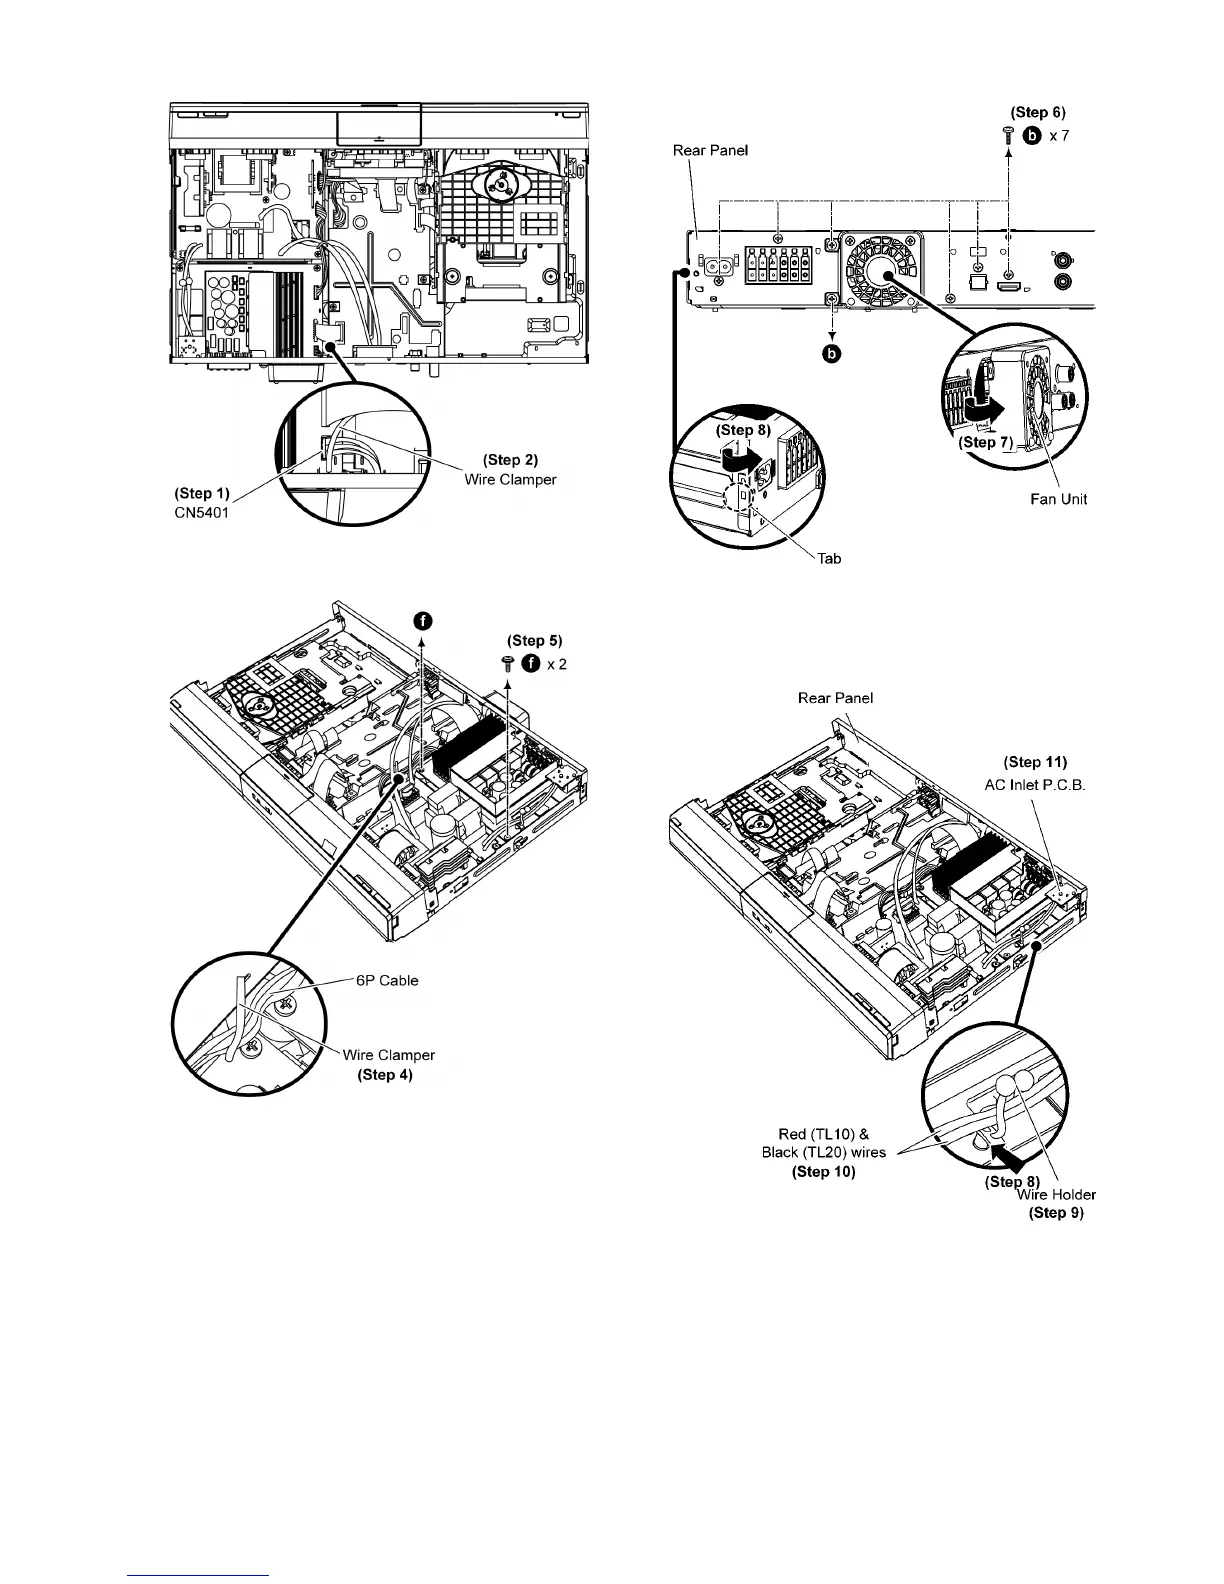
Step 4 Twist the Wire Clamper to release 6P Cable.
Step 5 Remove 2 screws.
Step 6 Remove 7 screws.
Step 7 Remove Fan Unit according to arrow shown.
Step 8 Release tab at the side of the Rear Panel in the direc-
tion of arrow.
Step 9 Twist the Wire Holder.
Step 10 Release Red (TL10) & Black (TL20) wires from the
Wire Holder.
Step 11 Remove AC Inlet P.C.B..
Step 12 Flip the D-Amp P.C.B. and position it according to dia-
gram shown.
Step 13 Connect Fan Unit to connector (CN5401) on D-Amp
P. C .B . .
Step 14 Side A of D-Amp P.C.B. can be chacked & repaired as
diagram shown.