89
٢֗
љ
٢֗
љ
٢֗
љ
Confirmation
ɑ Put in raisins and other
ingredients (P. 100 ȋ 102)
(Raisin)
(The LCD display will disappear when the power cord is unplugged.)
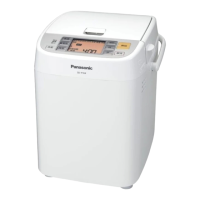
(Hour / minute)
(Start)
(Crust colour)(Menu) (Timer)
(Cancel)
ɑChange crust colour (P. 103) ɑSetting timer for completion timer (P. 104)
* Use the lithium battery to enable the bread maker to
memorize current time and previous settings.
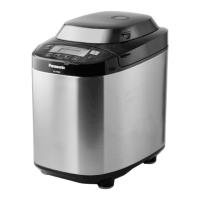
Battery base
Lithium battery
Lithium battery
(
Anode facing
downwards)
Turn over the
battery base
*Please confirm that the battery does not drop down.
*
Baking can be started even if the lithium battery is not installed.
Install the
lithium battery
with anode
facing upwards
ɑ Start baking or
timing
ɑReset
ɑ
Stop after baking
is started (Hold)
ɑSelect menu
ɑPull out the insulating film in advance (P. 88)
ɑThe time is displayed in the 24 hour system.
ɑ Release fingers when a beep
sound is heard.
ɑ Flashing stops after 5 seconds
(Time adjustment completed)
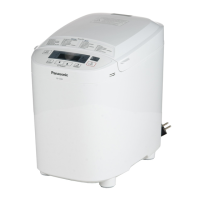
ʗPlug in
*You cannot adjust time if it is not plugged in.
ʚ Pull out the plug
* Time adjustment cannot be completed if you
pull out the power plug before the flicker stops.
ʗTake out the battery base
ʘ
Secure the battery with left hand by holding
the base in front. Take out the battery.
ʙ Turn the battery base upside down and
install the battery. Install the battery
base back in the main unit.
ʙAdjust time
* Adjust time when flashing
(E.g. adjust the time to 3:30 p.m.)
ʘPress (H) or ࠍ (M) (time display flashes)
Menu
ɑSet timer (P. 104)
ɑAdjust current time (See below)
ɑSet cooking time (P.146, 148)
Current time (clock displays)
adjustment
Replace lithium battery
Control panel
ɑ "12:00" for noon and
"0:00" for midnight
Hold for fast
forward
)(
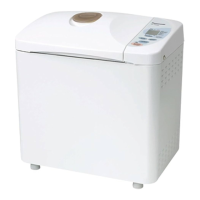
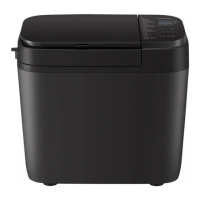
Parts names and accessories

 Loading...