Introduction 31
SmartNode 200 User Manual 5 • Initial Configuration
Introduction
This chapter leads you through the basic steps to set up a new SmartNode device and to download a configura-
tion.
Note If you haven’t already installed the SmartNode device, refer to Chapter 4,
"SmartNode Installation" on page 24.
See section “Connecting the SN200 to a laptop PC”.
Connecting the SN200 to a laptop PC
Verify that the Power LED is lit. Once the Status LED becomes solid the SmartNode device is ready.
Note The SmartNode device has a fixed IP and a DHCP client setup to simplify
configuration. The Ethernet port is equipped with Auto-MDX so you can
use a straight-through cable for host or hub/switch connection.
There are two options for configuring the SmartNode device:
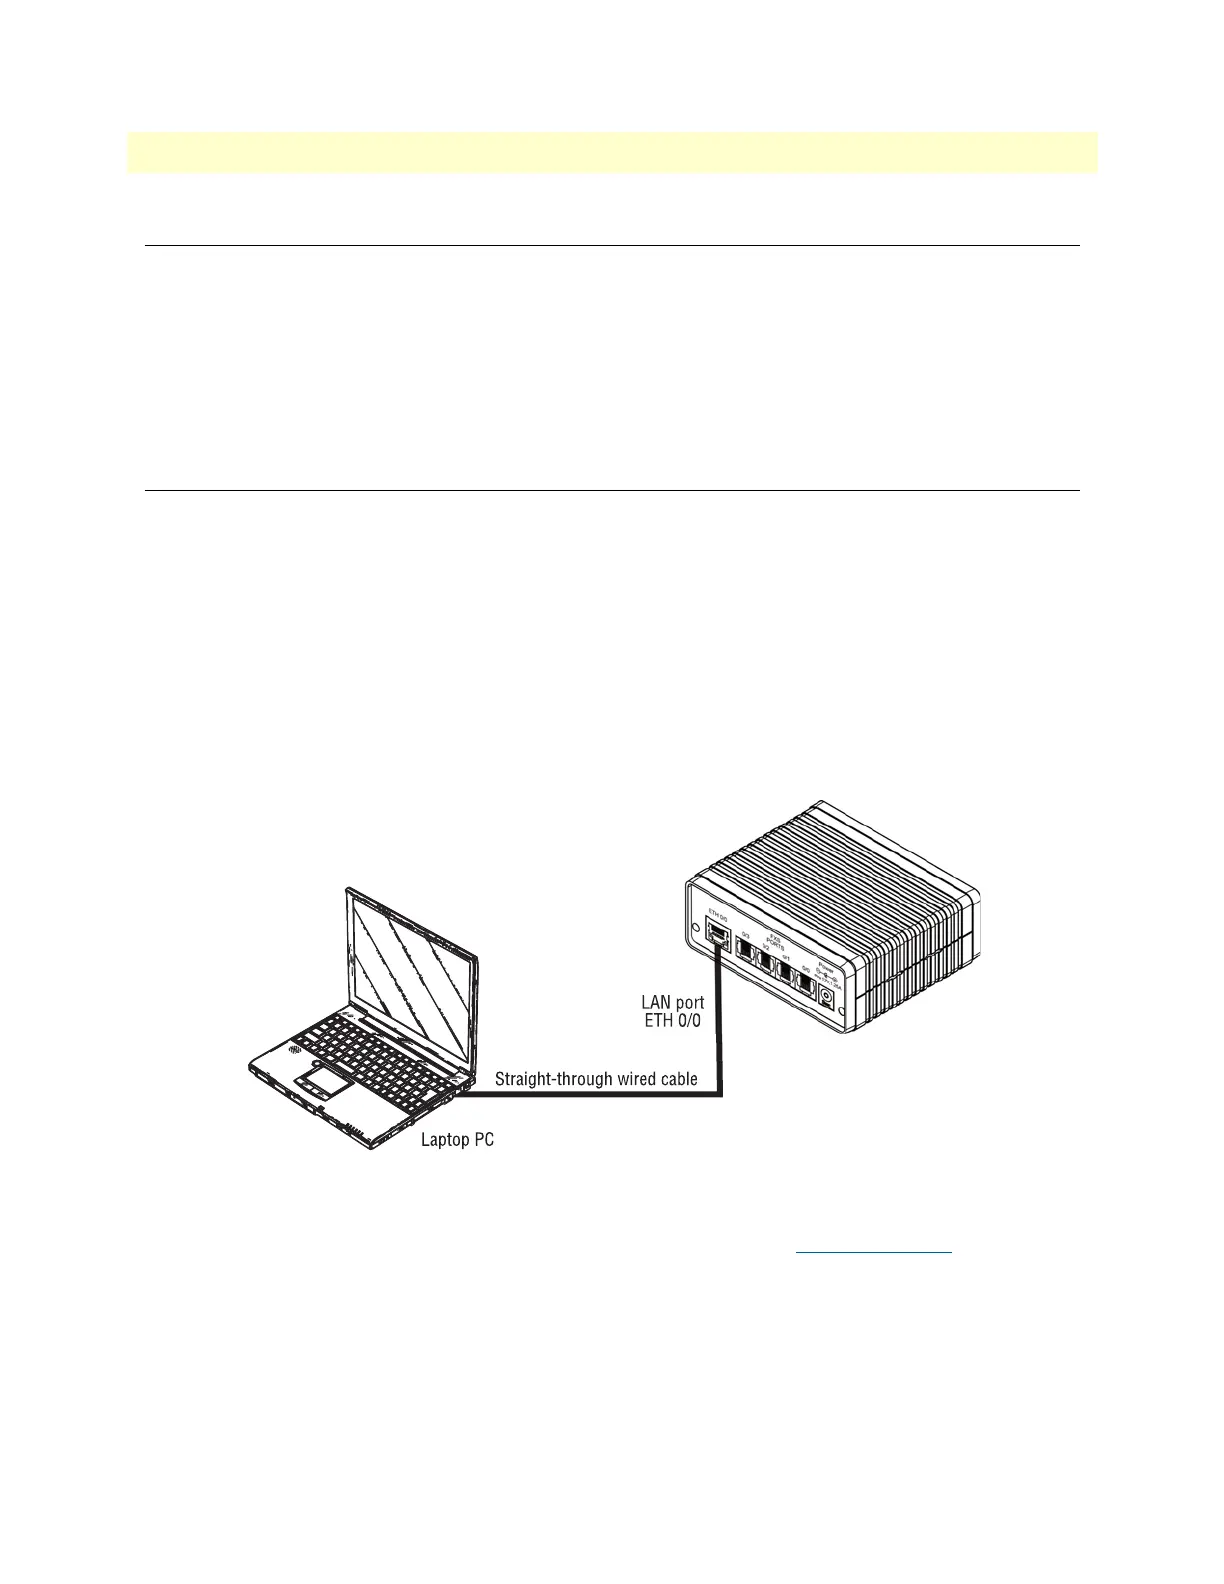
1. The SmartNode device is connected to a laptop PC (see figure 9) that is configured with a fixed IP in the
same range as the SmartNode device’s IP address (for instance: PC’s IP address; 192.168.200.20; mask:
255.255.255.0).
Figure 9. Connecting the SmartNode to a laptop PC
2. The SmartNode device is connected to a local area network (LAN) that has a DHCP server running which
assigns an IP address to the SmartNode device (see
figure 10). Using the SN Discovery tool, the Smart-
Node device’s IP can be determined.