© PCE Instruments
11
Now look at the bubble level. The bubble should be fully inside the red circle. If it is not, wind
direction, speed and rain readings may not be correct or accurate. Adjust the mounting pipe as
required. If the bubble is close but not quite inside the circle and you cannot adjust the mounting
pipe, you may have to experiment with small wooden or heavy cardboard shims between the
sensor package and the top of the mounting pole to achieve the desired result (this will require
loosening the bolts and some experimentation).
Make sure you check and - if necessary - correct the northward orientation as the final installation
step and tighten the bolts with a wrench.
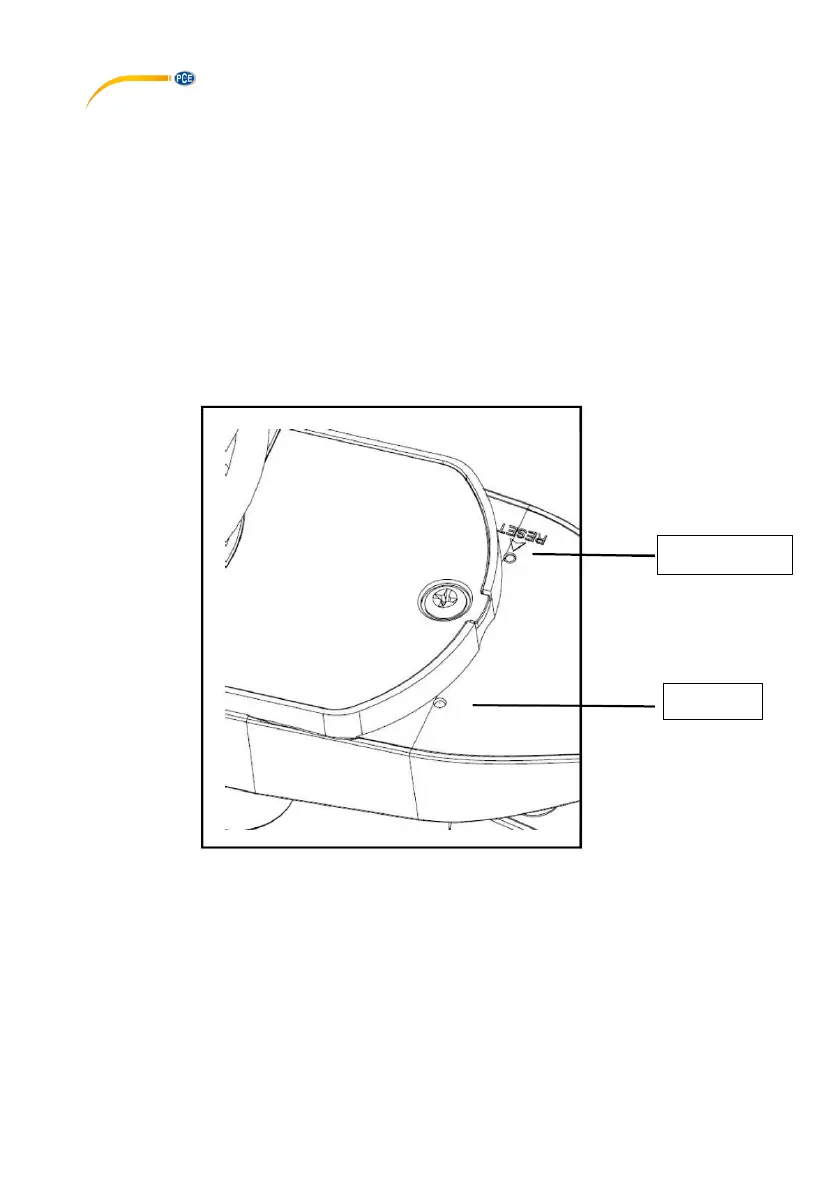
6.9 Reset button and outdoor unit LED
Using a bent-open paperclip, touch and hold the RESET button (see picture) to do a reset: the
LED turns on while the RESET button is pressed. You can then release it. The LED should then
resume as normal, flashing approximately once every 48 seconds.
6.10 Basic operation
All actions and functions of the weather station are started on the touch screen by slightly touching
(not pressing!) the related areas. Touch the flashing “+”, “ON/OFF” or “–“ icons to make a selection
or to increase/decrease a value. Everytime a programming step is activated by touching a
switching area on the touch screen, a tone will sound and the backlight is switched on for a few
seconds. If no areas are pressed for 30 seconds, the LCD will automatically revert to normal
display mode (automatic timeout).
 Loading...