VisuNet FLX System
Maintenance, Cleaning and Disposal
2023-11
107
6. Remove PB and cable ties.
7. Now the DPU can be removed from the housing. During the removal process, hold the DPU
steady so it cannot fall down, preferably with the help of another person. Place the DPU on an
even, cushioned surface after removal. To remove the DPU from the housing, take the cables
out of the carabiners and unhook the DPU from the housing cover.
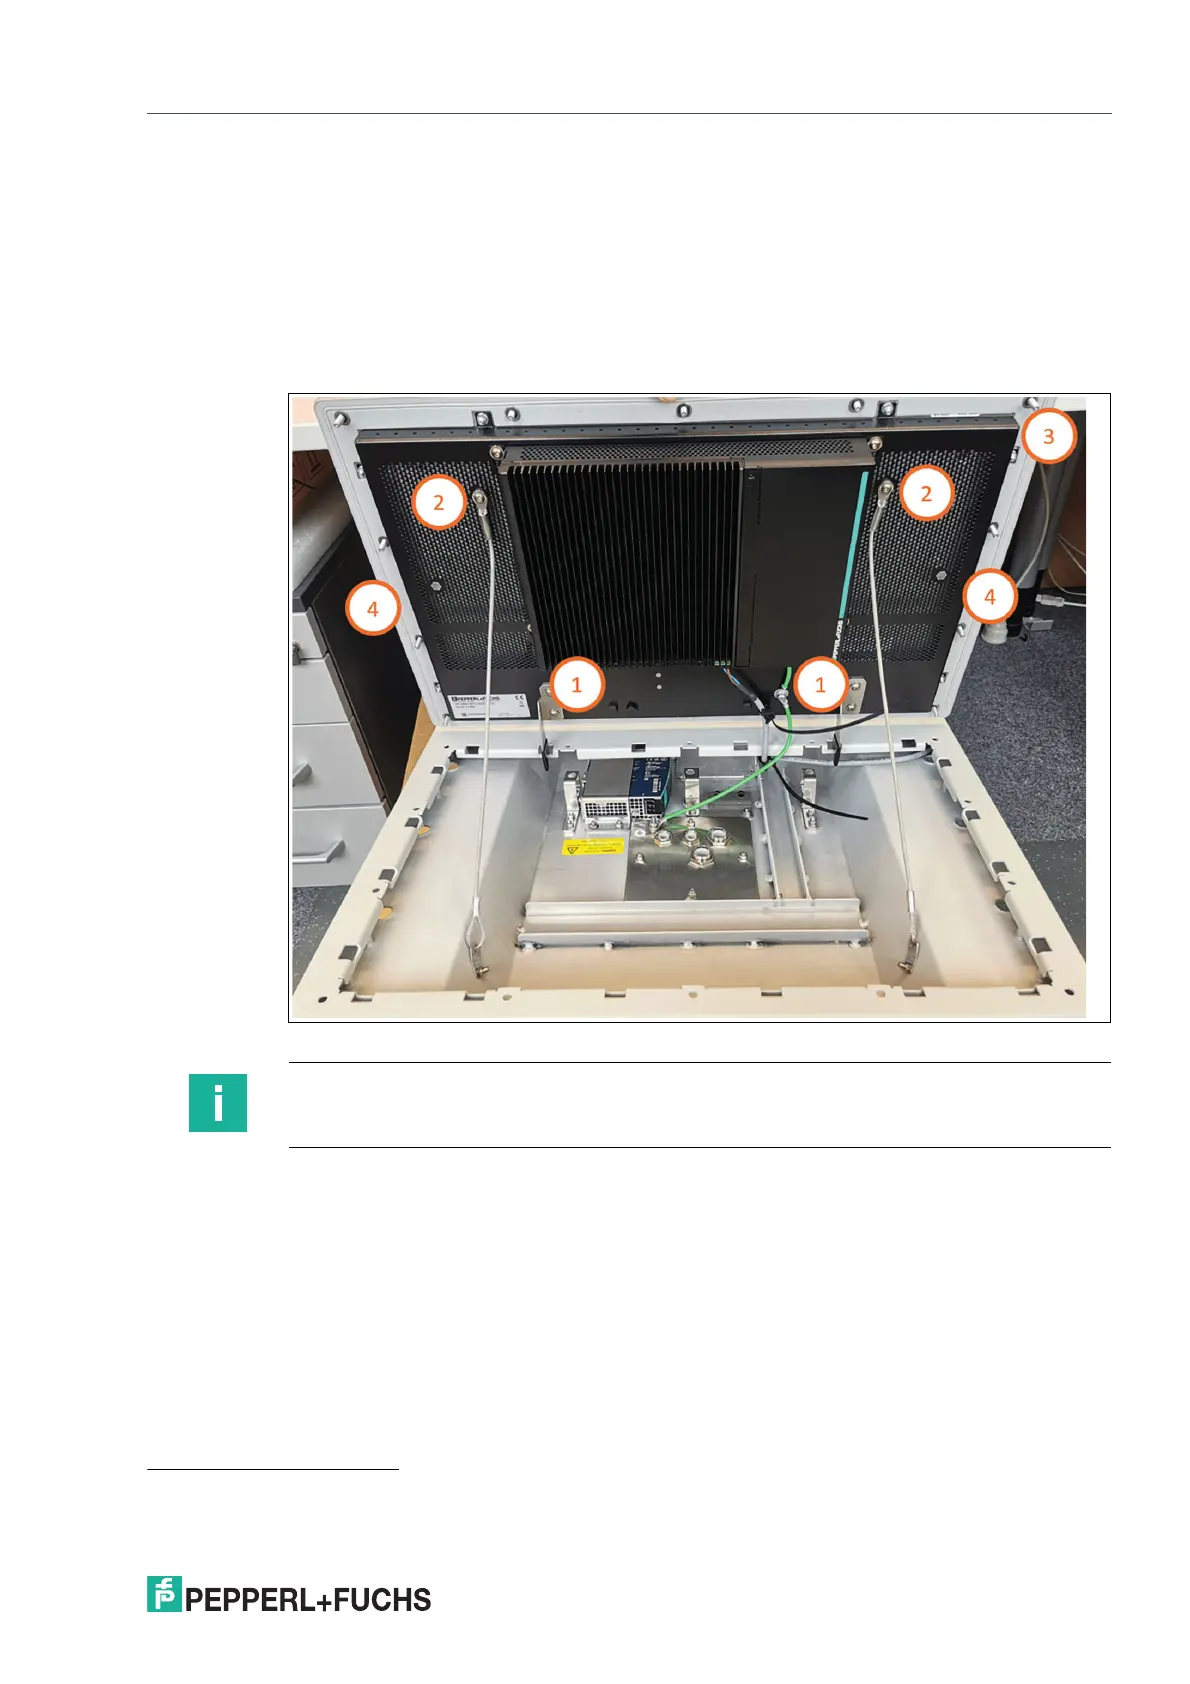
8. Remove the two holder brackets (1) and the 10 bolts at the top, sides, and bottom of the DPU
(2). Remove the carabiners (3) from their brackets, take out the 6 bracket screws (4), and loose
the screws of the carabiner brackets.
1
Figure 8.5
1. Fasten the safety lines to the back of the screen with a torque of 4 Nm and attach the hooks back by pulling them tight with the screws
with a torque of 4 Nm when steps are performed in reverse order.
Note
When mounting back the BPC3200-* or DMU3200-* to the DPU, be sure to slide it all the way
up - leave no clearance at the top of the screw bracket.