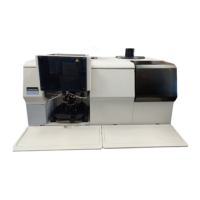
Install a DSC 6000 . 43
The PCD (P/N N5202068) can be filled with ice, ice water, liquid nitrogen or any other
cooling mixtures.
The DSC 6000 with CryoFill uses liquid nitrogen for operation in the range of –170 °C to
300 °C.
NOTE: When operating the analyzer with a cooling device you MUST use a purge gas.
Connecting to the Chiller
When using the chiller, connect the cooling supply to the DSC 6000 as follows:
CAUTION
ATTENTION
An appropriate fluid must be used with the chiller. The fluid should be
effective down to –20 °C. Any lower than that would impair the
conveyance power of the chiller's pump. Distilled water is recommended
for operation at temperatures between 15 °C and 90 °C. For operation at
–20 °C to 100 °C, 50% ethylene glycol in water is recommended.
Un fluide approprié doit être utilisé avec le refroidisseur. Le fluide devrait
être efficace jusqu'à -
20 ° C. Tout inférieur à celui qui affecterait le
pouvoir de transport de la pompe du refroidisseur. L'eau distillée est
recommandée pour un fonctionnement à des températures comprises
entre 15 ° C et 90 ° C. Pour une utilisation de -20 ° C à 10
0 ° C, 50%
d'éthylène glycol dans l'eau sont recommandés.
CAUTION
ATTENTION
Ensure that the cooling air vents at the front and rear of the cooler are
not blocked. Maintain a minimum space of 15–20 cm.
Assurez-vous que les évents d'air de
refroidissement à l'avant et à
l'arrière du refroidisseur ne sont pas bloqués. Maintenir un espace
minimum de 15-20 cm.
1. Make sure that the chiller is switched off but that its power cord is plugged into a power
supply.
2. Screw one of the barbed hose couplings shipped with the chiller into the OUTLET
connection on the chiller unit, and tighten with a suitable wrench.
3. Couplings suitable for several different hose sizes are provided with the chiller.
4. Push a hose (compatible with the desired coolant) onto the OUTLET coupling and
secure with a hose clamp.
5. Slide the other end of the hose over the metal tube labeled COOLING LIQUID IN on the
thermal analyzer. Place a hose clamp around the hose and metal tube to secure the
hose in place.
6. Screw a barbed hose coupling into the INLET connection on the chiller unit, and tighten
with a suitable wrench.
7. Push a hose onto the INLET coupling and secure with a hose clamp.
 Loading...