PAL-AT Installation Manual
46
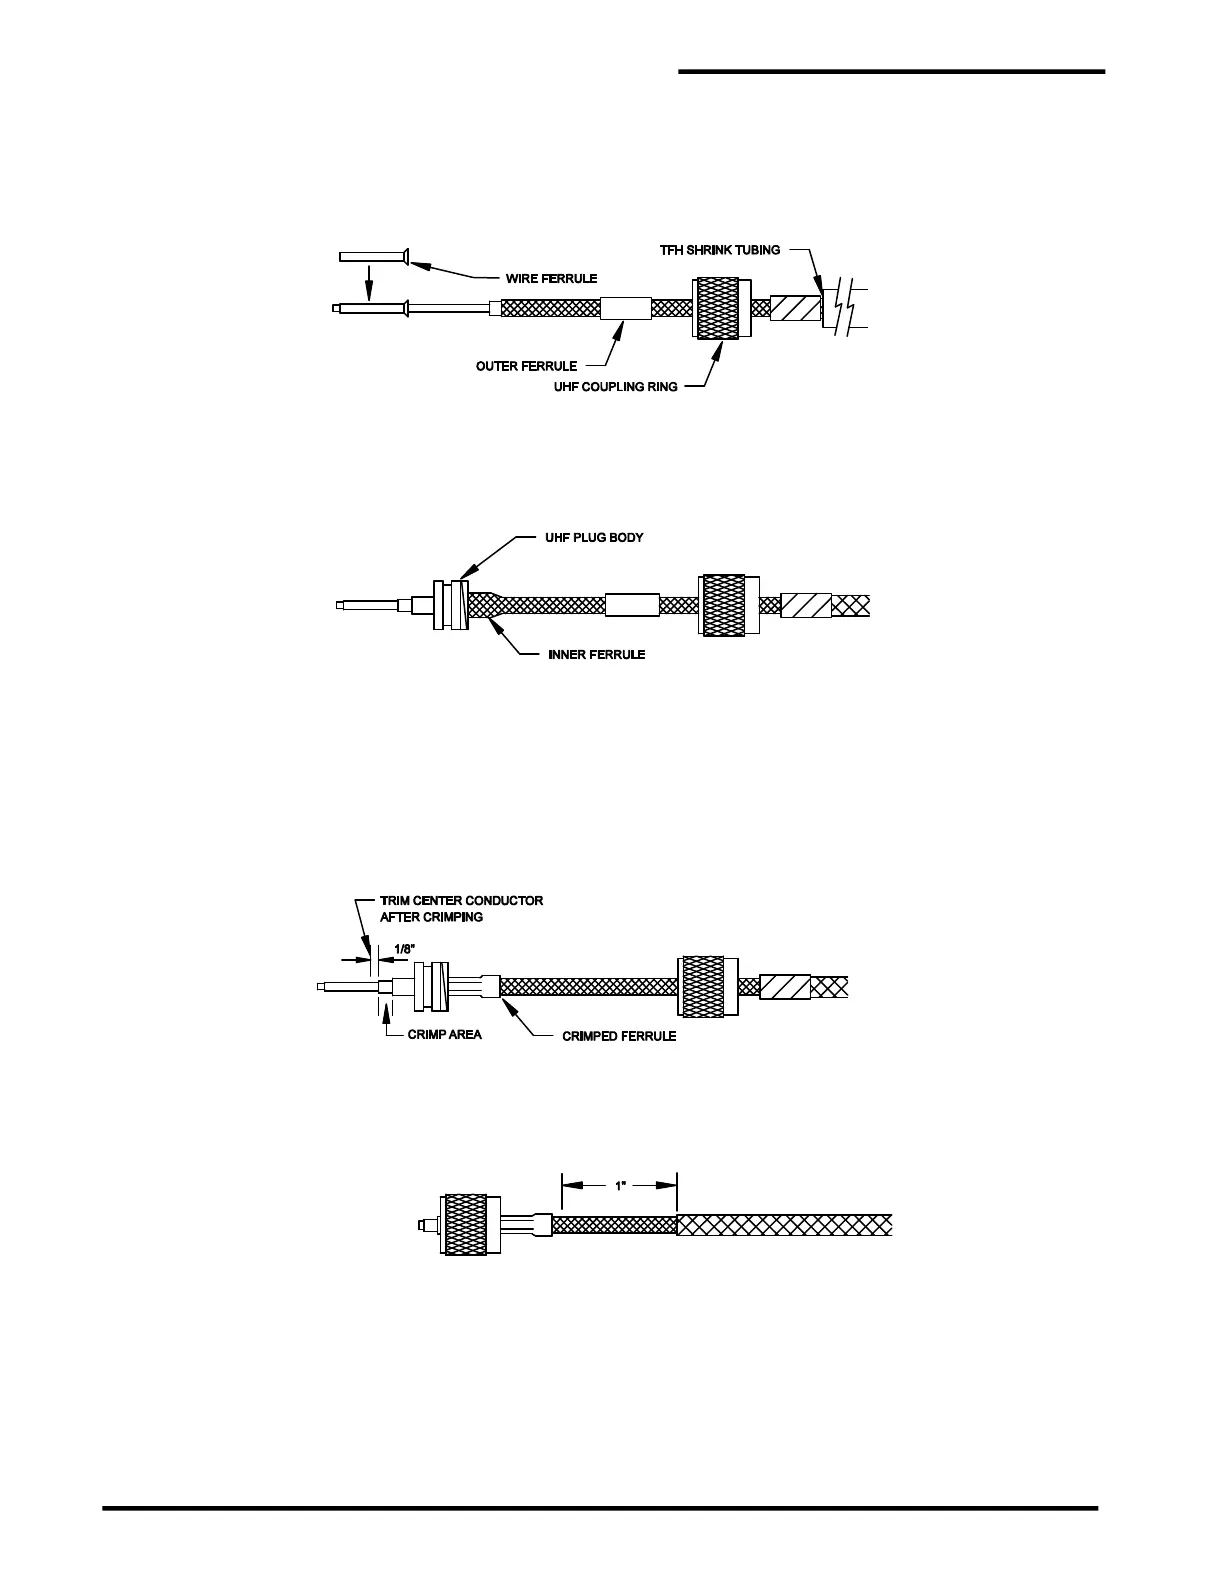
A ¾" [19 mm] long, #14 AWG [1.5 mm
2
] wire ferrule should be installed on the center conductor.
If the wire ferrule is slightly crushed, the conductor will not slide in easily. If this happens, push
the ferrule onto a piece of solid #14 AWG copper wire (or standard 3d finish nail) to straighten the
ferrule. Slide the ferrule over the conductor until it stops at the center conductor insulation. Make
sure all the strands go through the ferrule and extend out of the end.
Step G Slide the UHF plug body over the cable center conductor. Be sure all the strands of the center
conductor or the wire ferrule slide completely through the center contact of the plug. At the same
time, slide the braid over the inner ferrule to the UHF plug body.
Step H Slide the outer ferrule over the braid and up against the UHF plug body. Make sure the braid
extends slightly past the end of the outer ferrule against the UHF plug body. Caution: Once the
crimp tool (PermAlert Part No. 8068301) starts to close, it must be closed completely before
it will open again. Position the crimp tool (0.255" die) carefully around the outer ferrule and crimp
it.
Crimp the end of the center contact as shown using a 0.100" die. Leave a 1/8" [3 mm] gap from
the end of the plug and trim the excess center conductor and ferrule.
Step I Slide the plastic overbraid as close to the UHF plug body as possible to remove any slack. Trim
it so there is approximately a 1” [25 mm] gap between the end of the overbraid and the end of the
ferrule.
Test all connections as described in the "Cable and Connector Testing Procedures"
section. Each end of the cable in the stage shown above will be fastened together by using one
UHF straight adapter. All cable connectors should be encapsulated with non-corrosive RTV
sealant and shrink tubing.