PAL-AT Installation Manual
53
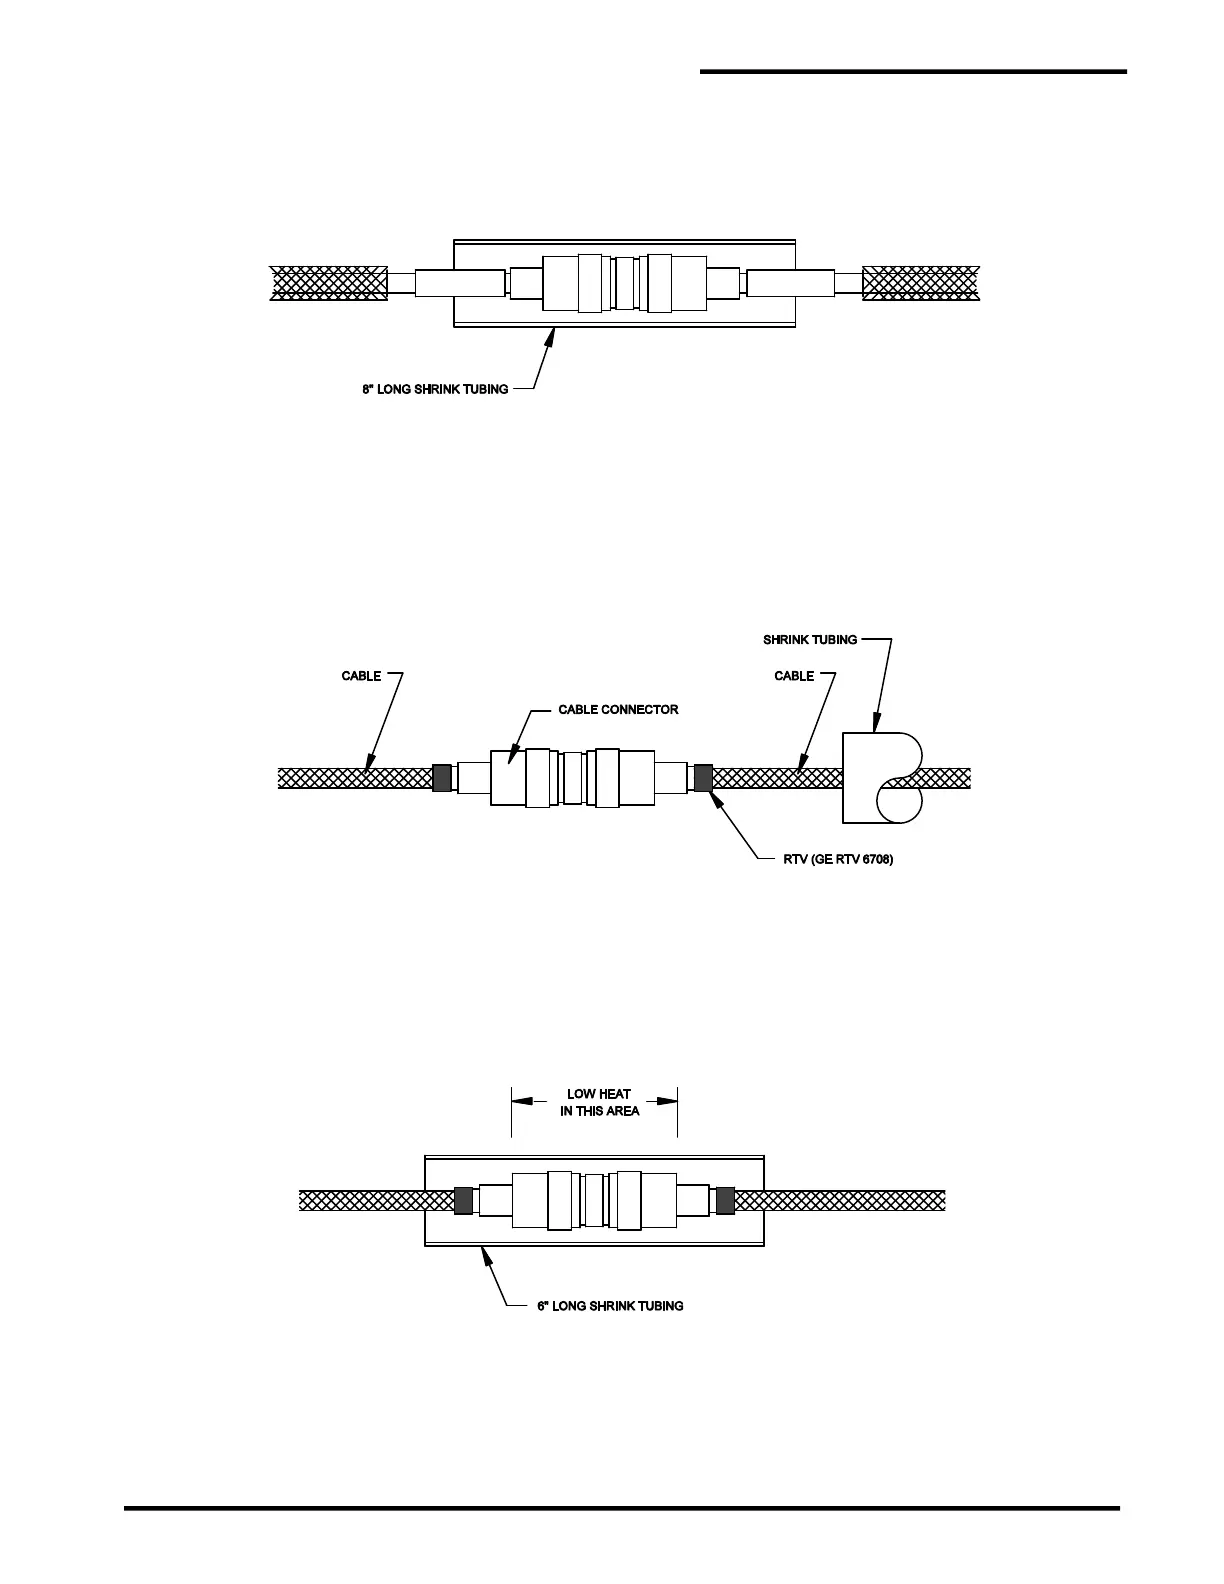
Step D After both cable ends have been sealed with the 4” [100 mm] shrink tubing, recheck that the
connectors are tightened securely. Test the connector according to the "Cable and Connector
Testing Procedures". Then slide and center the 8" [200 mm] shrink tubing over the connector and
heat it until it is fully shrunk and adhesive oozes out the ends.
Step E Slide the overbraid to the connector and tape in place with electrical tape.
8.3.2 Cable Types AGW-Gold, AGT-Gold and TFH-Gold
Step A Install connectors and test them following the "Cable and Connector Testing Procedures" in this
manual.
Step B Slide a 6" [150 mm] piece of shrink tubing on the cable and tighten the connector assembly
securely.
Apply a minimum ¼" [6 mm] bead of noncorrosive type RTV completely around the cable next
to the end of each of the connectors.
Step C Center the shrink tubing over the connector. Carefully heat the tubing, slightly, over the center of
the connector. Caution: If the shrink tubing is overheated in the center area, it may tear as
it tries to shrink to the size of the cable. Next heat the remainder of the tubing. Do not heat
the tubing any longer than required to shrink the tubing around the cable.