PAL-AT Installation Manual
47
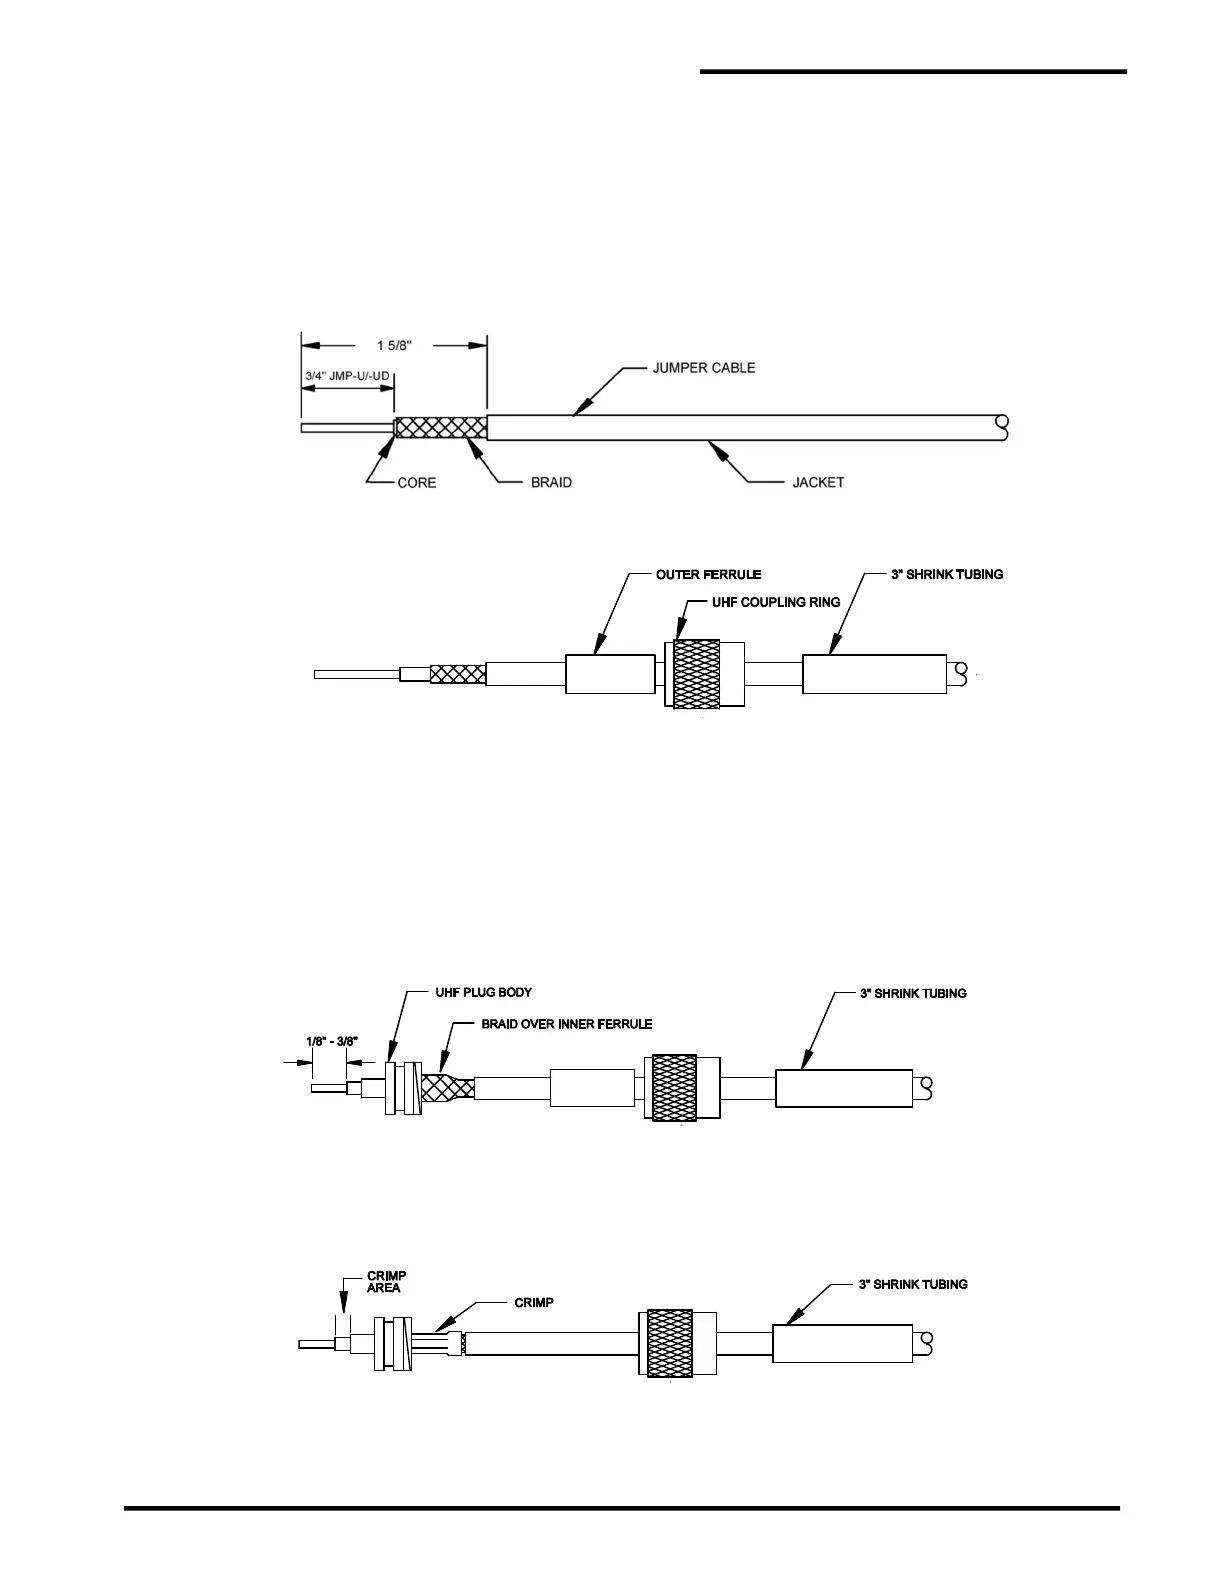
8.2.2 CAJMP Connectors for Jumper Cables JMP-U/-UD
The CAJMP connector assembly for JMP-U/-UD jumper cables consists of two crimp style UHF plugs and
one UHF straight adapter. It also includes 2 pieces of shrink tubing and spiral cable wrap. Steps A thru
H must be followed to install a connector.
Step A Measure and cut the required length of cable.
Step B Carefully cut and remove 1 5/8" [41 mm] of the outer jacket, 3/4” [19 mm] of the braid and 3/4" [19
mm] of the plastic dielectric core. JMP-U has a sticky water-blocking material on the braid. To
make handling it easier, keep your fingers and tools damp with water.
Step C Slide the 3” [75 mm] piece of shrink tubing onto the cable. Next, slide the UHF coupling ring and
the outer ferrule onto the cable.
Step D Slide the UHF plug body over the cable center conductor. Be sure all the strands of the center
conductor slide completely through the center contact of the plug. At the same time, the plastic
core should fit inside the inner ferrule of the plug body and the braid should go over the outside of
the inner ferrule. When the cable is inserted properly, 1/8” [3 mm] to 3/8” [9 mm] of the center
conductor will extend past the end of the UHF plug body and the plastic core will be tight against
the plug body inside the inner ferrule.
Note: Before installing JMP-U/-UD, flair the braid wire I.D. slightly with a small 1/8” [3 mm] slotted
screwdriver so the braid will slide over the inner ferrule. Be careful to keep the wire braided,
i.e. two strands thick, over the inner ferrule, to have the correct thickness for a good crimp.
Step E Slide the outer ferrule over the braid and up to the UHF plug body. Make sure the braid extends
slightly past the end of the outer ferrule against the UHF plug body. The center conductor should
extend at least 1/8” [3 mm] past the end of the connector. Caution: Once the crimp tool
(PermAlert Part No. 8068300) starts to close, it must be closed completely before it can be
opened again. Position the crimp tool 0.429" die carefully around the outer ferrule and crimp it.