PAL-AT Installation Manual
51
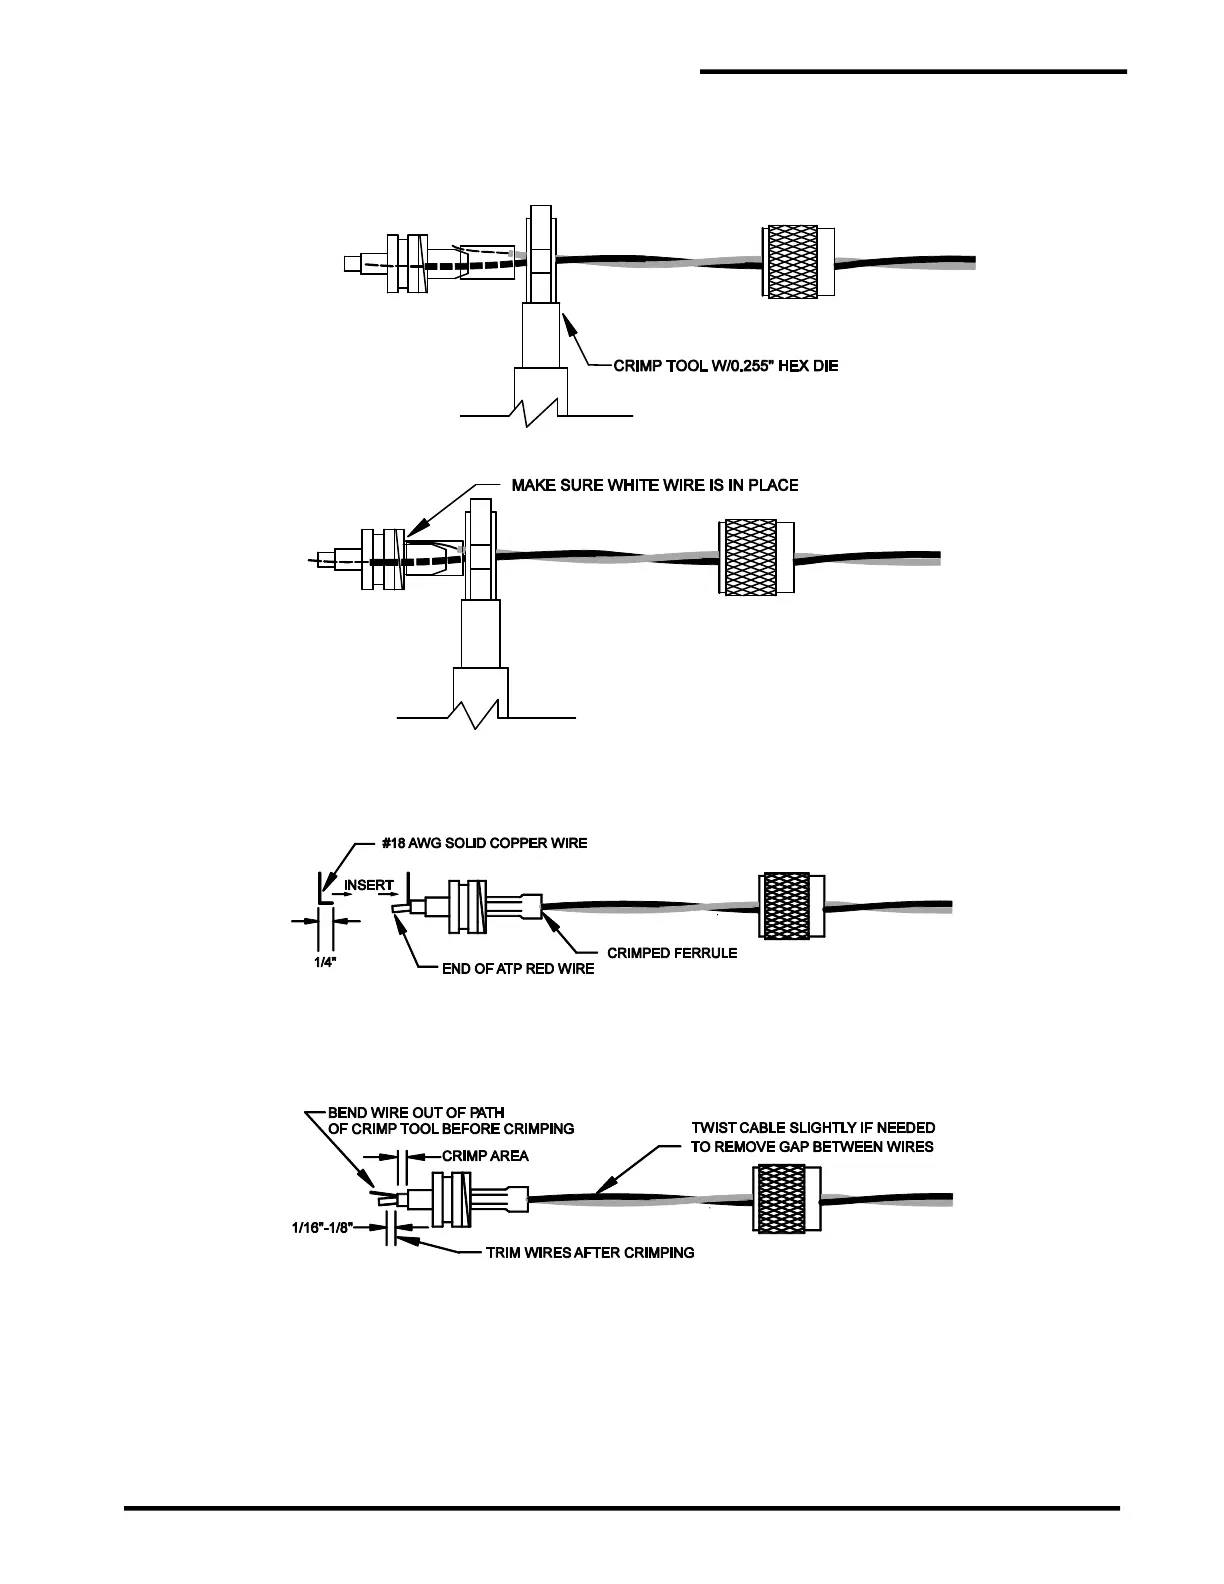
Step E Next, take the crimp tool and clamp the 0.255” die around the twisted wires behind the outer
ferrule. Be careful not to pinch the wires. They should slide freely through the die. Then push the
plug body toward the crimp tool to force the outer ferrule and white wire to slide over the inner
ferrule until they are tight against the plug shoulder as shown in the second view.
Step F Use the 0.255” hex die and crimp the outer ferrule.
Step G Bend a short length of #18 AWG [0.75 mm
2
] solid copper wire to a ¼” [6mm] long right angle and
insert it into the center contact next to the ATP conductor. Insert it as far as the bend.
Straighten the copper wire so it does not interfere with the crimp tool closing. Crimp the center
contact using the crimp tool 0.100” die. Trim excess wire as shown. Slide the coupling ring to the
plug body and thread it onto the body. If there are any gaps between the red and white wires,
twist the connector slightly to remove them.