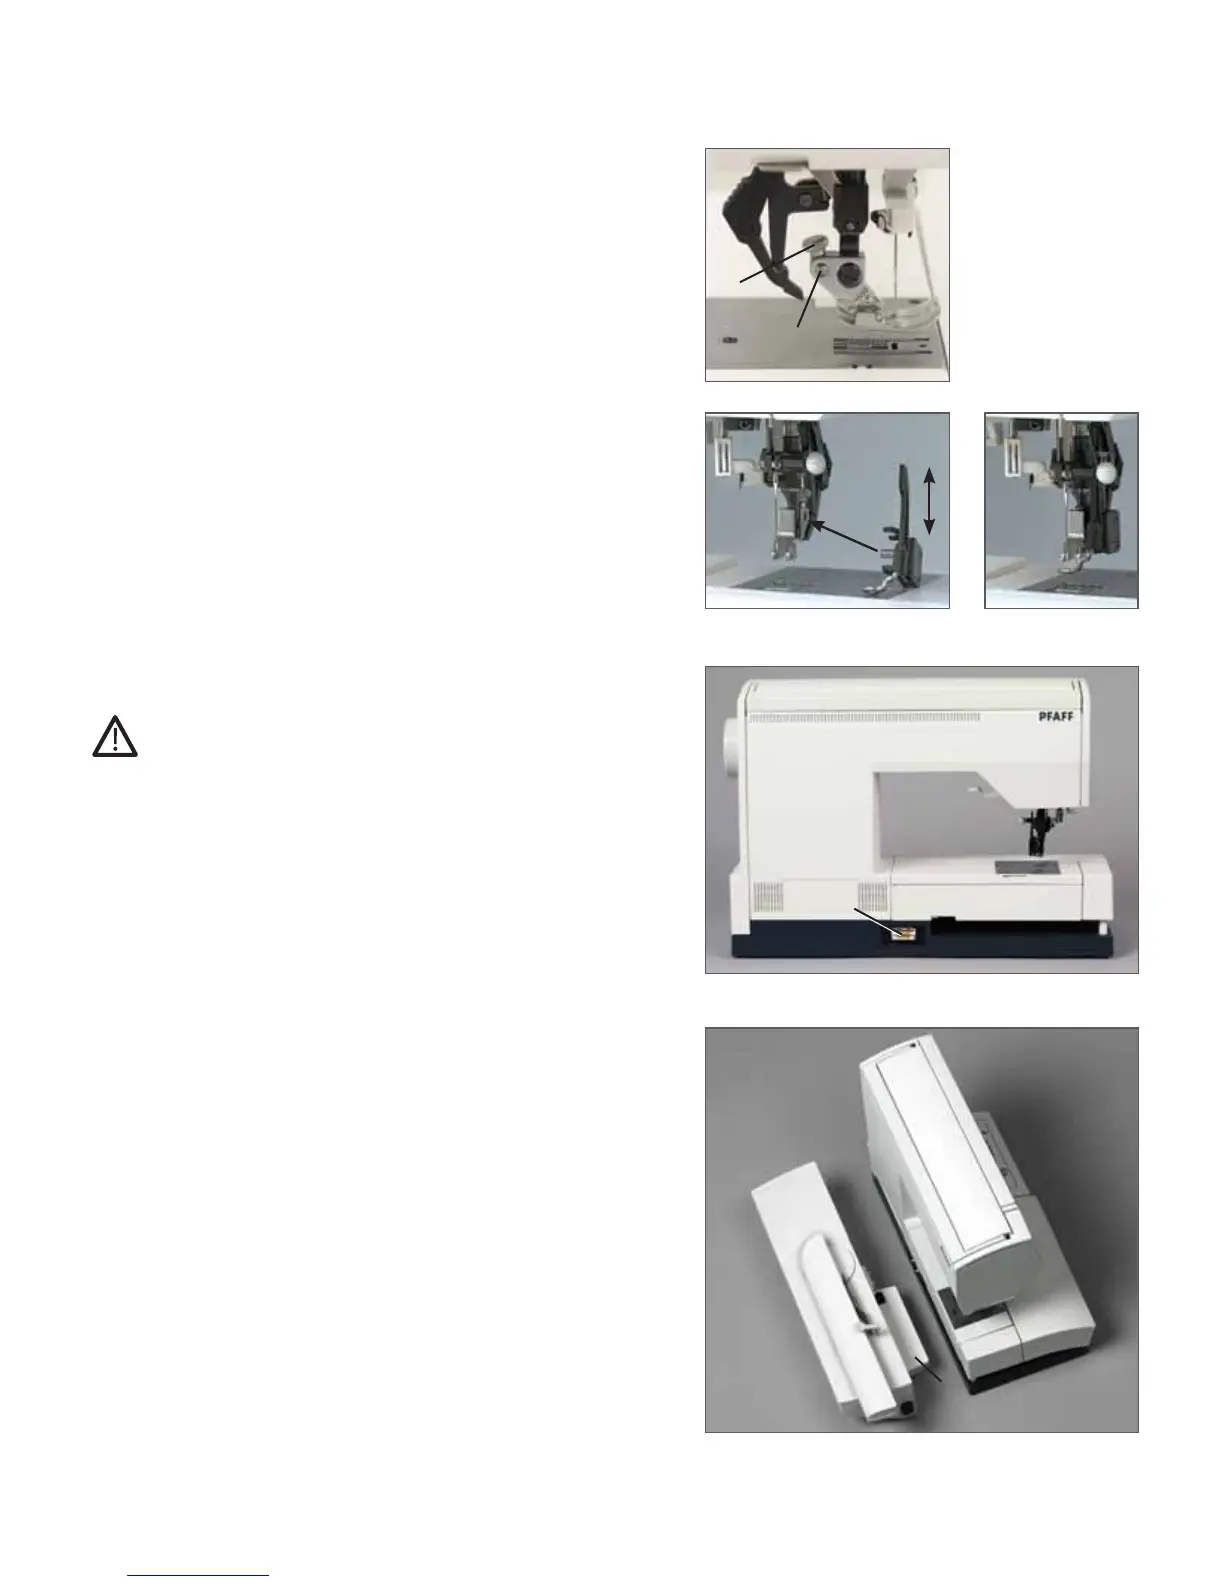
3:2
A
B
32
34
Attaching the embroidery foot
1. Remove the standard presser foot. Carefully loosen the screw (A)
until the cross-hole (B) is accessible.
2. Squeeze the embroidery foot gently together and guide the pin
of the foot into the cross hole of the presser foot holder as far as it
will go.
3. Tighten the screw (A).
To remove the embroidery foot loosen the screw (A), squeeze the
embroidery foot together and pull it out to the right. Tighten the screw
(A).
Attach the embroidery unit
Switch off the main switch
The connecting socket (32) for the embroidery unit is found on the back
side of the sewing machine.
Pull the embroidery keeping it parallel from the back to the front into
the embroidery unit socket.
Make sure that the under arm guide (34) on the embroidery unit is
placed between the base plate and the free arm, and pushed in as far as
it will go. The embroidery unit will be fl ush with the machine.