3:7
A
B
Embroidery
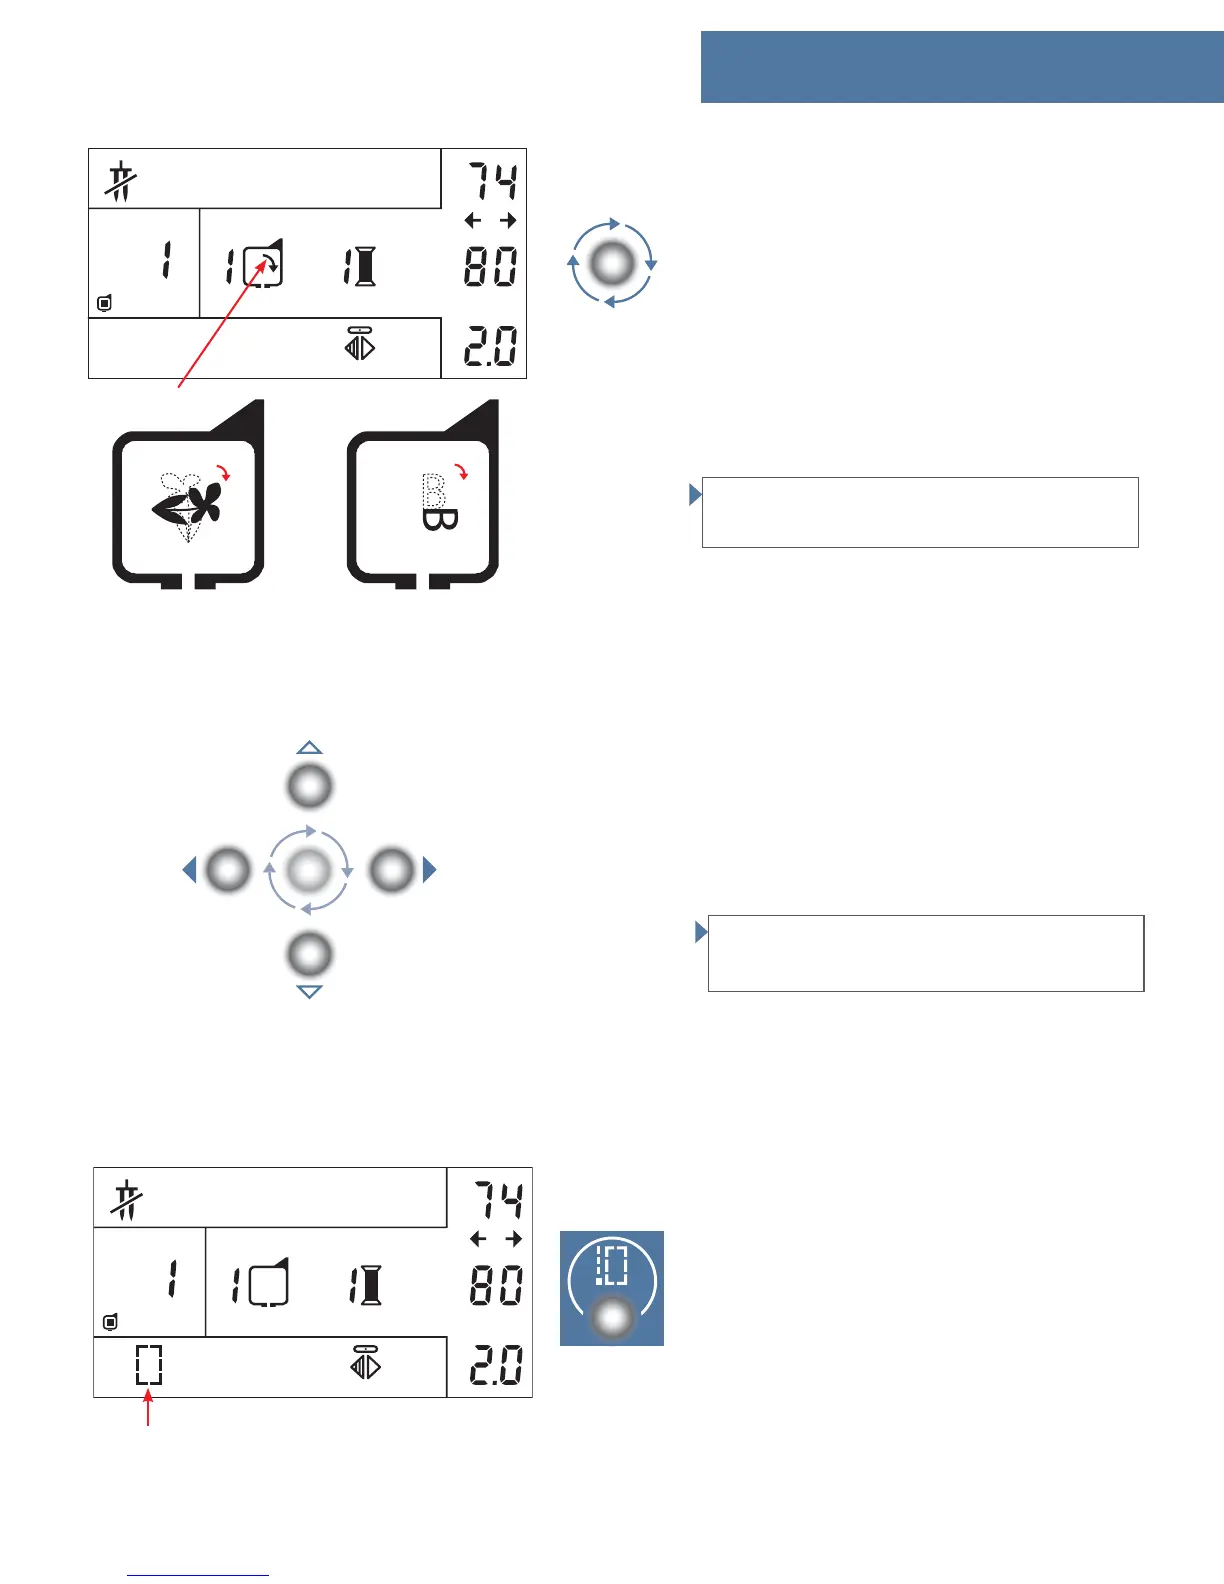
Rotating button
This function makes it possible to rotate a design in
90° steps. When pressing the rotating button (73) an
arrow will be added inside the hoop icon to show
how you have rotated your design.
A design is rotated from its centre around the centre
of the hoop as shown on the picture (A).
Letters are rotaded from the left lower corner around
the centre of the hoop as shown on the picture (B).
Rotate your design/letter before moving it out of the
centre. If the design is out of the centre it will change
place in the hoop when it is rotated.
Note: If the design does not fi t in the hoop when you
have rotated it 90 °, it will automatically be turned
180°.
Positioning buttons
The positioning arrows (71-72) makes it possible to
move the design in 4 different directions in the hoop.
If you have reached the limit of your hoop, you will
hear a beep.
If you want to go back to the original starting posi-
tion, press the design number again.
Note: If you want to change the design size, rotate or
mirror the design, it is best to do it before you move
the design.
Tie-off/basting button
If you press the tie-off/basting button (47) before
you start to embroider, you will activate the bast-
ing stitch and the basting icon will be shown on
the window. The machine will then baste a square,
outlining the design area.
The basting function can be useful when working
with fabrics that can not be hooped tightly. You can
then use the basting function to baste the fabric and
stabilizer together.