25
Go to cover page
DDC Instructions
170B6 LCD
3. Click (Write EDID) icon from the tool bar to write DDC data.
Then wait for 20-30 seconds ,DDC data will be finished Writing.
Fig. 41
Fig. 39
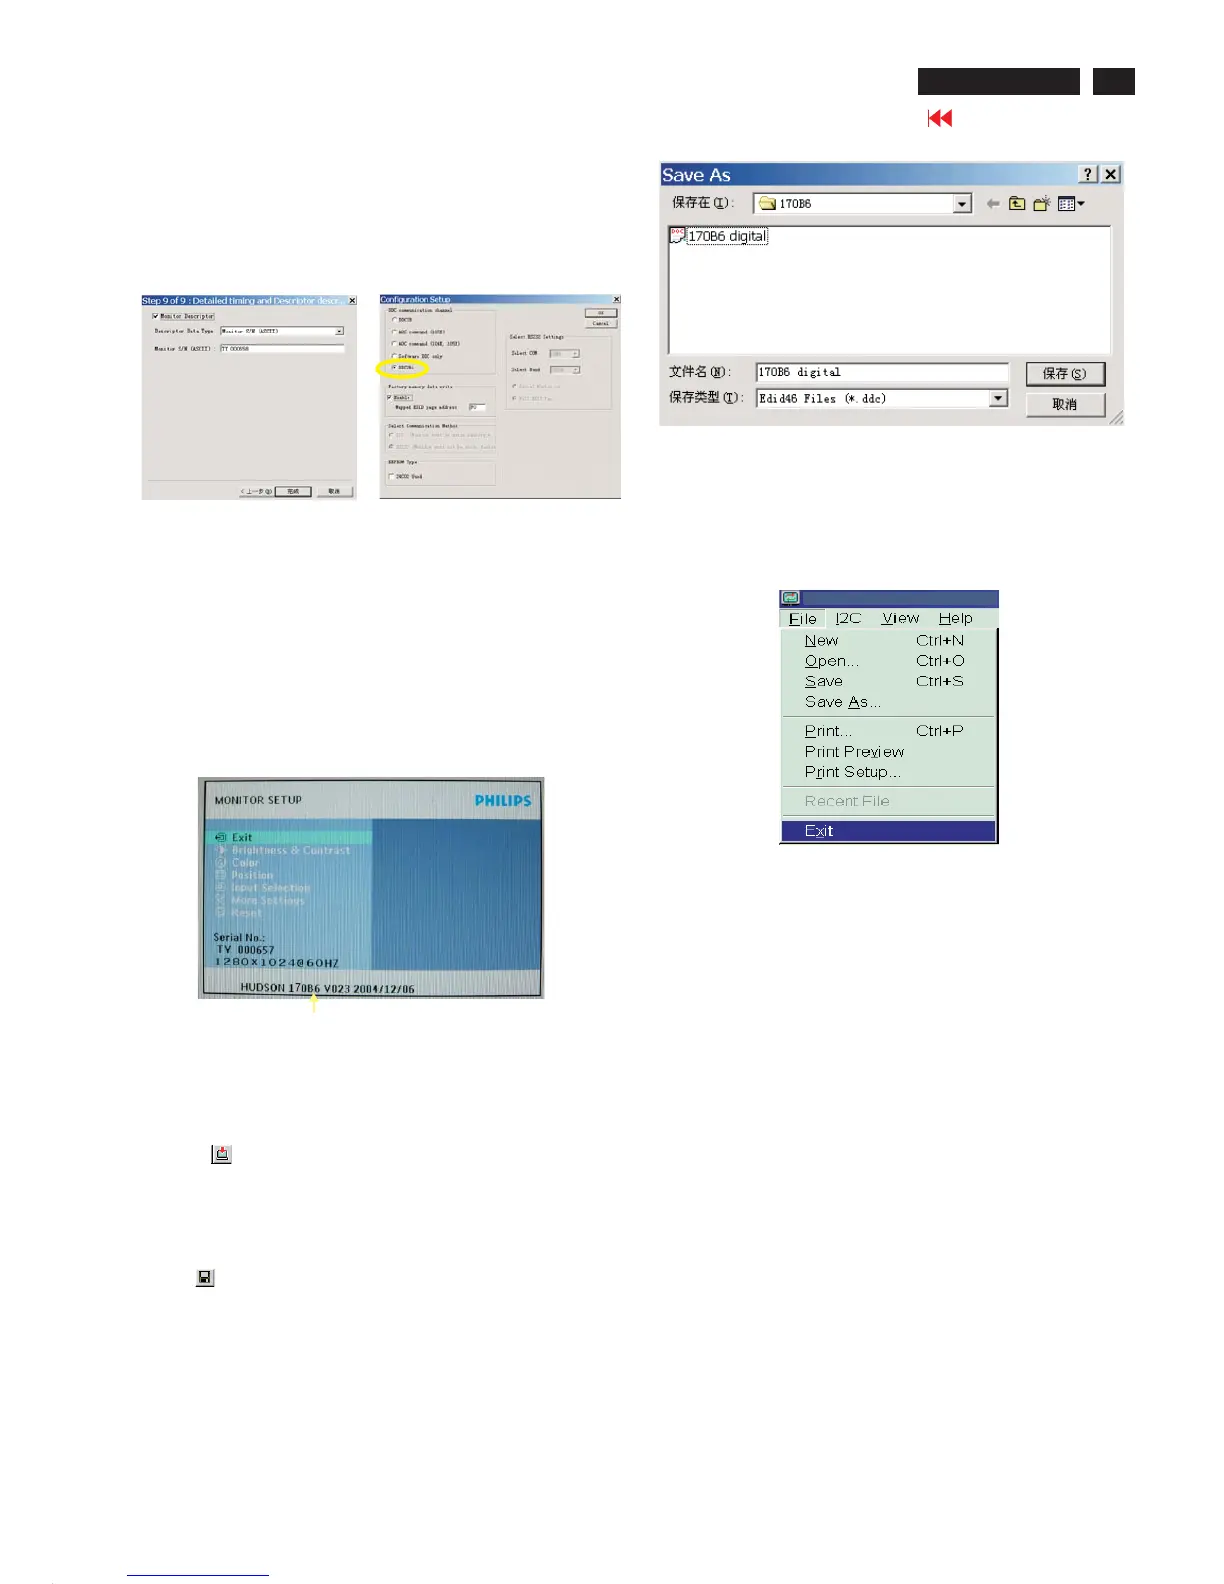
8. Click Next , bring up Fig. 39.
- Click Finish to exit the Step window.
- Serial number can be filled up at this moment (for example, TY
000658).
NOTE: You must modify the Serial NO. In step 9, otherwise the Serial
NO. In OSD Couldn't be modified correctly.
Step 5: Write DDC data
1. Configuration should be as Fig. 40. And press OK.
Fig. 40
2. Click Save.
Step 7: Exit DDC program
Pull down the File menu and select Exit as shown in Fig. 43.
Step 8: Turn off the monitor, exit the factory mode.
Fig. 43
3) Push Menu to exit OSD menu.""
Fig.42
Sometimes, you may need to save DDC data as a text file for using
in other IC chip. To save DDC data, follow the steps below:
1. Click (Save) icon (or click "file"-> "save as") from the tool bar and
give a file name as shown in Fig. 42.
The file type is EDID46 file (*.ddc) which can be open in WordPad. By
using WordPad, the texts of DDC data & table (128 bytes, hex
code) can be modified. If DDC TEXTS & HEX Table ar completely
correct, it can be saved as *.ddc flie to re-load it into DDC IC for DDC
Data application.
Step 6: Save DDC data
2. Access Factory Mode
1). Turn off monitor.
2).
3).Press "OK" button, wait until the OSD menu with Characters
"HUDSON 170B6 V023 2004/12/06" (below OSD menu) come
on the Screen of the monitor(See Fig.41).
[Push "AUTO" & "OK" buttons at the same time and hold them]
+[Press "power" button untill comes out "Windows screen" ]
=> then release all buttons
Factory Mode
Indicator