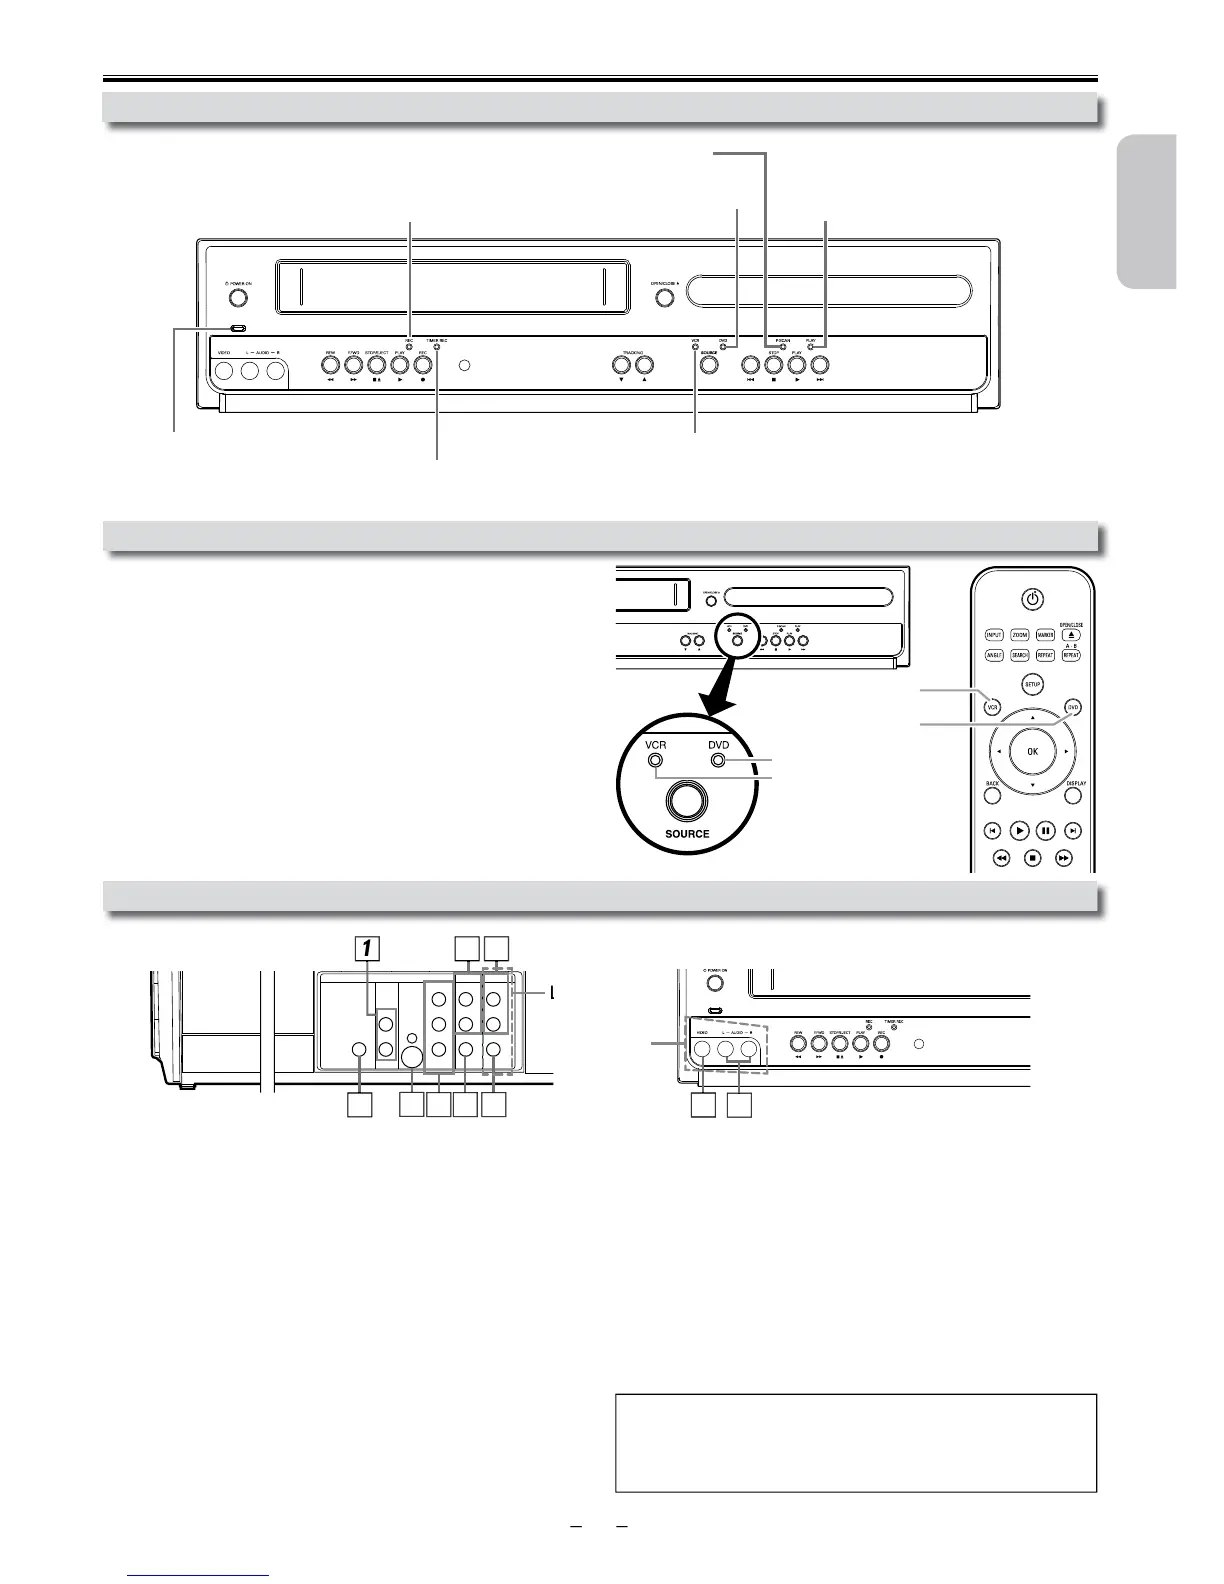
ou must first select either DVD or VCR operation.
VCR MODE
The VCR SOURCE light will illuminate.)
DVD MODE
The DVD SOURCE light will illuminate.)
Selecting DVD or VCR Operation
ront Panel Indicator Lights
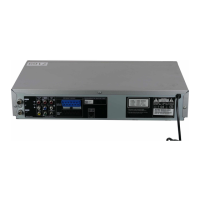
onnect audio cables from here to the audio input jack of your television
or au
evice.
2: DVD/VCR AUDIO OUT
onnect audio cables from here to the audio input jack of your television or
udio device. Standard connection for DVD/VCR use.
3: VCR AUDIO IN jacks
onnect a stereo audio cable from the audio output jacks of your
camcorder, VCR, etc. to here. After making the connection, press
on the Remote Control. Select “L1” to activate the rear
UDIO IN jacks or “L2” to activate the front jacks.
4: VCR VIDEO IN
onnect a video cable from the video output jack of your camcorder, VCR,
etc. to this Unit. After making the connection, press
e
Remote Control. Select “L1” to activate the rear VIDEO IN jack or “L2” to
onnect a video cable from here to the VIDEO input jack of your televi
sion or audio device. Standard connection for DVD/VCR use.
onnect a component video cable from here to the component video
input jac
onnect an S-video cable from here to the S-video input jack on your
evision.
8: DIGITAL AUDIO OUT COAXIAL* jack
onnect a digital audio coaxial cable from here to the digital audio input jack
on your
For enhanced DVD viewing. DVD/VCR video and audio connections
ote(s):
• Audio and video cables are included for both VCR and DVD viewing. You
can enhance your DVD picture and sound quality with an S-video cable, a
component vi
DVD button
VCR button
VCR SOURCE light
DVD SOURCE light
DIGITAL
AUDIO OUT
COAXIAL
AUDIO
OUT
DVD VC R
DVD/VCR
S-VIDEO
OUT
COMPONENT
VIDEO OUT
AUDIO IN
VIDEO IN
AUDIO OUT
VIDEO OUT
L
LY
R
L
R
R
C
B
/
P
B
C
R
/
P
R
one-touch timer recording (OTR) has been set
ecording (OTR). Blinks when a recording is paused.
Lights up when this Unit is in the VCR mode.
e progressive scan system is activate