ILC 1X1
48
PHOENIX CONTACT 8385_en_02
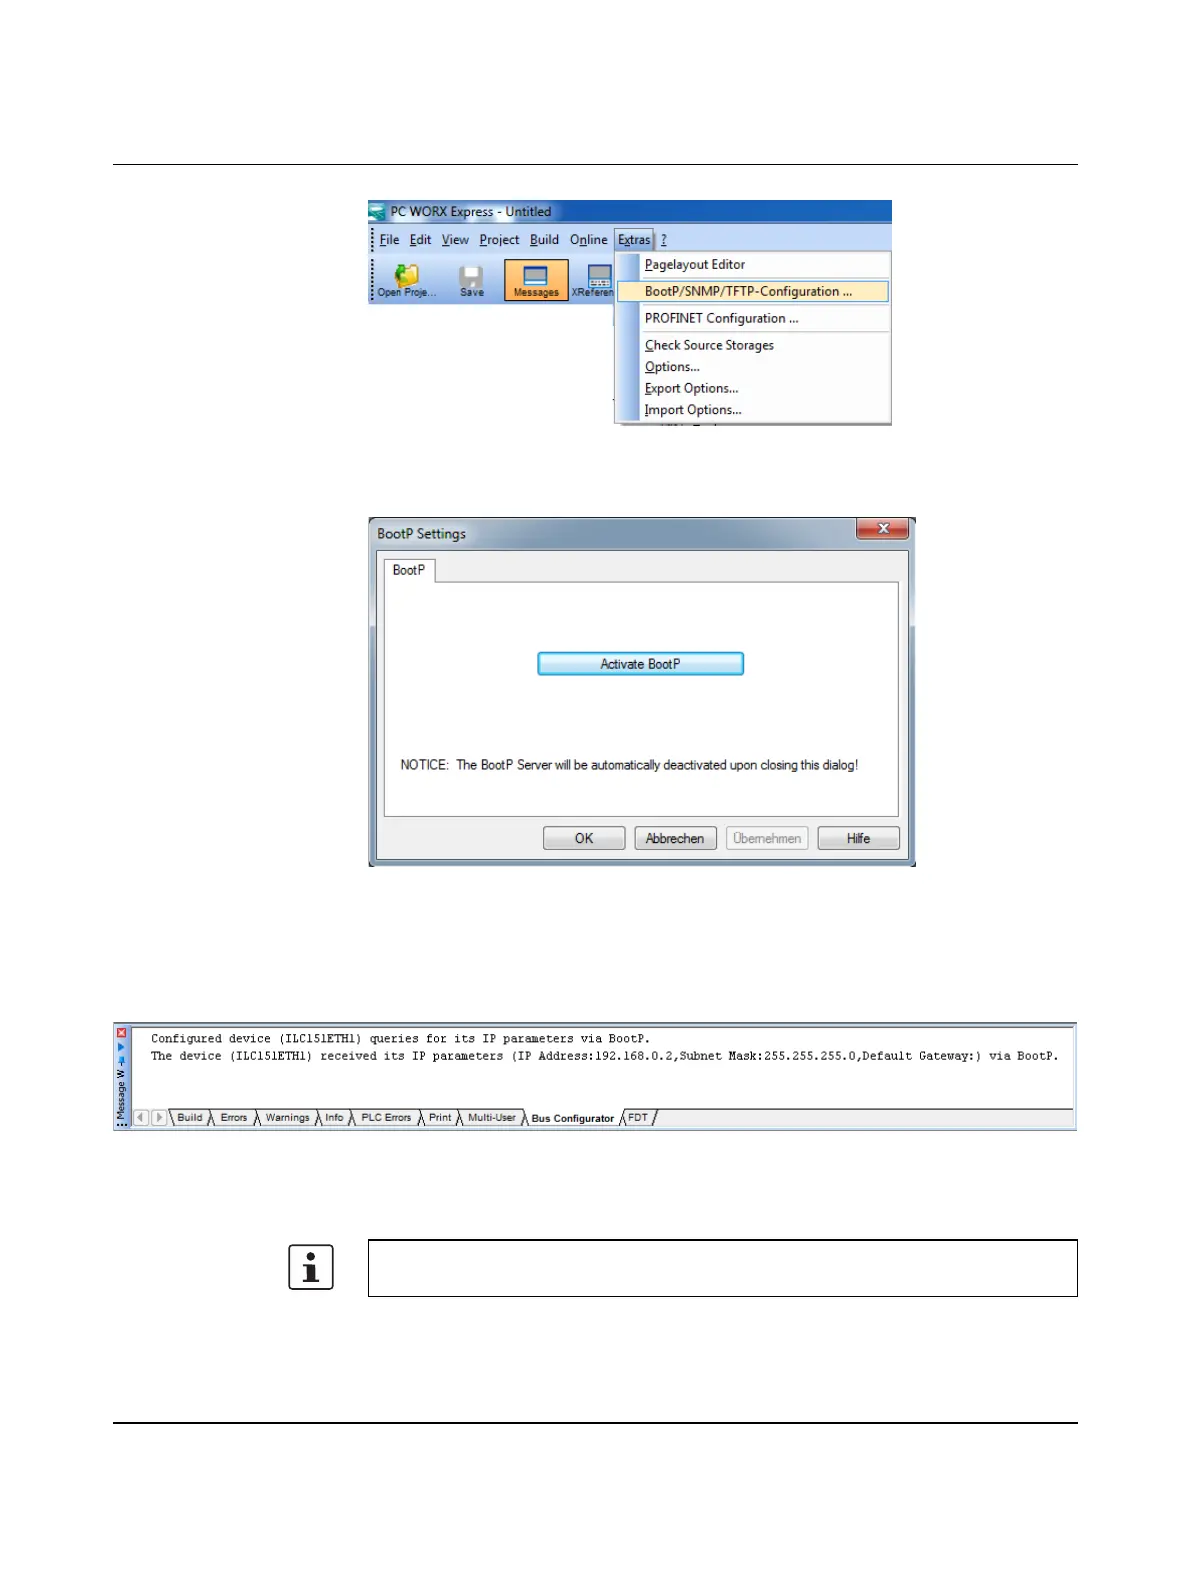
Figure 3-5 “Extras, BootP/SNMP/TFTP-Configuration...” menu
• Click on the “Activate BootP” button.
Figure 3-6 “Activate BootP” button
• Perform a cold restart for the controller. To do this, switch the supply voltage off and
then on again after about 2 seconds.
The controller is assigned the IP address which is specified in the project for the controller.
The following message appears in the message window in the “Bus Configurator” tab.
Figure 3-7 Message window following BootP
The IP address is now permanently stored on the controller's internal parameterization
memory.
For additional information on setting the IP address with PC Worx/PC Worx Express,
please refer to the quick start guides for the software used.



 To Next Page