16
En
English
Installation and Connections
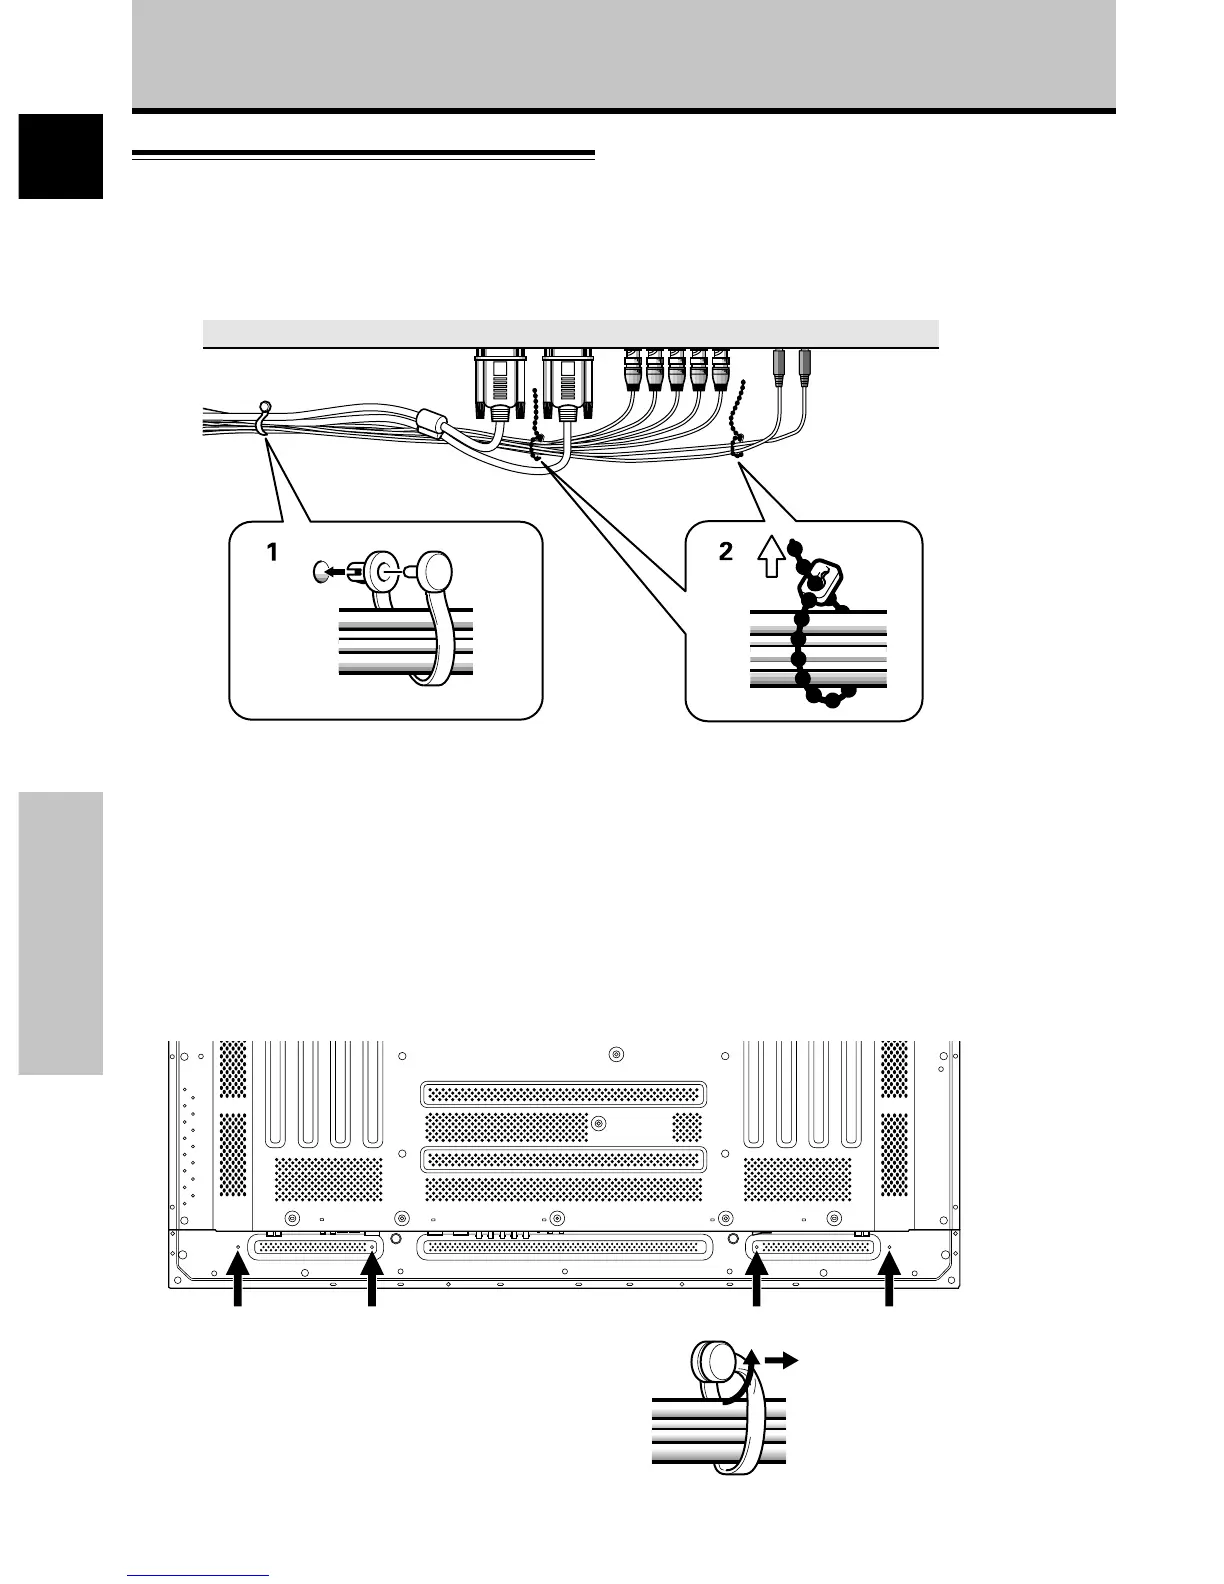
How to Route Cables
Speed clamps and bead bands are included with this unit
for bunching cables together. Once components are
connected, follow the following steps to route cables.
1 Organize cables together using the provided
speed clamps.
Insert 1 into an appropriate hole on the rear of the
unit, then snap 2 into the back of 1 to fix the clamp.
Speed clamps are designed to be difficult to undo
once in place. Please attach carefully.
To attach the speed clamps to the main unit
Connect the speed clamps using the 4 holes marked with •
(Black dot) below, depending on the situation.
* As viewed from the rear of the display.
Installation and Connections
1
2
To remove speed clamps
Using pliers, twist the clamp 90° and pull it outward.
In some cases the clamp may have deteriorated over
time and may get damaged when removed.
2 Bunch separated cables together and secure
them with the provided bead bands.
Note
Cables can be routed to the right or left.
Illustration depicts PDP-503MXE model.
 Loading...