ENGLISH
11
10. ,
Parts Required:
1 x Cabinet Door Handle (#9)
1 x Cabinet Door Latch (#10)
1 x Cabinet Door Heat Filter (#11)
2 x Screw (#C)
2 x Screw (#D)
Installation:
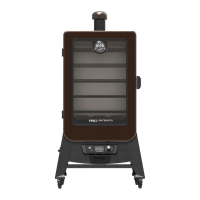
• First, remount the Cabinet Door to the Main Cabinet by aligning and
securing both hinges. Ensure the door is mounted correctly by testing
that it opens freely.
• Next, mount the Cabinet Door Handle onto the front side of the
Cabinet Door using two screws (C). Note correct direction in 10.
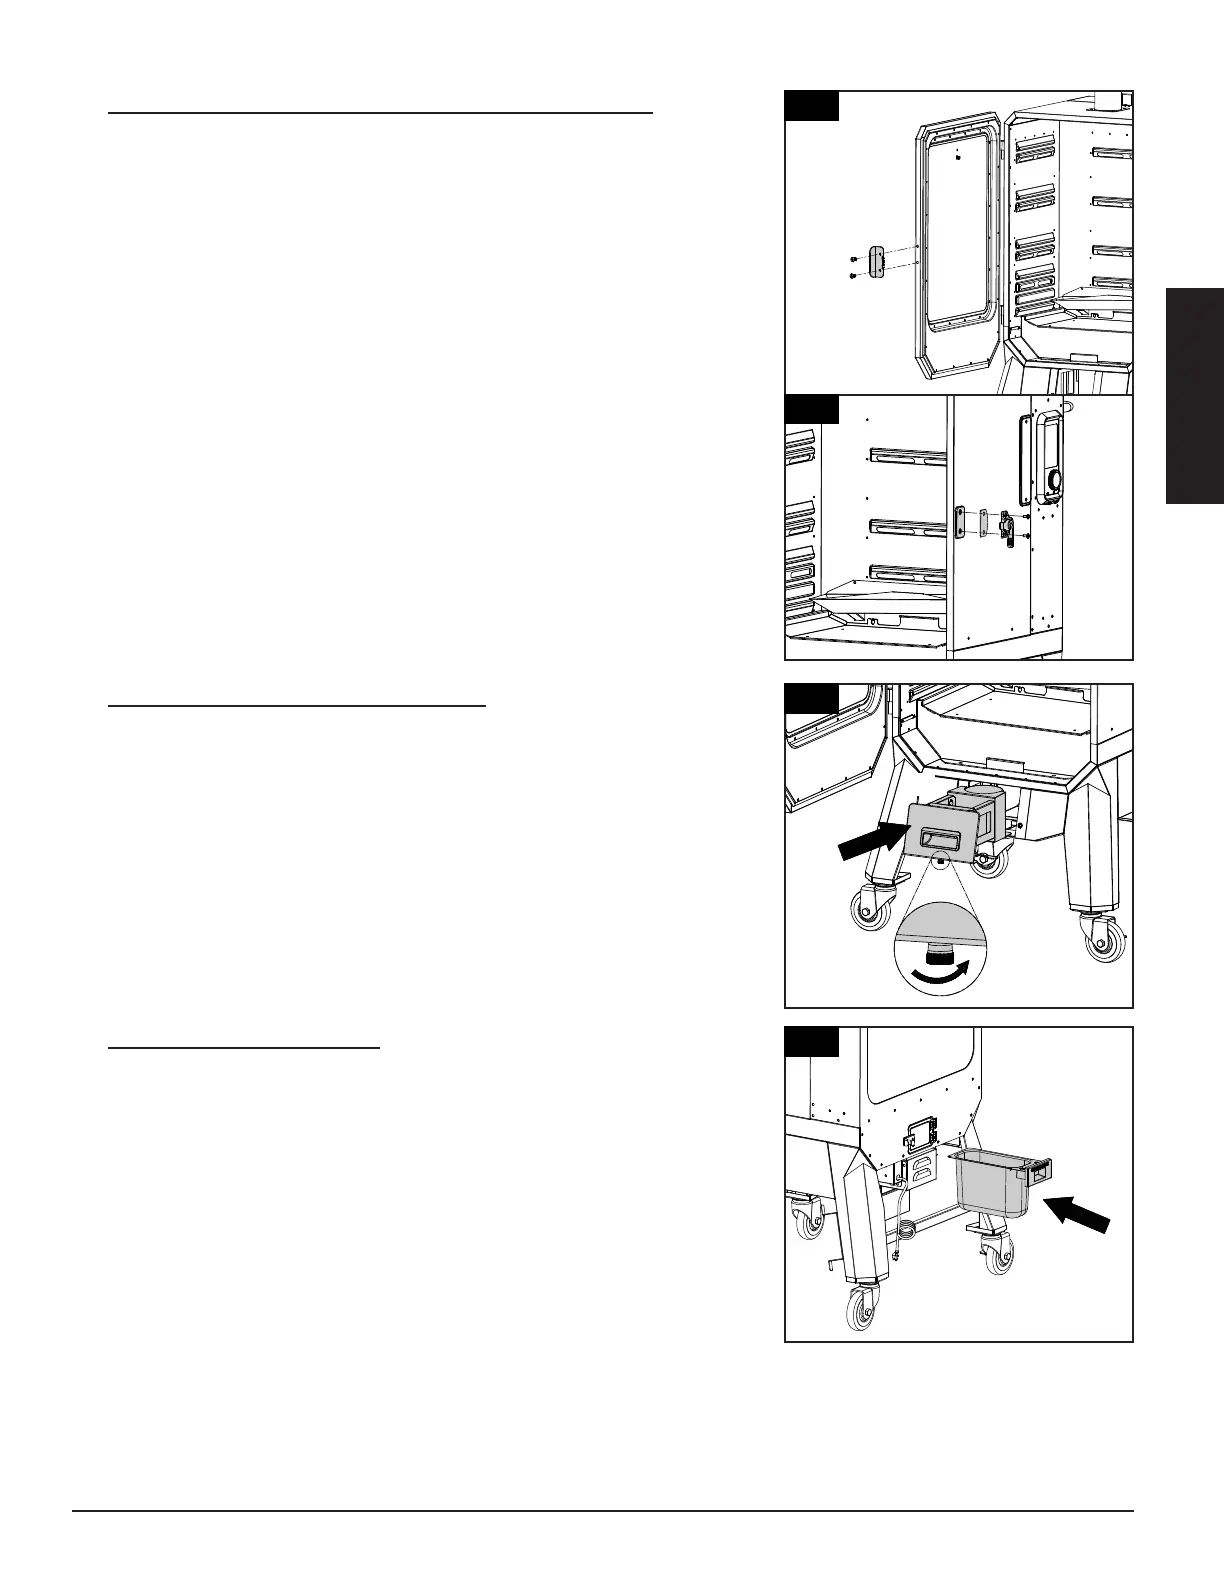
• Install the Cabinet Door Latch and Door Latch Heat Filter onto the
exterior side of the Main Cabinet using two screws (D). Note 10.
IMPORTANT: Fine tune and test the Cabinet Door Latch and Hooks
to ensure they align properly and there is a proper seal while the
Cabinet Door is closed. Poor alignment may result in heat loss and
leaks during use.
11.
Parts Required:
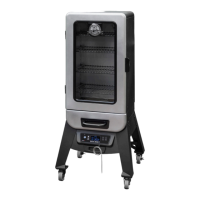
1 x Ash Clean-out Tray (#22)
Installation:
• Open the Cabinet Door. Next, insert the Ash Clean-out Tray into the
Ash Clean-out Housing on the front panel of the unit, below the Front
Shelf. Tighten the bottom screw counterclockwise to lock into place.
IMPORTANT: Ensure the Ash Clean-out Tray is inserted completely to
properly collect ash from the Main Cabinet.
12.
Parts Required:
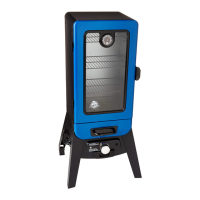
1 x Grease Tray (#19)
Installation:
• Slide the Grease Tray into the Grease Tray Brackets on the back
underside of the Main Cabinet.
NOTE: The Grease Tray is completely inserted once the front of the
tray is flush with the back of the Main Cabinet.
10
10
11
12
11
10
9
22
19