4-10 SV61831 Rev. A DA50S/DA55S/DA70S/DA75S AddressRight™ Printers Service Manual
4 • Troubleshooting/Diagnostics
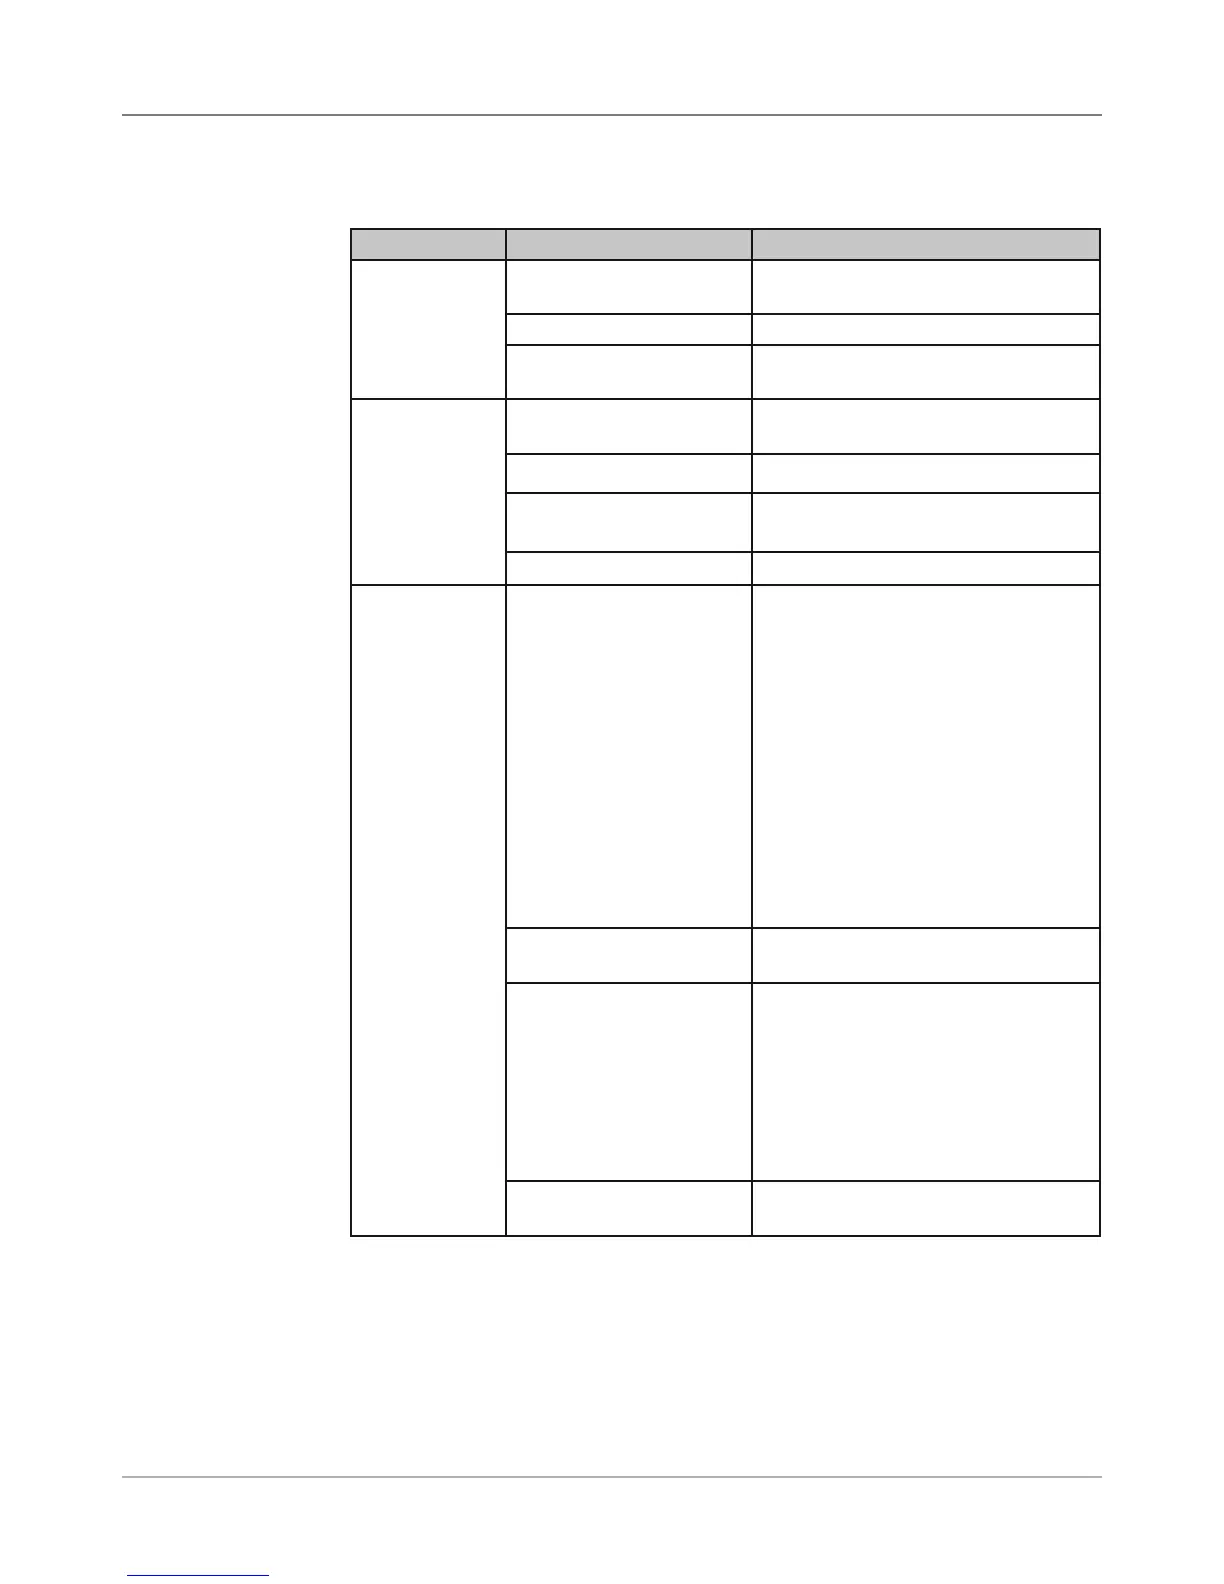
Table 4-4 Print Quality Problems
Symptom Possible Cause Solution
Ink Print Qual-
ity not Sharp
Envelope thickness ad-
justment incorrect
Adjust lever to lower print head
Material out of spec Change to typical white wove bonded
Contaminated mainte-
nance station
Clean the caps and wipe with damp
cloth or paper towel
Ink streaking
on Media
Envelope thickness ad-
justment incorrect
Adjust lever to raise print head
Exit idler rollers dirty Clean rollers with water to remove ink
Print head needs purging Run “Purge Print Head” from Setup
Menu
The print cartridge is dirty Clean the cartridge
Non-Uniform
Print
Quality
Print Head Holder broken Check the print head holder for
broken pins. Replace print head
drive board if pins are broken. NOTE:
When trying to decide if print head
driver board should be replace or
not, run “Test Print Head” from Setup
Menu, replace the ink cartridge with
a new one, then run the print head
test again. If the gaps are consistent
with different ink cartridge, then the
print head driver board needs to be
replaced (when there is no physical
sign that the print head driver board
is damaged).
Print head holder Check that flex circuit dimples are not
crushed
Multiple print nozzles not
working
Run “Purge Print Head“ from Setup
Menu, then run “Test Print Head”. If
not helpful, swap ink cartridge with
known good one. If the same nozzles
are out, check the ribbon cable going
to print head cartridge (it may have
lost power to nozzles). If cable is fine,
check print head board.
Print Head If gap appears in test pattern, replace
print head.
4.3
Troubleshooting
Tables