ProMax X-ray unit with Dimax3 43
CONTROL PANEL
User’s Manual
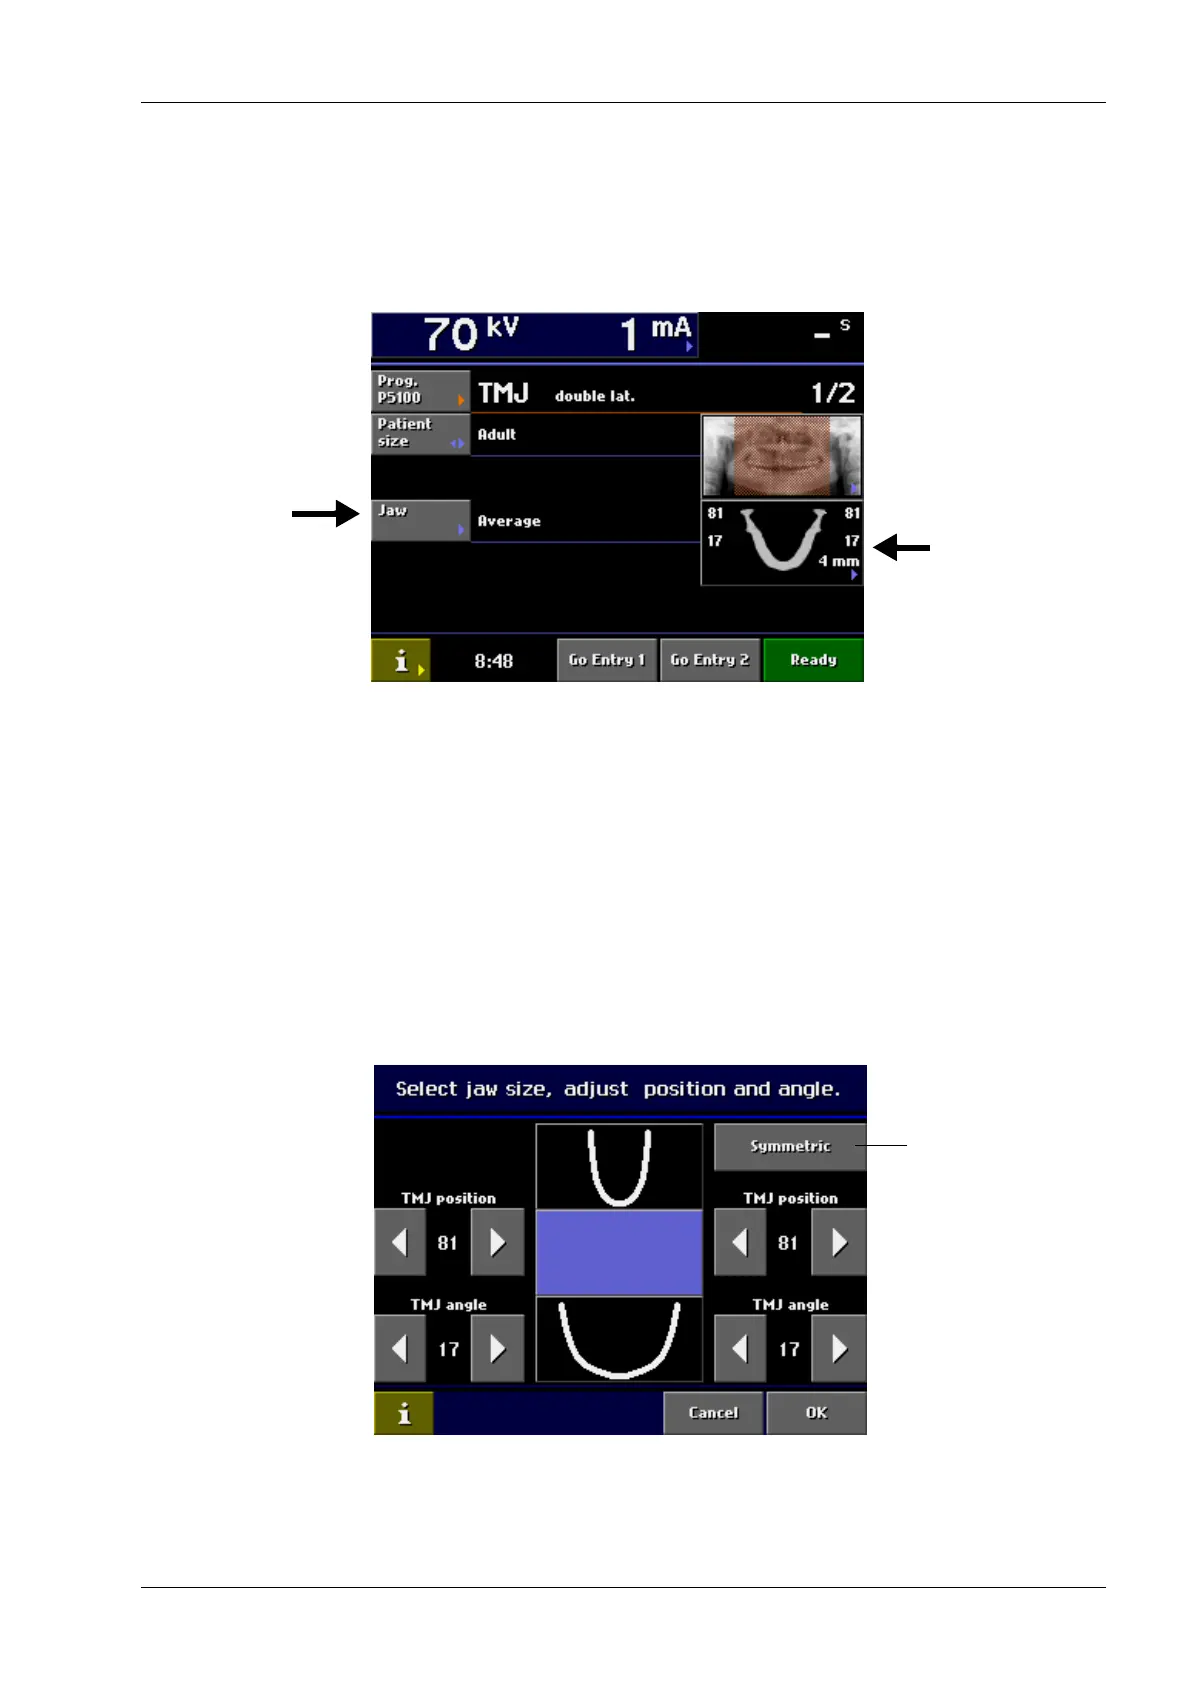
8.3.2 Adjusting position and imaging angle
This function allows you to adjust the form of the focal
trough to accommodate patients with different jaw sizes.
Touch the Jaw field on the main display, or alternatively,
tap the jaw icon on the right side of the display.
The Select jaw size, adjust position and angle display
appears. The marking on the jaw icon demonstrates the
image layer position.
The jaw size can be changed by touching the Jaw field or
the jaw icon. The size of the jaw affects the position of the
image.
Select the correct position and angle for the patient to be
X-rayed by tapping on the corresponding arrows.
You can also select an asymmetric exposure in case you
take Condyle exposures where the positions/angles of the
jaw are different. This feature enables you to adjust the
angle and position of the jaw separately on both sides.
The default angle is 17°.
Confirm the selection and return to the main display by
touching OK.
OR JAW ICON
Jaw size:
Narrow
Average
Wide
Jaw shape:
Normal
Select symmetric/
asymmetric exposure

 Loading...


