INSTALLING THE X-RAY UNIT
14 Planmeca ProOne
Installation Manual
6 INSTALLING THE X-RAY UNIT
NOTE The X-ray unit must be installed in a location where the user can freely monitor the
patient during the whole imaging process. For minimum operational space
requirements, see section 2.5 “Dimensions for X-ray unit” on page 6.
6.1 Attaching the X-ray unit to the wall
NOTE The wall bracket installation must be able to resist a pull-out force of 2759 N
(276 kg, 608 lb).
NOTE For dimensions of the wall bracket and the optional extension plate, see section 2.6
“Dimensions for wall bracket and extension plate (optional)” on page 7. For
installation drawing, see section 10 “DIAGRAMS” on page 27.
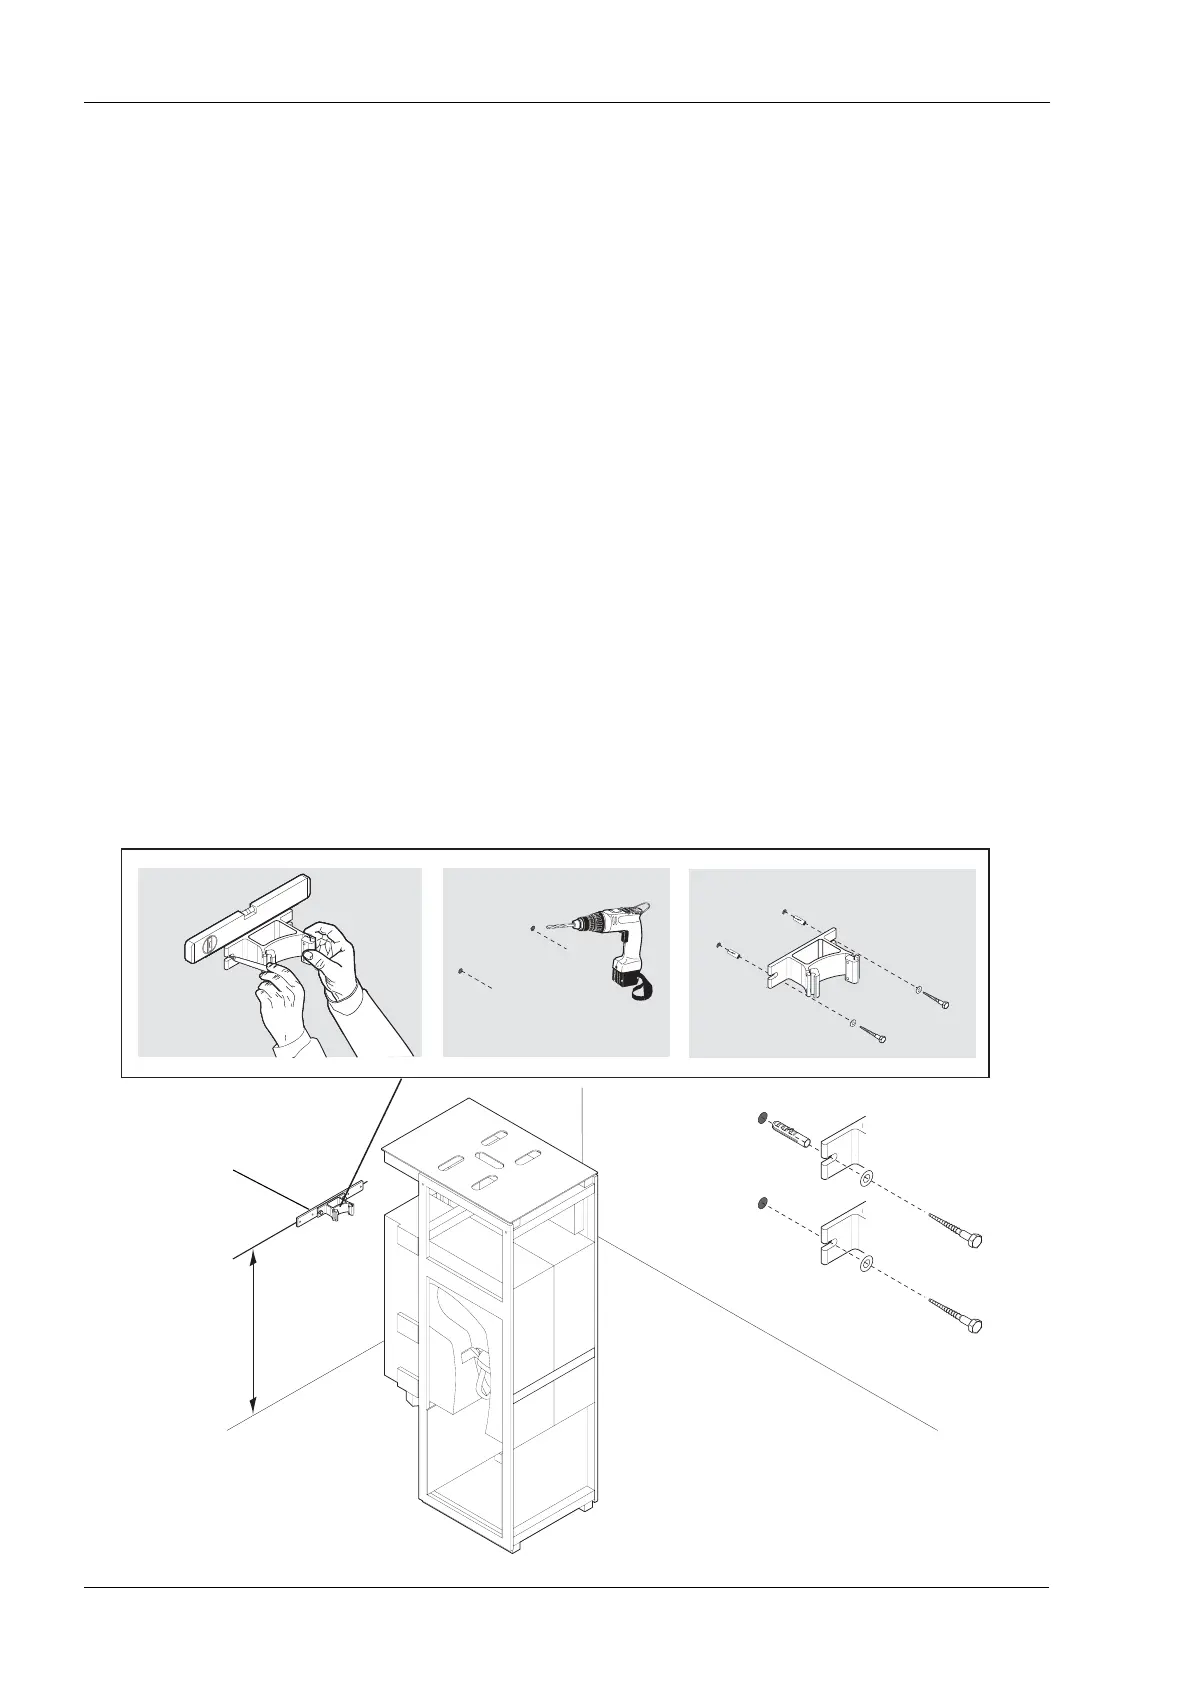
Use the wall bracket to mark the positions of the mounting screws. The wall bracket must
be secured to the wall with two mounting screws. Position the wall bracket approximately
1700 mm (66.9 in.) from the floor. Use a spirit level to ensure that the wall bracket is level.
NOTE When using the optional extension plate, first attach the wall bracket to the extension
plate by tightening the nuts on both sides of the wall bracket. Then use the extension
plate to mark the positions of the two mounting screws.
If the wall is made of concrete or brick, use the 10x70 DIN 571 lag screws and the 14x70
expansion anchors to secure the wall bracket/extension plate in position. Drill two securing
holes (ø14mm (0.55 in.), 85 mm (3.3 in.) in depth) and insert the expansion anchors into
the holes.
If the wall is made of wood, use the 10x70 DIN 571 lag screws. Do not use expansion
anchors with wooden wall. Drill two securing holes (ø7 mm (0.3 in.), 70…75 mm (2.75...3
in.) in depth) for the mounting screws.
1
2
3
4
5
6
~1700mm
(66.9 in.)
ProO _Pack6.eps
Wall made of concrete or stone
Wooden wall
NOTE:
Extension plate
optional
Printed copies of this document are considered uncontrolled.
7535.13.Rev001 08.07.2018