Planmeca ProOne 23
Installation Manual
INSTALLING THE DIGITAL SYSTEM
8.2 Configuring the Ethernet link
To enable the communication of the ProOne X-ray unit through the Ethernet link:
1. The correct Ethernet link cable needs to be attached to the unit (see section 8.1
“Connecting the Ethernet cable” on page 22).
2. The Ethernet settings of the ProOne X-ray unit need to be configured (see below).
3. The used Ethernet link IP Addresses and the configured Net Password must be
defined in the DIDAPI configuration (Ethernet Interface settings). Refer to the Dimaxis
Pro/Classic Installation manual (publication number 10006119), Appendix DIDAPI
CONFIGURATION.
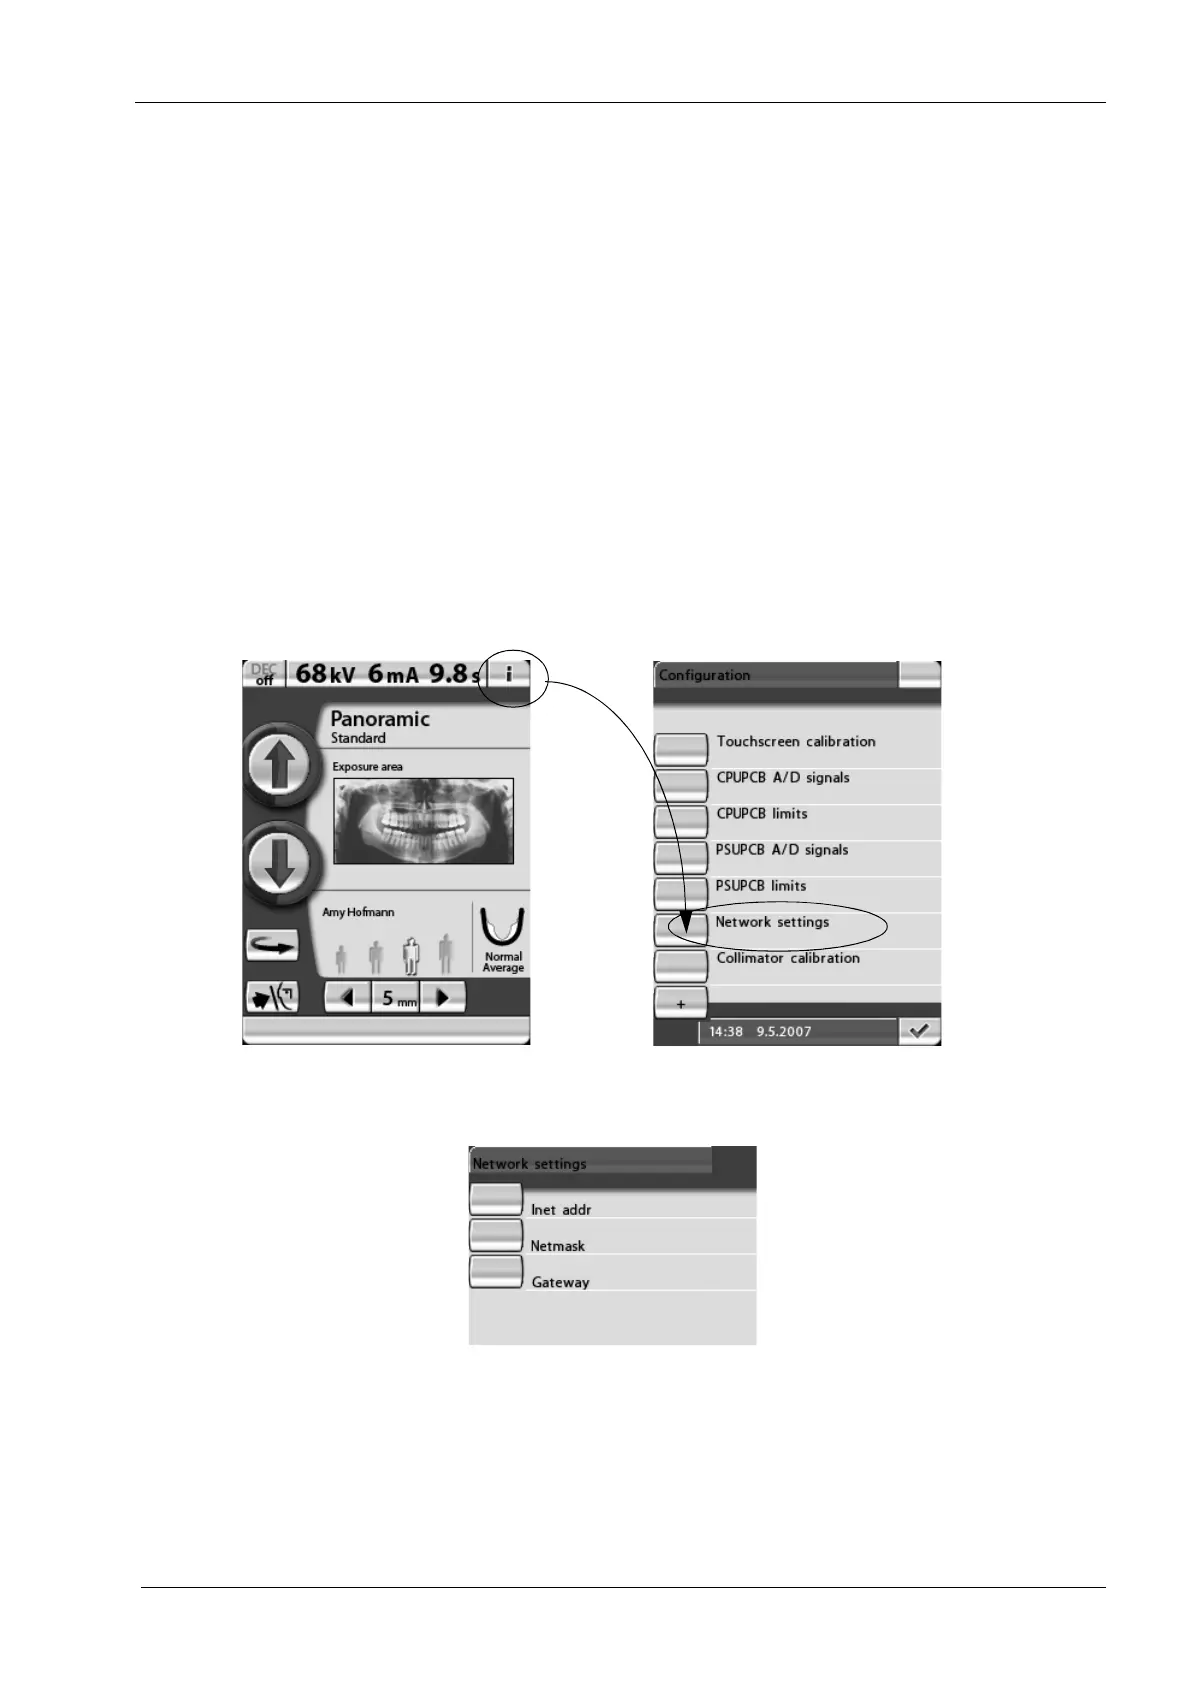
The X-ray unit’s Ethernet settings are configured from the control panel. Start by touching
the i-field on the main display. The main display is the display that is shown when the X-
ray unit is switched on. The
Configuration
display will appear. On the
Configuration
display, select the option Network settings.
NOTE You will need a password to gain access to the information displays. The password
needs to be entered each time the X-ray unit is switched on. The password is 1701.
The
Network settings
display will appear. On this display you can change the network
default settings.
Inet addr - Ethernet interface IP Address
Netmask - Subnet mask
Gateway - Gateway IP address
NOTE The Gateway, Netmask and Inet address have to be static and specified by the
local administrator to be used only for this configuration.
Printed copies of this document are considered uncontrolled.
7535.13.Rev001 08.07.2018