INSTALLING THE X-RAY UNIT
16 Planmeca ProOne
Installation Manual
If the floor is made of concrete or brick, use the 8x50 DIN 571 lag screws and 10x50
expansion anchors. Drill two securing holes (ø10 mm (0.4 in.), 45...50 mm (1.9 in.) in
depth) and insert the expansion anchors into the holes.
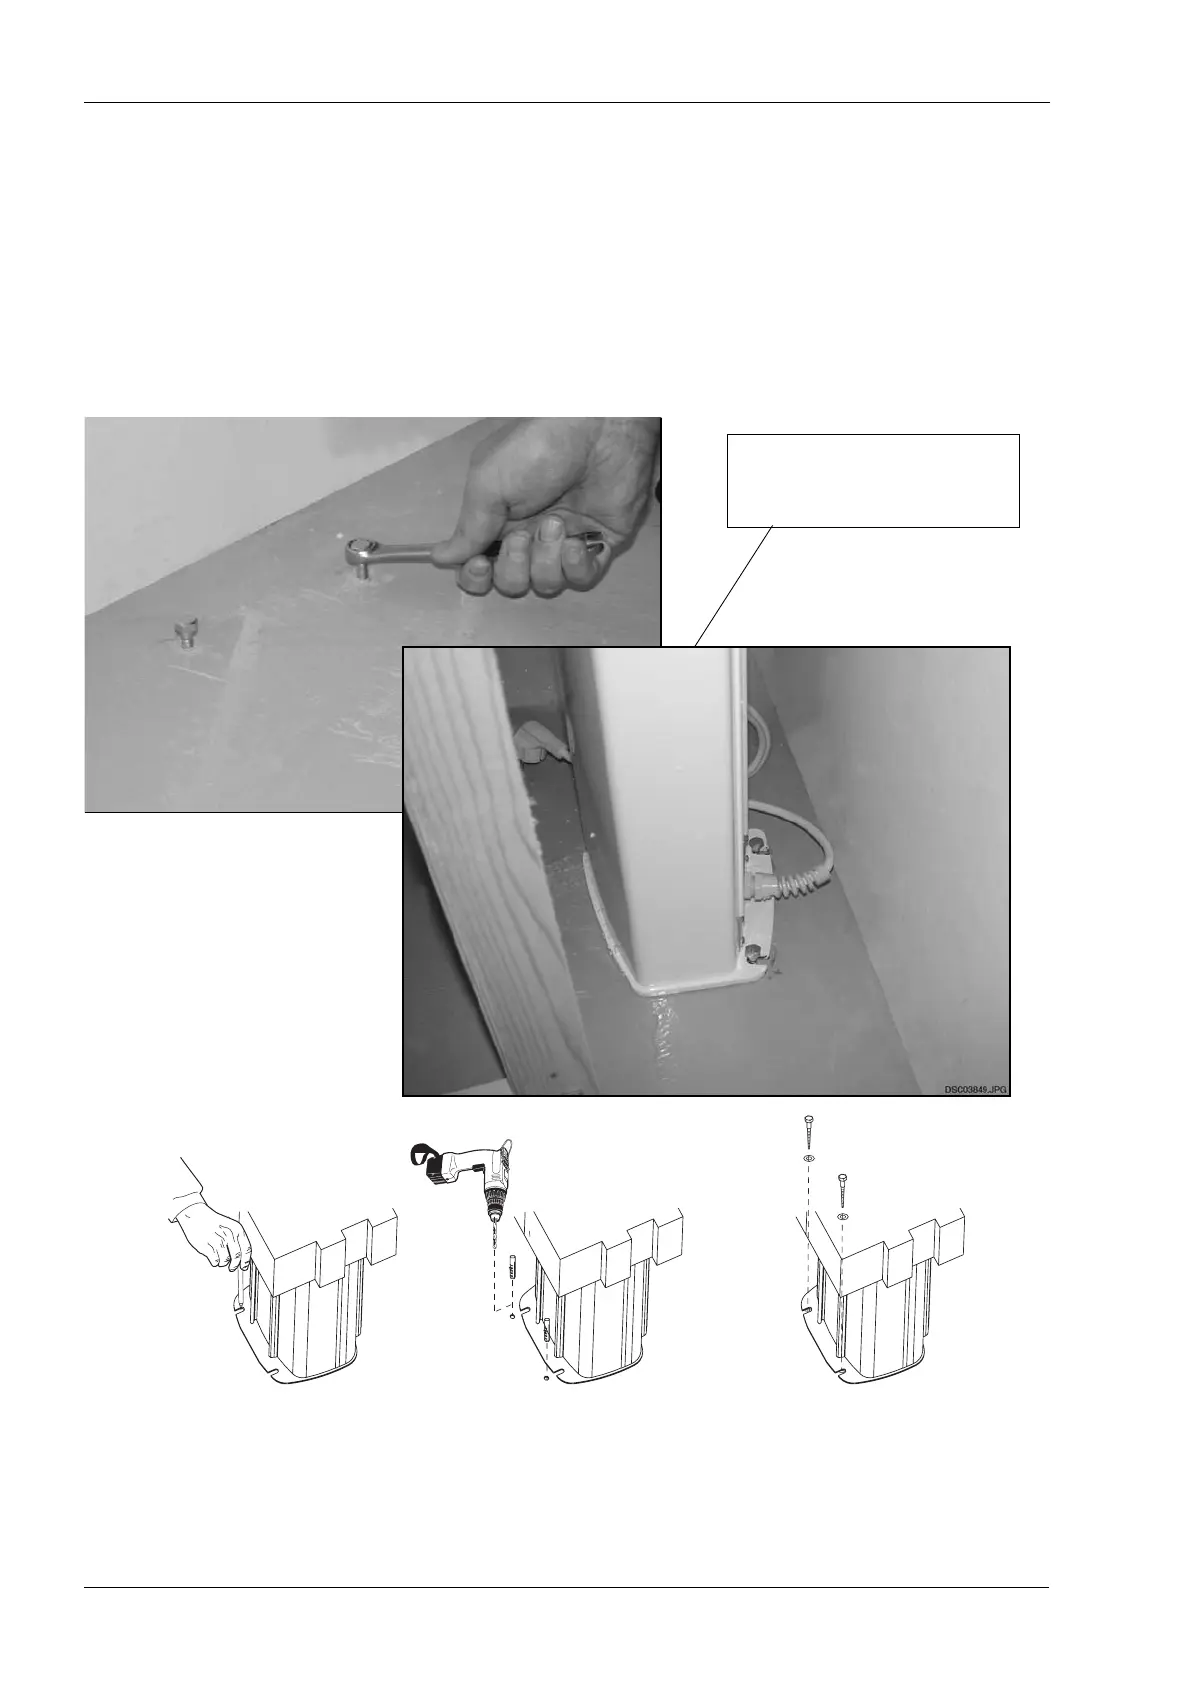
If the floor is made of wood, use the 8x50 DIN 571 lag screws. Do not use expansion
anchors with wooden floor. Drill two securing holes (ø5 mm (0.2 in.), 45…50 mm (1.9 in.)
in depth) for the mounting screws.
Insert the mounting screws into the anchor holes and tighten the screws a couple of turns.
NOTE Remove the two transport locking pins from the back of the unit.
You can now carefully push the X-ray unit back against the wall.
Secure the X-ray unit in position by tightening the four wall bracket attachment screws and
the two floor mounting screws to full tightness.
NOTE Use a spirit level to ensure that the column is vertical.
NOTE!
Remove transport locking pins
before moving the unit back
1
2
3
4
5
6
ProO_pack7.eps
Printed copies of this document are considered uncontrolled.
7535.13.Rev001 08.07.2018