14! Plexxi Switch 3eq Installation Guide (Switch-Control 3.0.0-3.2.x)! !
3 Installing!Plexxi!Switch!3eq!
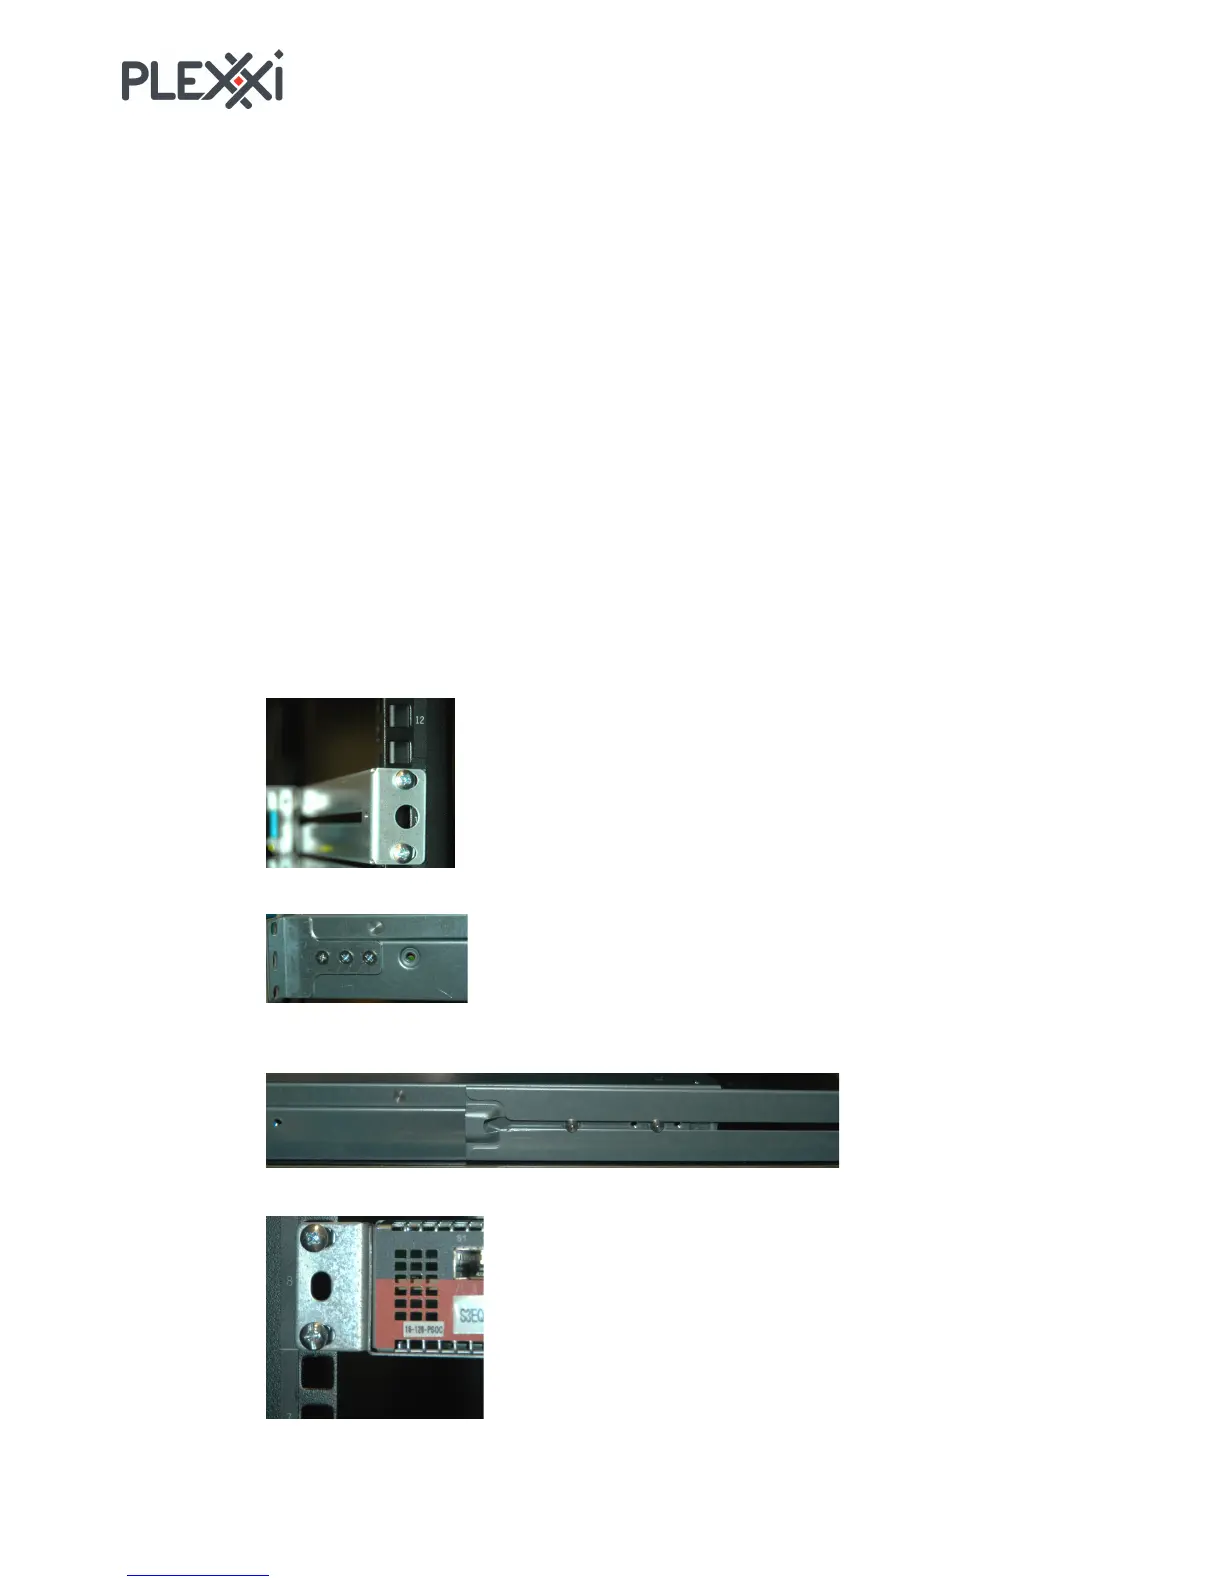
Rack!Mounting!Plexxi!Switch!3eq!
You need the following to install the switch in a telco rack:
• Two rails (provided in switch kit)
• Two brackets (provided in switch kit)
• Eight #10-32 x ¾ inch screws
• Eight #10-32 nut plates
• Six #6-32 x ¼ flat head machine screws (provided in switch kit) to mount the brackets to the switch.
The switch can be installed in the telco rack with the switch I/O panel either facing the front of the rack or the
rear of the rack. Therefore, the switch should have been ordered with the appropriate airflow option to match the
rack installation.
To install Switch 3eq in a rack:
1. Find a 1-U slot position in the rack and install the nut plates in the appropriate mounting holes. You
can use two per rail and two per bracket.
2. Install the two rails (2 screws for each rail).
3. Mount the I/O-side brackets to the switch (three #6-32 x ¼ flat head machine screws each).
4. Position the switch in the rack slot. Support the bottom of the switch and slide the switch in to align
the mounting pins with the rail guides, then. slide the switch fully into the slot.
5. Install two #10-32 x ¾ screws in each bracket to fasten the I/O end of the switch to the rack.