6.10
CLUTCHING
Drive Belt Removal
NOTE: Turn the key to the “OFF” position and allow the engine to come to a complete stop.
Always install a used belt in the same direction as it was installed before removing. When installing a new belt, position the
identification numbers so they can read when viewed from the left-side of machine.
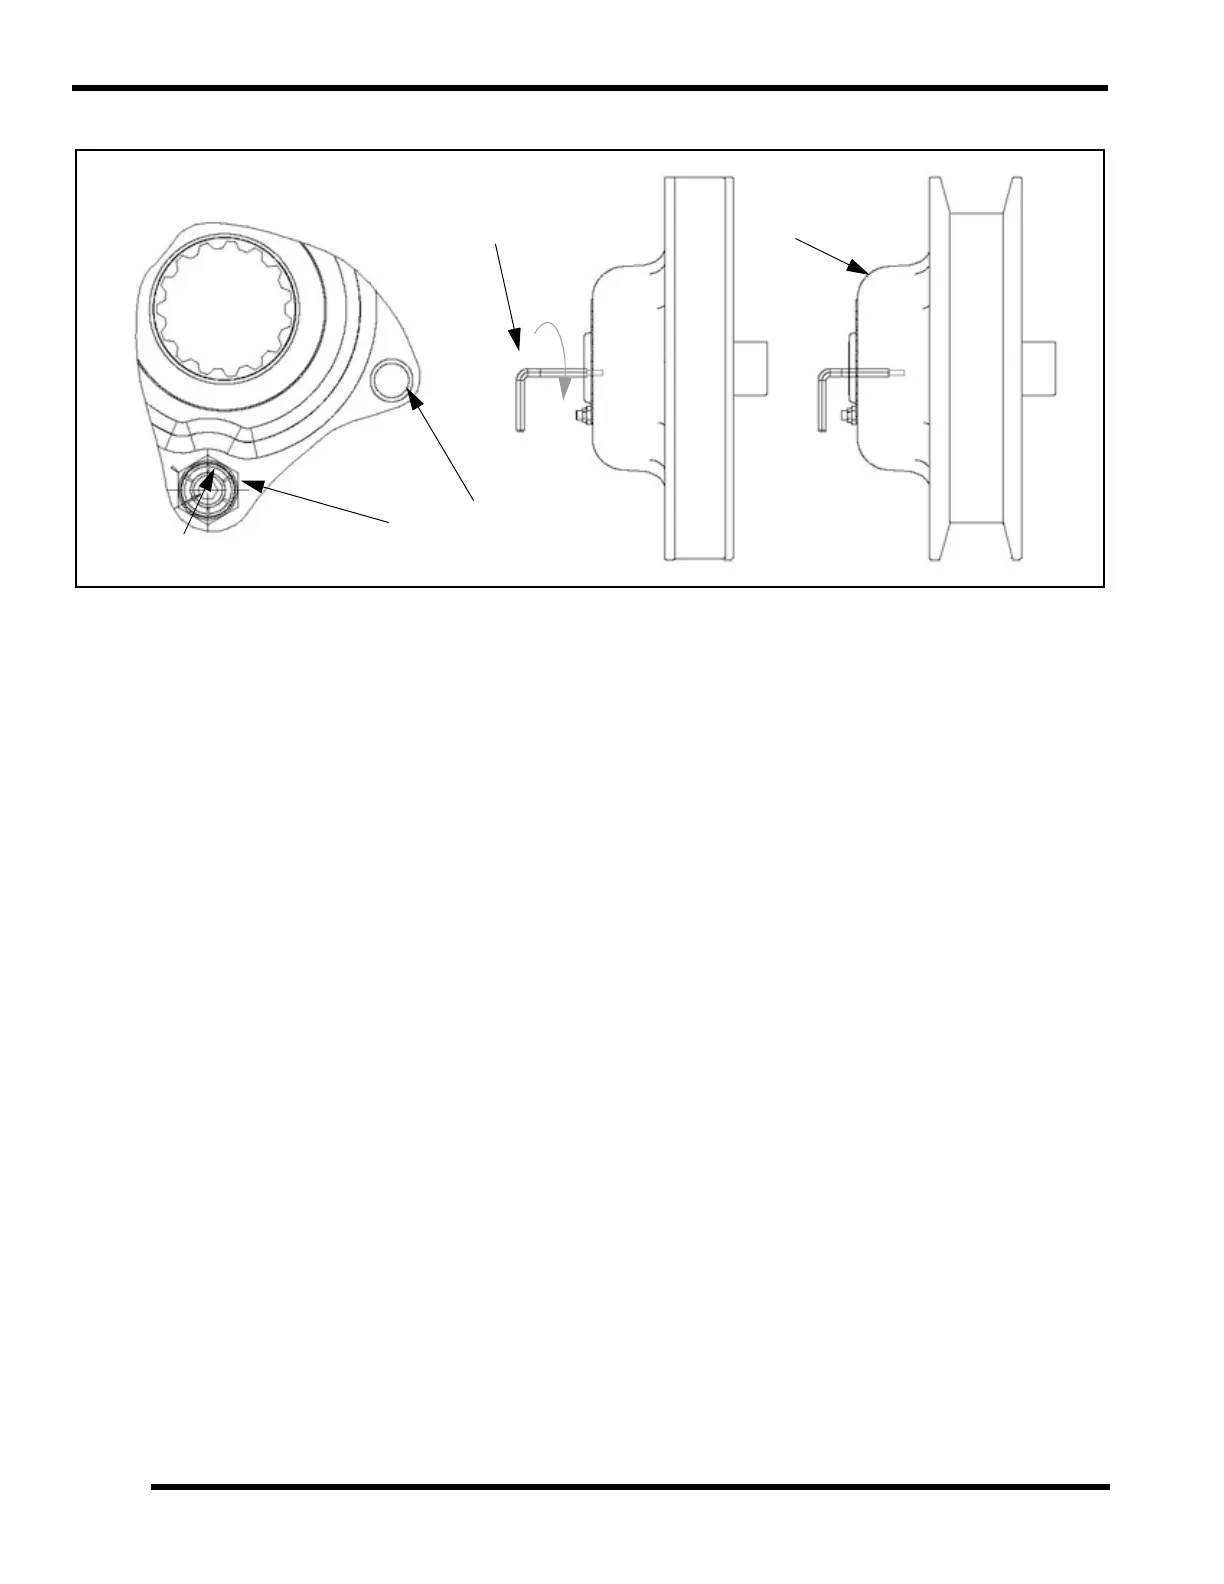
1. Remove the clutch guard / air intake.
2. Position the thread hole (B) so that it is in the 10:00 or 2:00 position.
3. Insert the “L” wrench (A) into the threaded hole (B) located on the driven clutch, and turn it clockwise until the clutch sheaves
are in the open position (C).
NOTE: L wrench PN 2874857
4. Remove the drive belt.
Drive Belt Installation
1. With the “L” wrench inserted into the threaded into hole (B) and the sheaves in the open position (C), install the drive belt.
NOTE: Install belt so that the numbers can be read correctly on the left side of the machine.
2. Turn the “L” wrench counter-clockwise until the driven clutch sheaves are in the closed position. “Wiggle” the belt to remove
slack while removing the wrench.
3. Reinstall the clutch guard / air intake.
A
B
C
D
E
 Loading...