EasyManua.ls Logo

Postek Q8 - User Manual

Postek Q8
39 pages
Print Icon
To Next Page IconTo Next Page
Loading...

Questions and Answers

  • C
    Connor GeorgeJul 26, 2025
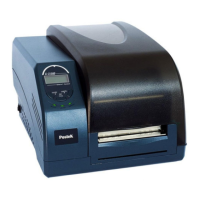
    How to fix poor printing quality on Postek Q8?
    • T
      Thomas BauerJul 26, 2025
      If you are experiencing poor printing quality with your Postek Label Maker, there are several steps you can take to improve it. First, adjust the print darkness and speed settings. Next, clean the Printhead and the platen roller. Also, consider that poor quality printing may be caused by a low quality ribbon or media, so try changing to higher quality ribbon and media.
  • M
    Michael PachecoJul 30, 2025
    What to do if READY and MEDIA lamps blink on my Postek Q8?
    • M
      Mark WilkersonJul 30, 2025
      If the READY and MEDIA lamps are blinking simultaneously on your Postek Label Maker, it could be due to several reasons. First, ensure that the media has been loaded correctly. Second, check the position of the media sensor to confirm it detects the media gap or black line, and calibrate the media sensor. Third, check if the media ran out and load a roll of media if needed. Also, clear any media jams and make sure the Media Roll Guides are correctly installed. If none of these steps resolve the issue, the media sensor may be broken, and you should contact an authorized POSTEK service provider.
  • G
    Gina TorresAug 3, 2025
    What to do if READY and RIBBON lamps blink on my Postek Label Maker?
    • M
      Mary SchmidtAug 3, 2025
      If the READY and RIBBON lamps are blinking simultaneously on your Postek Label Maker, it could be due to the following reasons: the ribbon ran out (load a new roll of ribbon) or the ribbon is jammed (clear the jam). If the problem persists, it may be due to a Ribbon Sensor error, and you should contact an authorized POSTEK service provider.
  • B
    Betty CastanedaAug 8, 2025
    What to do if data sent but Postek Label Maker not printing?
    • D
      Daniel WhiteAug 8, 2025
      If you're sending data to your Postek Label Maker but it's not printing, ensure the correct driver is chosen in the label software and reset the printer. If the issue persists, please contact an authorized POSTEK service provider.
  • J
    Jerry ThomasAug 12, 2025
    How to fix Printer Timeout Error Message on Postek Label Maker?
    • G
      Garrett SmithAug 12, 2025
      To resolve a Printer Timeout Error Message on your Postek Label Maker, check the interface cable for a proper connection and ensure the printer is powered on. If problems continue, please contact an authorized POSTEK service provider.
  • D
    davidbanksAug 17, 2025
    Why is only the READY lamp blinking on my Postek Q8 Label Maker?
    • A
      Ashlee HuangAug 17, 2025
      If only the READY lamp is blinking on your Postek Label Maker, it could indicate a Serial I/O error, so check the DIP switches for the baud rate settings. It may also indicate a memory overflow; in this case, restart or reset the printer.
  • H
    Henry HollandAug 20, 2025
    How to fix vertical blank lines appearing on printouts from Postek Label Maker?
    • A
      Angela MooreAug 21, 2025
      If vertical blank lines appear on printouts from your Postek Label Maker, the printhead may be dirty. Clean the printhead following the recommended maintenance guidelines. If the issue persists, contact an authorized POSTEK service provider.

Summary

FCC Notice

Trademarks and Copyright

Lists product trademarks and copyright information for POSTEK and Microsoft.

Legal Disclaimer

States limitations of warranty and manufacturer liability for product use and potential issues.

Important Safety Instructions

Preface

Important Notice, Read Me First!

Crucial information regarding printhead care and avoiding damage, with warranty implications.

Chapter 1: Introduction

Technical Specifications

Details printer specs like method, resolution, speed, width, length, memory, media, ribbon, fonts, barcodes, sensor, interfaces, power, weight, dimensions, environment, and optional items.

Power Adapter Specifications

Details input voltage, frequency, output voltage, current, and operating environment for the power adapter.

Packing List

Lists items included in the printer's shipping carton, such as guides, printer, adapter, cables, spindle, and CD-ROM.

Chapter 2: Setup and Use

Setting up the Printer

Provides initial considerations and steps for setting up the printer, including space and cable access.

Main Parts and Structures

Identifies and labels the key physical components and structural elements of the printer.

Connecting the Printer

Details the process of connecting the printer to a power source and host device, including warnings.

Interface Connection

Explains how to establish USB and RS-232 serial connections for communication with a computer.

Installing the Ribbon

Provides step-by-step instructions and warnings for correctly installing a thermal transfer ribbon.

Loading the Media

Guides users on how to load media rolls into the printer for different operating modes.

Peel-off Mode Operation

Details the specific steps and settings required to operate the printer in Peel-off mode.

Cutting Mode Operation

Explains how to enable and use the printer's cutting function with appropriate media loading.

Adjusting Media Sensor Position

Provides instructions on how to adjust the media sensor for accurate label detection.

Chapter 3: Operations and Settings

Basic Operations

Covers fundamental controls including the power switch, front panel layout, and indicator lamp meanings.

Button Functions and Modes

Explains the functions of the Feed/Calibration, Pause/Self Test, and Cancel/Reset buttons in different operational modes.

Advanced Operations

Details advanced procedures like Media Sensor Calibration and performing a Self Test.

Factory Default Settings Reset

Outlines the steps to restore the printer to its original factory default configuration.

DIP Switch Panel Configuration

Describes the location and function of the DIP switches on the printer's back panel for configuration.

Driver and Software Installation

Discusses printer compatibility with Windows OS and the included PosLabel software, including download sources.

Chapter 4: Maintenance

Cleaning the Printhead

Provides instructions and warnings for cleaning the printhead to maintain print quality and longevity.

Cleaning the Platen Roller

Details the procedure for cleaning the platen roller to remove debris and ensure proper label feeding.

Cleaning the Printer Interior

Advises on periodic cleaning of the printer's interior to prevent dust and debris accumulation.

Chapter 5: Troubleshooting

Error Indicators and Solutions

Explains how to interpret LED indicator patterns for common printer errors and their causes.

Common Printing Issues

Addresses common printing problems like vertical blank lines, timeout errors, no printing, and poor print quality.

Printer Recovery Procedures

Describes how to clear alarms and resume printing after resolving issues, or when to contact support.

Appendix A: IO Interface Specifications

RS232 Serial Interface Details

Details the DB9F connector pinout, host connections, baud rates, data format, and flow control for serial communication.

Appendix B: ASCII Table

ASCII Character Reference

Provides a reference table for ASCII character codes and their corresponding representations.

Postek Q8 Specifications

General IconGeneral
Resolution203 DPI
Power SupplyAC 100-240V, 50/60Hz
Print TechnologyThermal Transfer
Memory8 MB Flash
ConnectivityUSB, Serial, Ethernet
Media TypeRoll-fed labels
Media Width25.4 mm to 108 mm
Media Thickness0.06 mm to 0.25 mm
Supported Barcode TypesCode 39, Code 128, UPC-A, UPC-E, EAN-8, EAN-13, Codabar, QR Code, Data Matrix, PDF417

Related product manuals