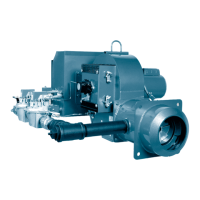
Figure 40
C1 & C2 Ignition Electrode Adjustment
Gas Pilot Flood Test
Many pilot problems are caused by a poor mixture of
gas and air at the point of ignition (ignition spark gap).
The cause of this poor mixture condition is usually
excessive gas flow or insufficient air (air dampers
are closed too far).
Once the pilot is adjusted and felt to be correct - it is
suggested that the following test be accomplished to
further verify that the pilot will be reliable.
1. Turn the burner off and shut the manual leak test
cock in the main gas train. (This valve should always
be closed when making pilot adjustments.)
2. If the burner is Low/High/Off, Low/High/Low or
Modulating, take steps to keep the fuel air linkage in
the pilot light off position. If the flame safeguard
control has a timer check switch, it can be placed in
the test position. If the flame safeguard control does
not have the timer switch, it may be necessary to
disconnect the power wire to the motorized gas
valve.
3. Install a 0 to 10" W.C. gas pressure gauge or a
manometer in the pilot test tee fitting. Plug an
appropriate flame signal meter into the flame
safeguard control.
4. Disconnect the high tension ignition leadwire at the
ignition transformer secondary terminal. Either hold
onto the insulated portion or let the free ignition wire
hang loose, so that it is not able to come into contact
with the bare ignition terminal on the transformer.
5. Start the burner and let it go through the prepurge
period. As soon as the pilot ignition circuit is
energized (listen for the sound of the solenoid valve
opening or watch the pilot gas pressure gauge), let
about 3 to 4 seconds lapse and then CAREFULLY
(the ignition transformer is putting out 6000 volts)
touch the ignition leadwire to the transformer terminal
secondary.
If the pilot fuel/air mixture and ignition electrode are
adjusted correctly, the pilot will light instantly and
the flame signal reading will be steady and of the
correct value. If the pilot does not light instantly,
then readjust the pilot gas pressure and/or the air
dampers and/or the ignition electrode setting
according to the information provided in this
manual.
6. Turn the burner off. Reconnect the ignition leadwire
to the ignition transformer secondary terminal. Set
the check switch in the flame safeguard control for
automatic operation. Reconnect any wires that have
been disconnected to hold the motorized gas valve in
the pilot position. Open the checking gas cock, turn
the burner on and verify that the pilot lights and
proves instantly, providing good, smooth ignition of
the main gas flame.
7. If Gas Pilot Flood Test is successful, it is not
always a guarantee of correct pilot air/fuel mixture,
but a failure will almost always indicate an
excessively rich mixture.
1
/
16
” -
3
/
32
”
Spark Gap between Electrode
Tip and Pilot Case (Housing)
Air Hole
Primary Air Holes (2)
Pilot Orifice
3
1
/
16
”
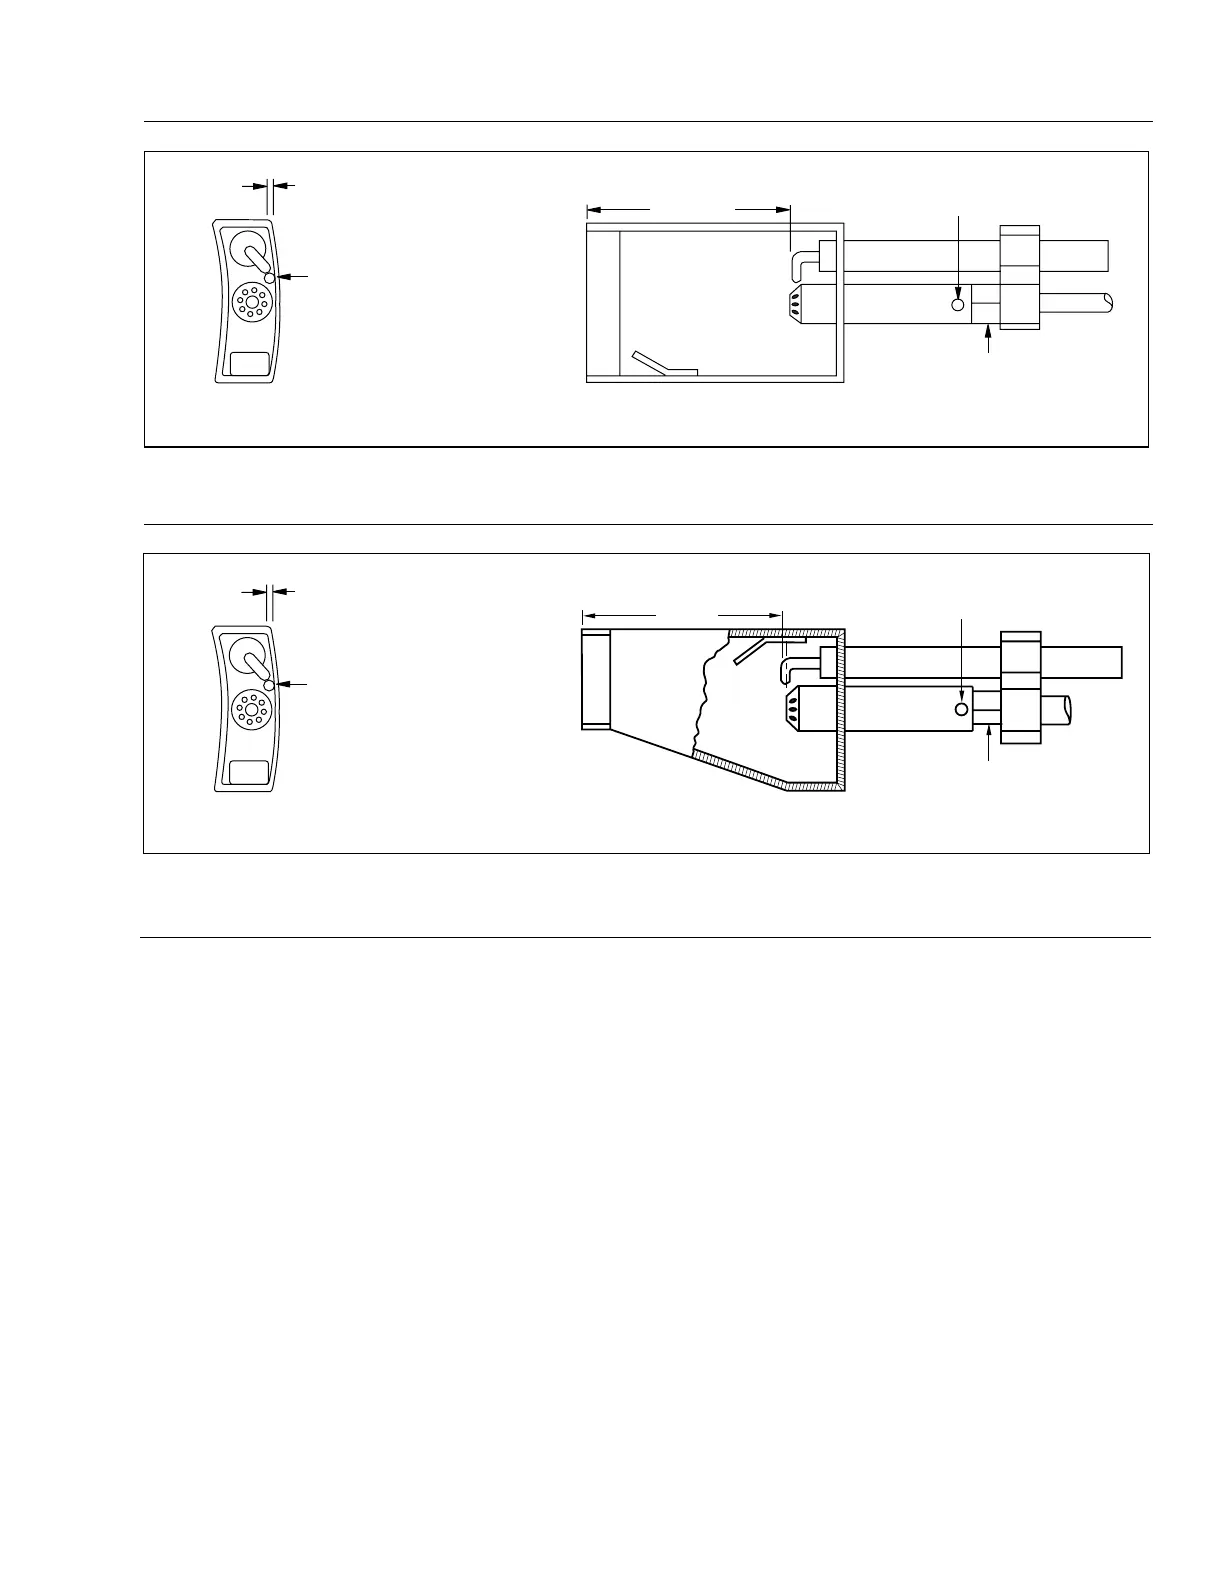
Figure 41
C3, C4 & C5 Ignition Electrode Adjustment
For C5B, C6, C7 and C8 Pilot Ignition Electrode Adjustment, see Figure 37, page 37.
1
/
16
” -
3
/
32
”
Spark Gap between Electrode
Tip and Pilot Case (Housing)
Air Hole
2
15
/
16
”
Primary Air Holes (2)
Pilot Orifice
C40
Rev.304