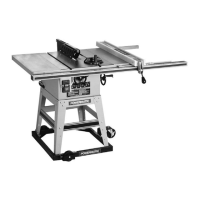
13
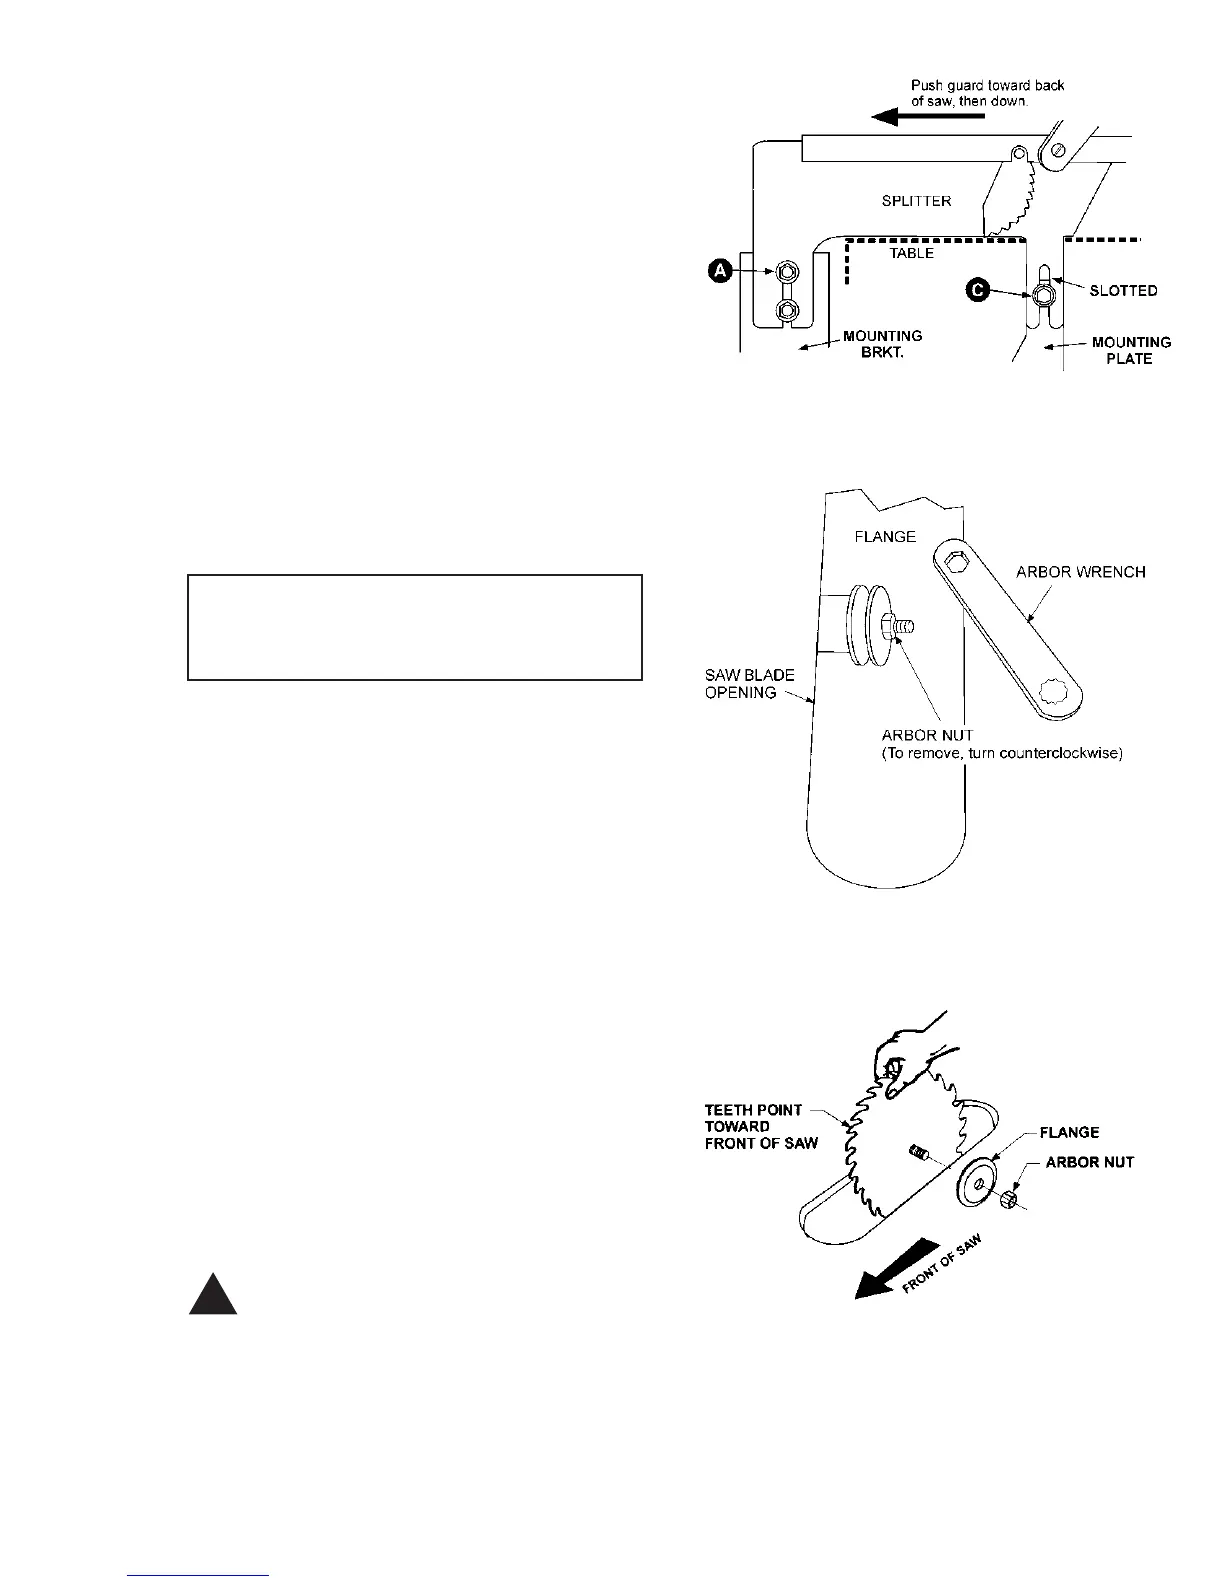
3. Loosen top screws (A) on the mounting bracket,
and the screw (C) on the inside splitter mounting plate,
as shown in Figure 14. The slotted legs of the splitter
assembly will slide onto the screws. (You may need
to loosen set screws (B), Figure 13, to slide bracket
to required position on pin.)
TIP: The slotted section of the splitter may be difficult
to position over the screw on the mounting plate (C).
Push the splitter guard toward the back of the saw
then push down on the guard, allowing the slotted sec-
tion to slide on to the screw so that the nut and washer
compress the guard's feet against the plate.
4. When splitter assembly is properly situated,
tighten screws (A), (B), and (C).
SAW BLADE INSTALLATION
Tools required
Arbor wrench
12mm wrench
12mm socket wrench with extension.
1. Disconnect machine from power source.
2. Raise the arbor to its highest point and remove
the arbor nut, shown in Figure 15, by turning nut coun-
terclockwise.
3. Remove the flange and place saw blade on the
arbor making sure the cutting edge of the teeth at the
top of the blade face toward the front of the saw, as
shown in Figure 16.
4. Slide the flange on the arbor and start the nut on
the threads. Snug the nut against the flange using
the wrench while holding saw blade with thumb and
fingertips.
5. Lower the saw blade and wedge a block of wood
between the blade and the table to keep the blade
from moving. Tighten the blade securely with the arbor
wrench.
6. See page 20 to align the splitter with the saw
blade.
CAUTION: Before operating the saw, the
splitter must be aligned with the blade to
help prevent kickback.
FIGURE 14
FIGURE 15
FIGURE 16
!