8
RECEIVING
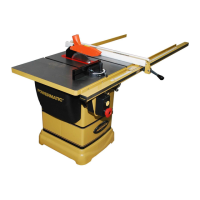
Remove the saw and accessories from the shipping
carton and inspect for damage. Any damage should
be reported to your distributor and shipping agent im-
mediately.
Before proceeding further, read your instruction manual
thoroughly to familiarize yourself with proper assem-
bly, maintenance and safety procedures.
Contents of box:
1 Saw body with switch
1 Motor
1 Stand assembly
2 Extension wings
1 Blade guard
1 Motor bracket
1 Standard insert
1 Dado insert
1 Pulley cover
1 Pulley cover seat
1 Motor base plate
1 Mitre gauge
2 Handle assemblies
INSTALLATION & ASSEMBLY
Tools required
Arbor wrench (supplied)
12mm combination wrench (supplied)
3mm and 4mm hex wrenches (supplied)
8, 10, 14, 15, and 19 mm open-end wrenches
Phillips screwdriver
Flat head screwdriver
The following are a few hints and suggestions to help
with assembly.
1. A bowl should be used to hold hardware.
2. To avoid harming the table saw top, a cloth should
be placed on the floor first.
3. Do not remove wax coating from table until saw
is assembled.
4. Start assembly in the area where saw will be
used. This area should be clean and tidy in order to
make it easy to find any dropped fasteners and tools.
5. Unwrap only the hardware packages that one is
working on.
6. A mobile light should be used to illuminate ob-
scure areas.
7. The use of a socket wrench with ratchets and
extensions will greatly reduce assembly time.
2 Splitter mount brackets
1 Pin
4 Foot assemblies
1 Small pin
2 Spacers
1 Belt
1 Dust Shroud
1 Arbor wrench
1 Combination wrench
2 Hex wrenches
2 Hardware bags
1 Manual
1 Warranty card