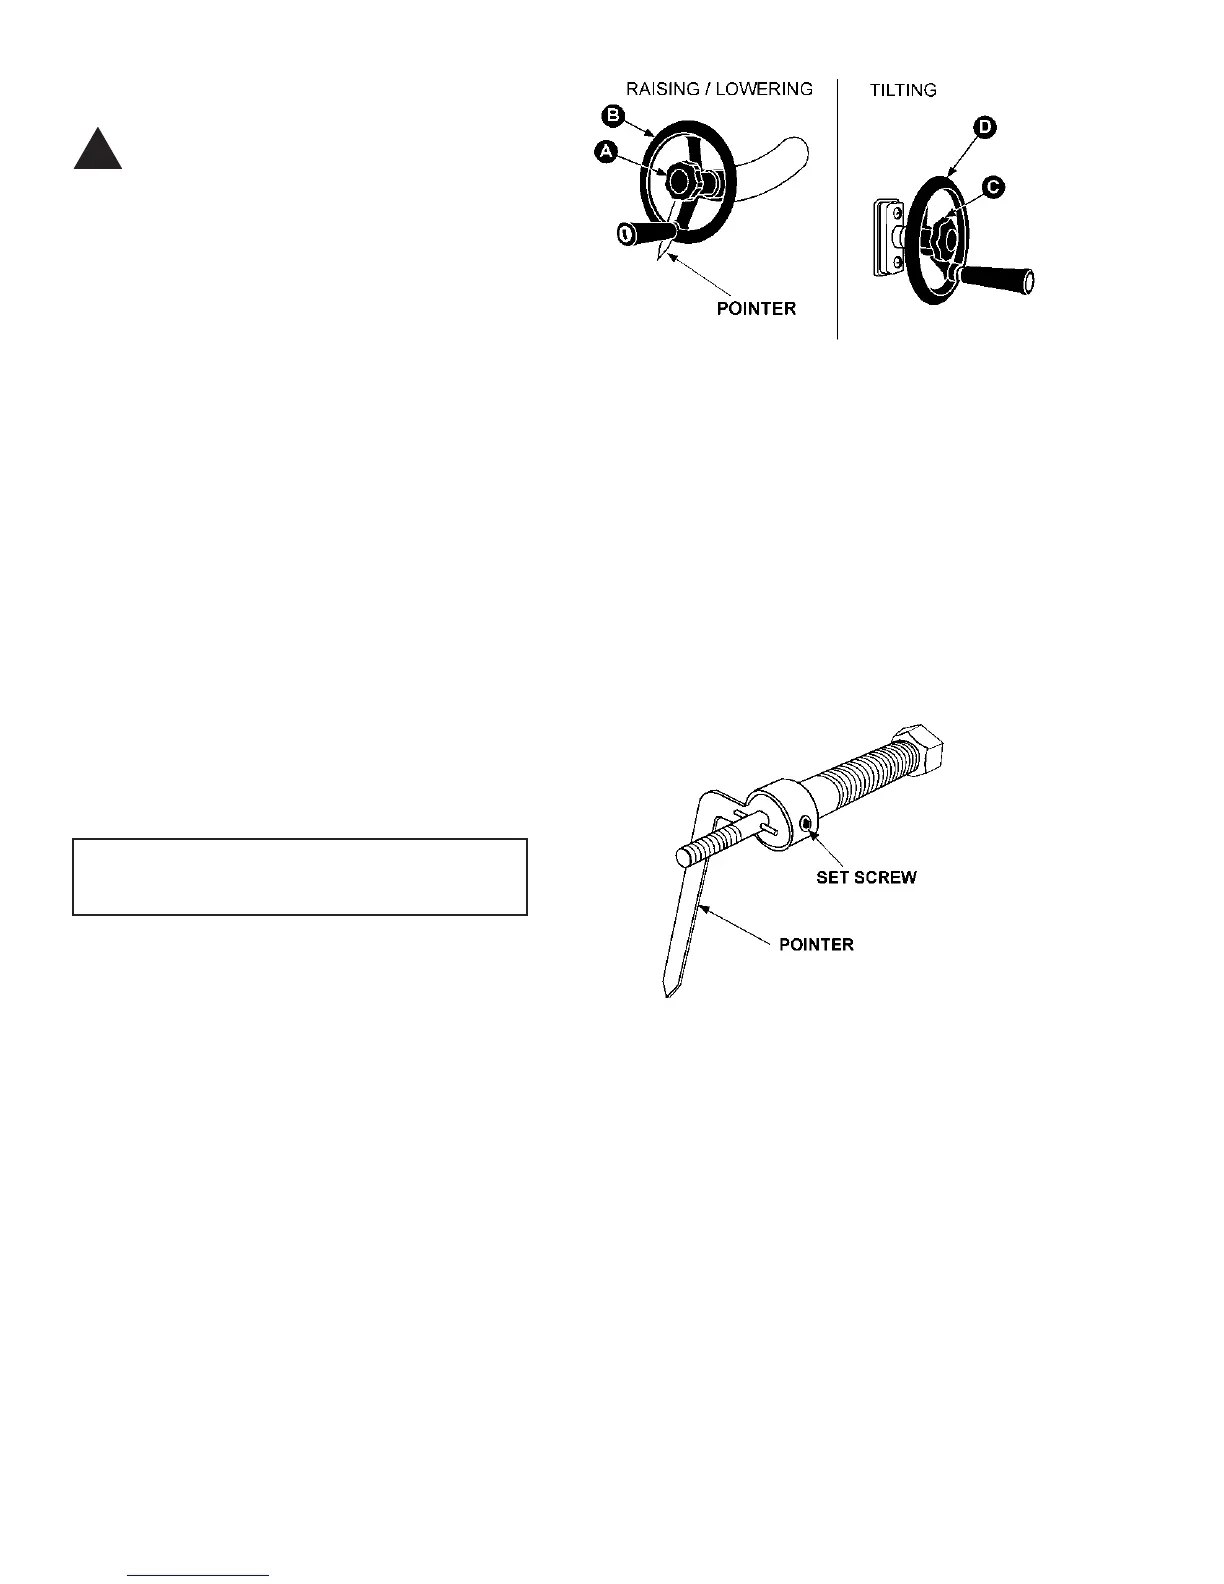
18
ADJUSTMENTS
CAUTION: Disconnect motor from power
source before making any adjustments.
BLADE ADJUSTMENT
1. To raise and lower the saw blade, loosen the front
lock knob (A) on the elevating handwheel as shown in
Figure 24.
2. Turn front handwheel (B) clockwise to raise saw
blade and counterclockwise to lower saw blade.
3. Tighten lock knob when the desired height of
blade is reached.
4. To tilt the saw blade to the left, loosen lock knob
(C) on the tilting handwheel as shown in Figure 24.
5. Turn handwheel (D) to tilt saw blade to desired
angle, as read on indicator scale on front of saw.
6. Tighten lock knob (C).
RESETTING THE POINTER
Tools Required
3mm hex wrench
After a long period of time the tilt pointer on the front of
the saw may require adjusting. If this is necessary,
do the following:
1. Set the saw blade to cut a perfect 90 degrees.
2. Remove the front lock knob and raise handwheel
(A & B, Figure 24) to make the pointer's set screw
accessible as shown in Figure 25.
3. Loosen the set screw and move the indicator point
to "0" on the scale.
4. Lock set screw and reinstall handwheel and lock
knob.
FIGURE 24
FIGURE 25
!