page 21
Diagram 20
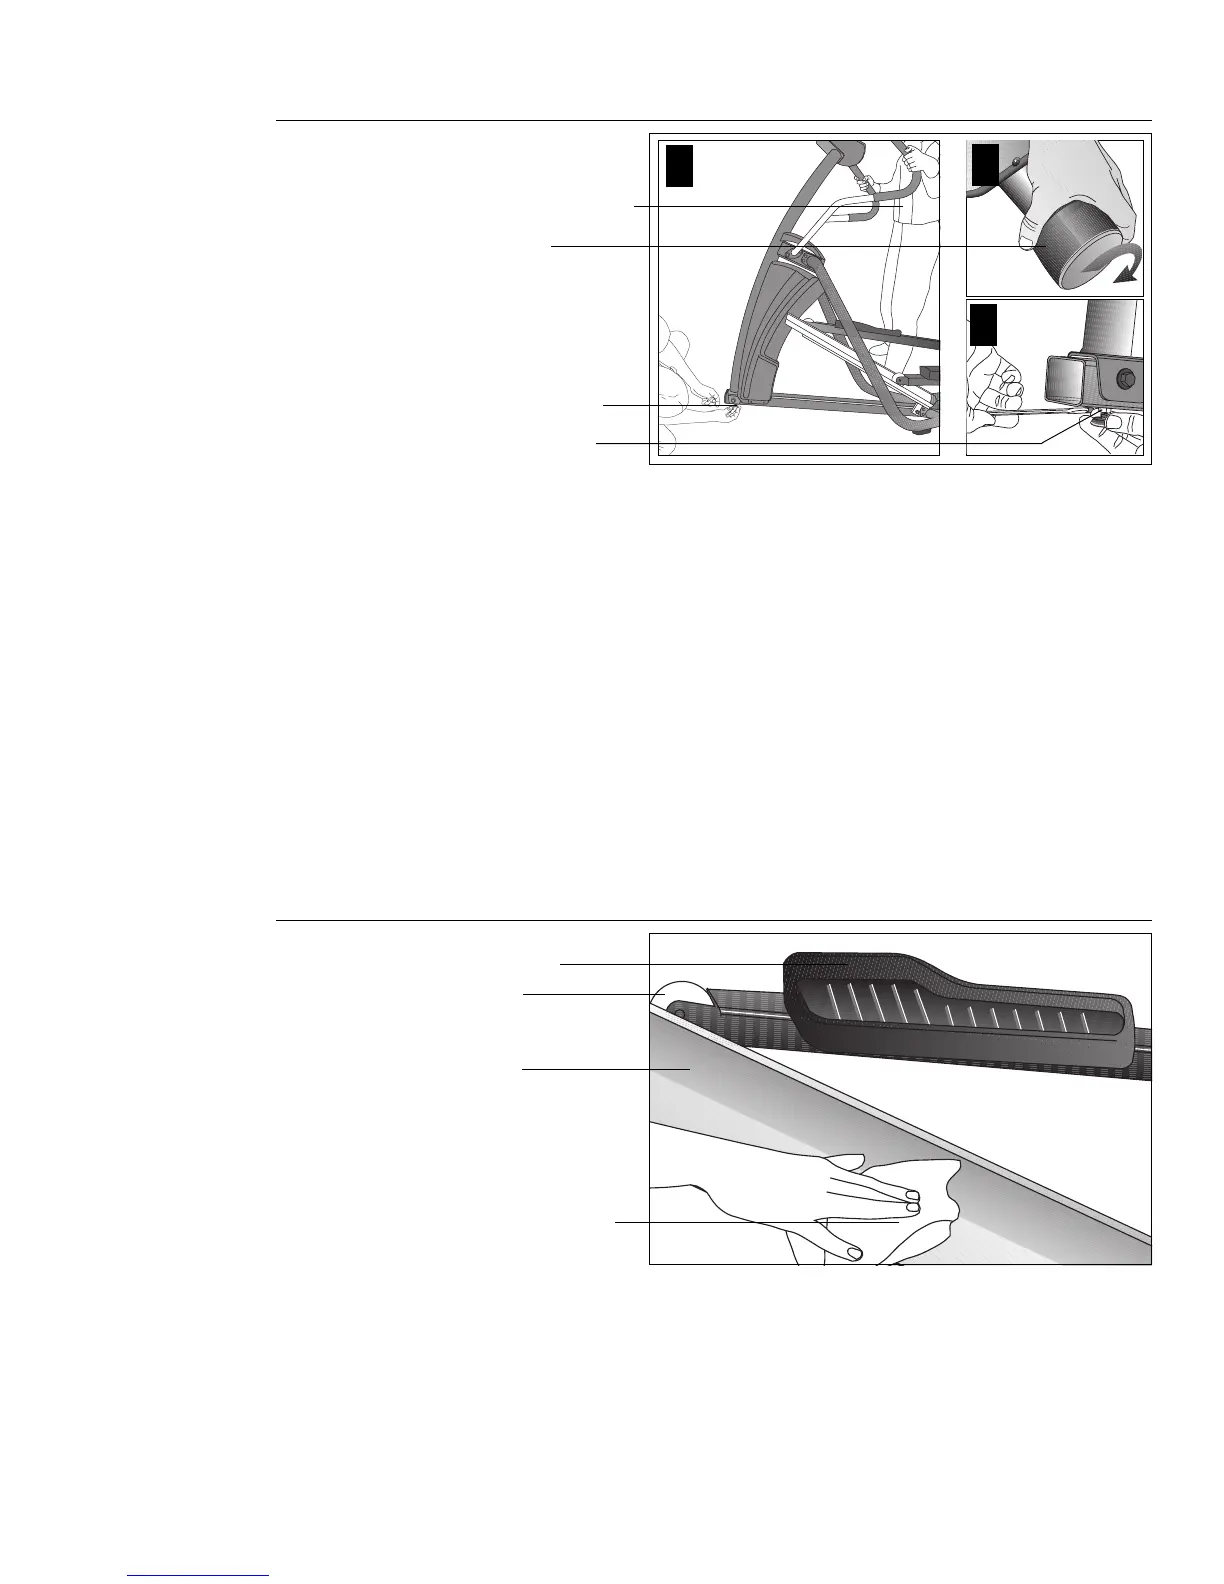
Level the unit.
Rear pad
29. Level the unit. Diagram 20. To keep the unit stable, the EFX
®
5.23 has adjustable
rear pads and, at the front of the base assembly, a height adjustor. Check to make
sure that the unit does not wobble from side to side or front to back.
Important: If the unit is placed on a slightly, uneven surface, adjusting the rear
pads can help, but will not compensate for extremely uneven surfaces.
a. To remove any side to side movement or wobble, rotate the rear pads.
Diagram 20, #2.
b. To counteract any rocking (front to back) motion, ask your assistant to grasp the
upper handrails so that he or she can raise the front of the unit off the floor. Use
a crescent or combination wrench to loosen the nut. See Diagram 20, #1.
• Turn the height adjustor clockwise to raise the height of the front end.
• Turn the height adjustor counterclockwise to lower the height.
Once you have the proper height adjustment, use the wrench to turn the nut
counterclockwise and tighten it securely against the base tube. Diagram 20, #3
c. Have your assistant carefully lower the unit onto the floor.
Diagram 21
Clean the ramp.
Roller
Wipe ramp with a
damp, clean cloth.
Ramp
Foot pedal
30. Clean the ramp. Diagram 21. Wipe down the ramp and foot pedals with a soft
cloth dampened in a diluted solution of Simple Green
®
.
Assistant holding
unit above the floor.
Turn the height
adjustor to the
proper level.
Tighten the nut
2
3
1