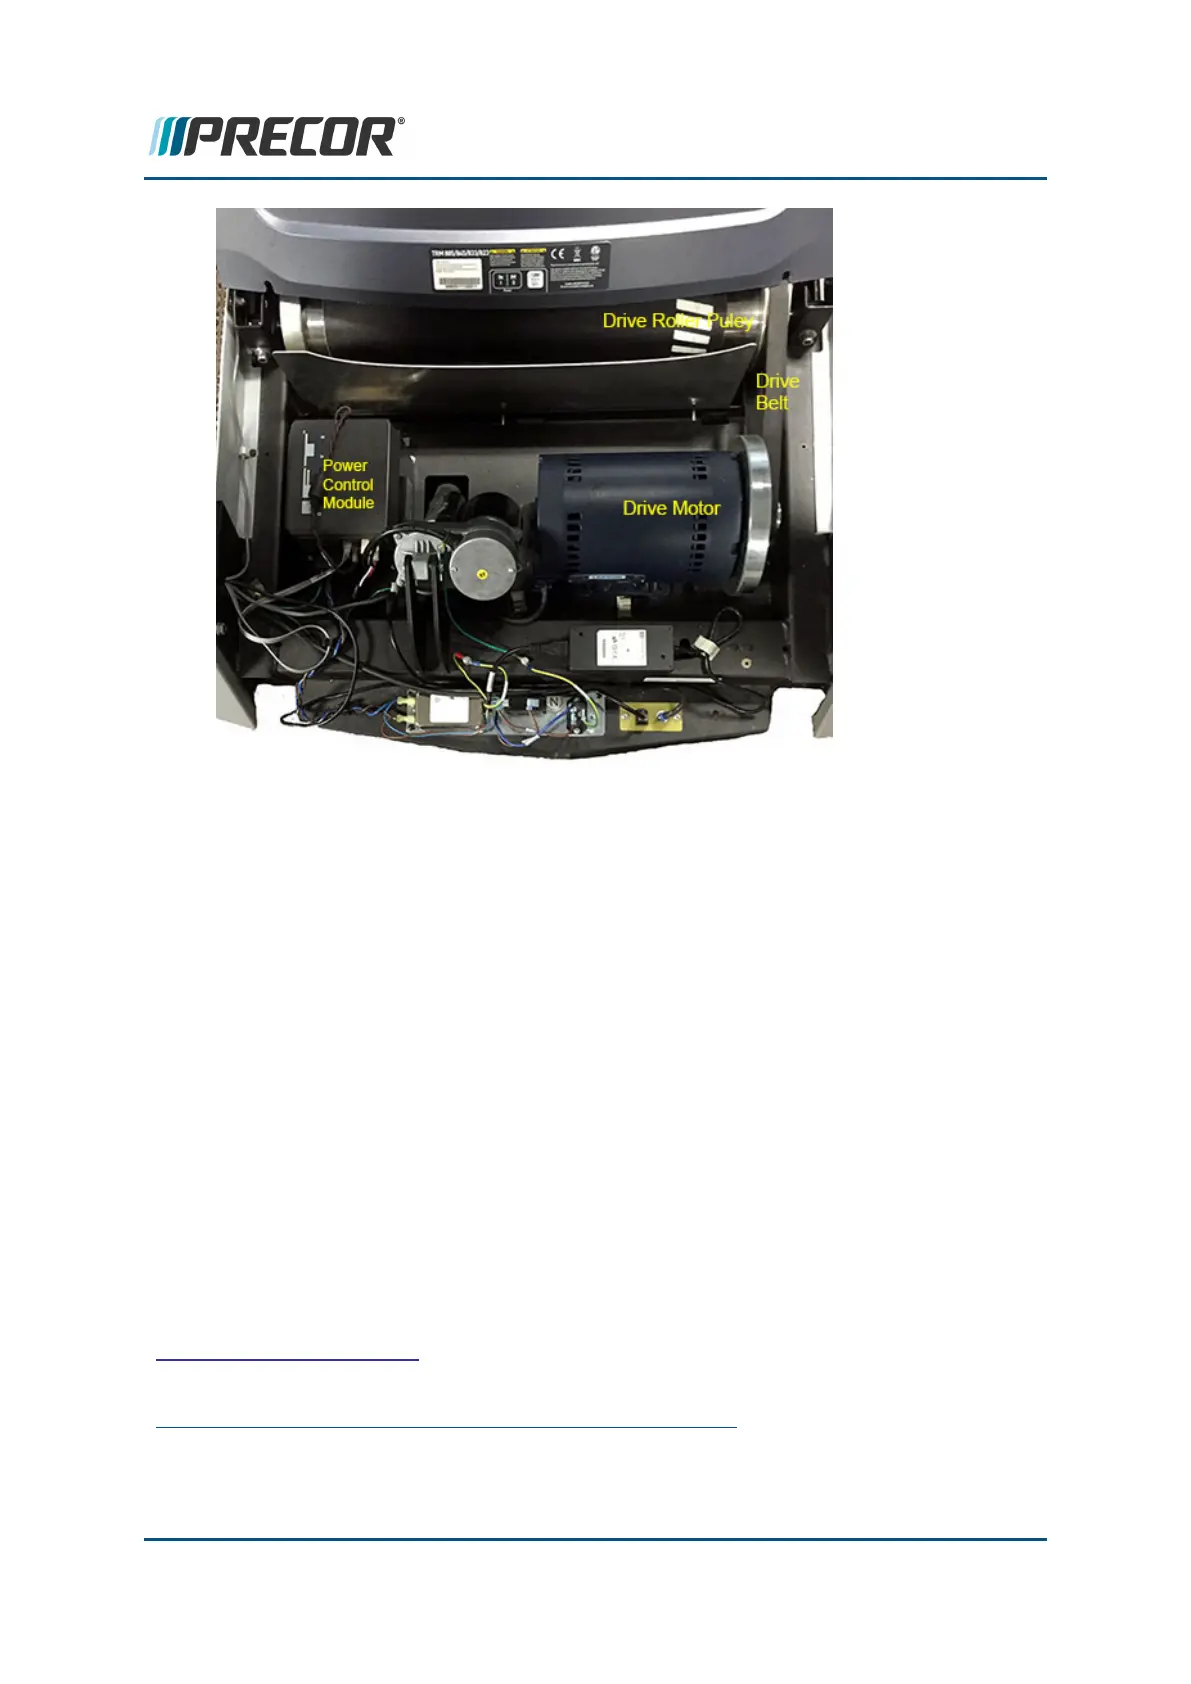
5. Mark the outline of the current motor mounting plate which will be used as a reference
position when you install the replacement motor.
6. Remove the four drive motor mounting bolts. Keep bolts for replacement installation.
7. Set the replacement drive motor onto the frame. Align the motor mount plate to the ref-
erence position marks, insert and tighten the four mounting bolts to the torque 204 in-lbs
(17 ft-lbs, 23 N-m).
8. Re-install the drive belt. It is recommended that you walk the drive belt onto the larger
drive roller pulley.
9. Connect the drive motor connector from the OUTPUT connector on the power control
module.
10. Verify that the drive belt is properly seated and aligned, see "" on page 42 procedure.
11. Verify the drive belt tension is within specification and adjust as necessary, see "Drive
Belt Tension & Alignment Adjustment" on page 40
12. Re-install hood.
13. Plug
1
in the power cord and Switch the input power ON.
14. Verify treadmill operation per "" and return to service.
.See Also
1
Device power cord connector or electrical cable male connector that is inserted into an elec-
trical receptacle "outlet" (also called the plug-in).
Contact Precor Customer Support at support@precor.com or 800.786.8404 with
any questions.
Page 60
6 Replacement Procedures
Drive Motor Replacement
 Loading...