Complete setup instructions for Studio One Professional and a brief tutorial
on its features can be found in Section 6 of this manual. However, you can
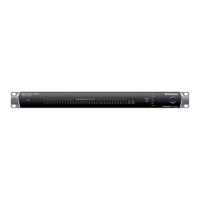
use your Quantum 4848 with any audio-recording application that supports
Core Audio or ASIO. Please consult the documentation that came with your
audio application for specific instructions on how to select the Quantum-
series interface driver as the audio-device driver for your software.
Studio One Professional
的完整设置说明和其功能的简要教程,可以在本
手册的第
6
部分找到。你还可以将
Quantum 4848
与任何支持
Core Audio
或
ASIO
的音频录制应用程序一起使用。关于如何选择
Quantum-
系列接
口驱动作为软件的音频设备驱动,请查阅音频应用程序附带的文件,以
获得具体说明。
Below are basic driver-setup instructions for a few popular audio applications.
下面是几个热门的音频应用程序的基本驱动设置说明。
1.
Launch Ableton Live.
启动
Ableton Live
2.
Go to Options | Preferences | Audio.
进入选项
|
首选项
|
音频。
3.
Choose Driver Type: ASIO | Audio Device: ASIO PreSonus Quantum 4848.
选择驱动类型:ASIO | 音频设备:ASIO PreSonus Quantum 4848。
4.
Go to Input Config: Enable and select the desired Input channels.
进入输入配置: 启用并选择需要的输入通道。
5.
Go to Output Config: Enable and select the desired Output channels.
进入输出配置:启用并选择所需的输出通道。
1.
Launch Pro Tools
启动Pro Tools
2.
Go to Setup | Hardware and select Quantum
4848 from the Peripherals list. Click OK.
进入设置 | 从外围设备列表中选择 Quantum
4848。点击 ”OK” 确认。
3.
Go to Setup | Playback Engine and select Quantum
4848 from the menu at the top of the window. Click OK.
进入设置 | 播放引擎,从窗口顶部的菜单中,选择
Quantum 4848。点击 ”OK” 确认。