EasyManua.ls Logo

Printrbot Simple - User Manual

Default Icon
23 pages
Print Icon
To Next Page IconTo Next Page
Loading...
WINDOWS 7/8 instruction guide for your Printrbot printer and computer software
Software
To start printing with your Printrbot Simple 3d printer, you need to download 3 pieces of
software and two digital models (STL files).
1. The teensy Serial Driver. This connects the printer to your computer and can be
downloaded using your web browser from
http://www.pjrc.com/teensy/serial_install.exe
2. Repetier Host v1.04. This controls your printer and slices your 3D model in
preparation for printing. The URL is http://www.reptier.com/download-now.
You may make a donation to the open source project if you wish.
3. A 3D CAD program to allow you to create your models. There are many possibilities
including some free versions. Two such free versions are Sketchup Make –
downloaded from http://www.sketchup.com or TinkerCad that is a web based
program located at www.tinkercad.com
4. From http://www.printerbot.com/simple download the firstcube.stl and
fanshroud.stl files to your computer. These will be your first and second prints
respectively.
Note that at the time of writing (Sept 2014, the printerbot.com site does have very
presentable software set up guides for the above programs. However they refer to
old obsolete versions of repetier.com that have a slightly different user interface so
do not use them unless they now refer to versions 1.04 or above.
Before you start
Please unbox your Printrbot and power it up. Verify that the green light on the circuit board
underneath the unit is on. DO NOT PLUG IN THE USB CABLE YET.
Installing the Serial Driver
The serial driver must be installed as an administrator.
Download the serial driver file .
There may be a small delay depending on the speed of your internet connection or
computer. You will see the following dialog box .
Follow the on screen instructions after selecting Run . This software will create a virtual
serial port for your printer.
Page 1 of 23

Other manuals for Printrbot Simple

Question and Answer IconNeed help?

Do you have a question about the Printrbot Simple and is the answer not in the manual?

Summary

Software and Driver Installation Guide

Download Essential Software

Lists required software: Teensy driver, Repetier Host, CAD program, and STL models.

Prepare for Printer Setup

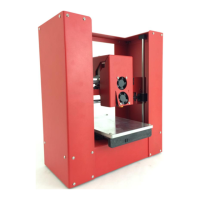
Unbox, power on, verify green light, and do not connect USB yet.

Install Teensy Serial Driver

Download the serial driver executable to begin the installation process.

Serial Driver Installation Steps

Confirm Driver Installation Prompts

Respond to User Account Control and Windows Security prompts for driver installation.

Finalize Driver Setup

Complete the virtual serial driver installation by clicking 'Done'.

Driver Installation Verification

Handle Compatibility Assistant

Address the Program Compatibility Assistant dialog by selecting 'Cancel'.

Connect Printer via USB Cable

Plug the USB cable into the printer and a USB port on the computer.

Driver Installation Outcome

Skip Windows Update for Drivers

Choose 'Yes' to skip obtaining driver software from Windows Update.

Confirm Successful Driver Install

Verify the "Teensy USB Serial (COM4) installed" message indicating success.

Repetier Host Installation

Download Repetier Host Software

Download the Repetier Host software from the specified URL.

Start Repetier Host Setup Wizard

Run the installer and select the setup language.

Repetier Host Setup Wizard Configuration

Accept License Agreement

Read and accept the End User License Agreement.

Select Installation Components

Choose components to install, avoiding Skeinforge Slicer.

Repetier Host Installation Steps

Configure Start Menu Shortcuts

Specify the Start Menu folder for program shortcuts.

Initiate Repetier Host Installation

Click 'Install' to begin the software installation process.

Completing Repetier Host Setup

Finish Repetier Host Installation

Click 'Finish' to exit the setup wizard and launch Repetier-Host.

Prepare for First Use

Delete the pre-loaded tablet stand from the build platform.

Printer Configuration in Repetier

Set Connection Parameters

Configure Port, Baud Rate, and Reset on Connect in the Connection tab.

Configure Printer Movement Settings

Set Travel Feed Rate, Z-Axis Feed Rate, and retraction speeds in the Printer tab.

Advanced Printer and Slicer Settings

Configure Extruder Settings

Set extruder temperature, volume per second, and nozzle diameter.

Define Print Area Dimensions

Set print area width, depth, height, and bed limits.

Printer Connection and Control

Connect to Printer

Click the 'Connect' button and verify the status changes to green.

Prepare Print Bed Surface

Apply painter's tape evenly to the print bed for better adhesion.

Manual Printer Control Operations

Home the Extruder

Press X, Y, and Z home buttons to park the extruder.

Load Filament and Extrude

Heat extruder, load filament, and extrude to test functionality.

Slicer Configuration - CuraEngine

Select CuraEngine Slicer

Choose CuraEngine as the slicer and select 'Configuration'.

Configure Speed and Quality Settings

Set print, travel, and layer speeds, and default quality.

CuraEngine Slicer Detailed Settings

Configure Print and Infill Settings

Adjust shell thickness, infill overlap, pattern, and support settings.

Configure Extrusion Parameters

Set retraction speed, distance, and nozzle diameter in Extrusion tab.

G-Code and Advanced Slicer Settings

Configure Start and End G-Code

Set Start and End G-Code for auto-levelling features.

Save Slicer Configuration

Save the configured G-Code and Advanced settings.

Filament Settings for Slicing

Set Filament Diameter and Flow

Input filament diameter (1.75mm) and flow rate for accurate extrusion.

Save and Close Slicer Settings

Save the configured slicer settings and return to the main screen.

Preparing for Your First Print

Load First Print Model

Load the 'firstcube.stl' file into Repetier for slicing.

Slice Model with CuraEngine

Select the Slicer tab and click 'Slice with CuraEngine'.

Executing Your First Print

Preview Sliced Model

Select the Preview tab to visualize the sliced model layers and details.

Start the Printing Process

Ensure connection, then press 'Start Print' to begin printing the model.

Prepare for Second Print

Download, unzip, and load the 'fanshroud.stl' model for the next print.

Next Steps and Model Resources

Download Additional Models

Find 3D models on Thingiverse, Youimagine, and Grabcad.

Design Custom 3 D Models

Install Sketchup or TinkerCad to design your own 3D models.

Troubleshooting Serial Driver Installation

Access Device Manager

Open Control Panel, select 'Hardware and Sound', then 'Device Manager'.

Locate Serial Port Entry

Find 'Ports (COM & LPT)' and look for the Teensy USB Serial entry.

Verifying Serial Driver Status

Check Teensy USB Serial Properties

View the properties of the Teensy USB Serial device.

Interpret Device Status Message

Check the 'Device status' for confirmation of correct installation.

Updating or Reinstalling the Driver

Access Driver Update Options

Go to the 'Driver' tab and select 'Update Driver'.

Browse for Driver Software

Select 'Browse my computer for driver software' to locate drivers manually.

Final Driver Search and Update

Specify Driver Location

Enter or browse to the driver directory (e.g., C:\Windows\System32\drivers).

Search for Driver Files

Click 'Next' to search for 'usbser.sys'; search other directories if needed.

Printrbot Simple Specifications

General IconGeneral
Filament Diameter1.75mm
Nozzle Diameter0.4mm
ConnectivityUSB
Build Volume150 x 150 x 150 mm
Print SpeedUp to 80mm/s
SoftwareCura, Repetier-Host
Frame MaterialLaser-cut wood
Weight5 kg
Print TechnologyFused Deposition Modeling (FDM)

Related product manuals