46
Running Manual Calibrate
Manual Calibrate should be performed only when the values derived from
Auto Calibrate fail to improve the
media sensors’ ability to sense label length
indicators on the installed media. Manual Calibrate is located in
the Sensors > Diagnostics section.
NOTE: Verify the Gap/Mark Sensor option (Gap, Mark, Advanced Gap,
Advanced Notch, or Disable)
matches the installed media. See Sensing Different Media Types page 40.
Ensure the media sensors are horizontally positioned to permit
sensing of the label length
indicators. See Positioning the Media Sensors page 35.
Ensure the Media > Handling > Print Mode option matches the media installed. Select “Direct”
for heat sensitive media
(no ribbon required) or “Transfer” for thermal transfer media (ribbon
required).
If you try to do a Manual Calibrate when Peel-Off Media Handling is
enabled, the LCD will
display a “CANNOT CALIBRATE” error. Before you can do a Manual Calibrate, you must
select another
media handling mode.
1. Press the PAUSE key to place the printer OFFLINE (Home Screen).
2. Find the Settings ICON and press ENTER.
3. Press the up and down arrow keys together until “ENTER SWITCH UNLOCKED” displays.
4. Find the Sensors ICON and press ENTER.
5. Select the “Diagnostics” submenu and press
↵
ENTER.
6. Find “Manual Calibrate” and then press
↵
ENTER to start the process
.
7. Follow the instructions displayed on the LCD. Example: “REMOVE RBN&MEDIA/Press Enter”
indicates that you must open the pivoting deck and remove the ribbon and media from under the
printhead, close and lock the pivoting deck, and press the
↵
ENTER key.
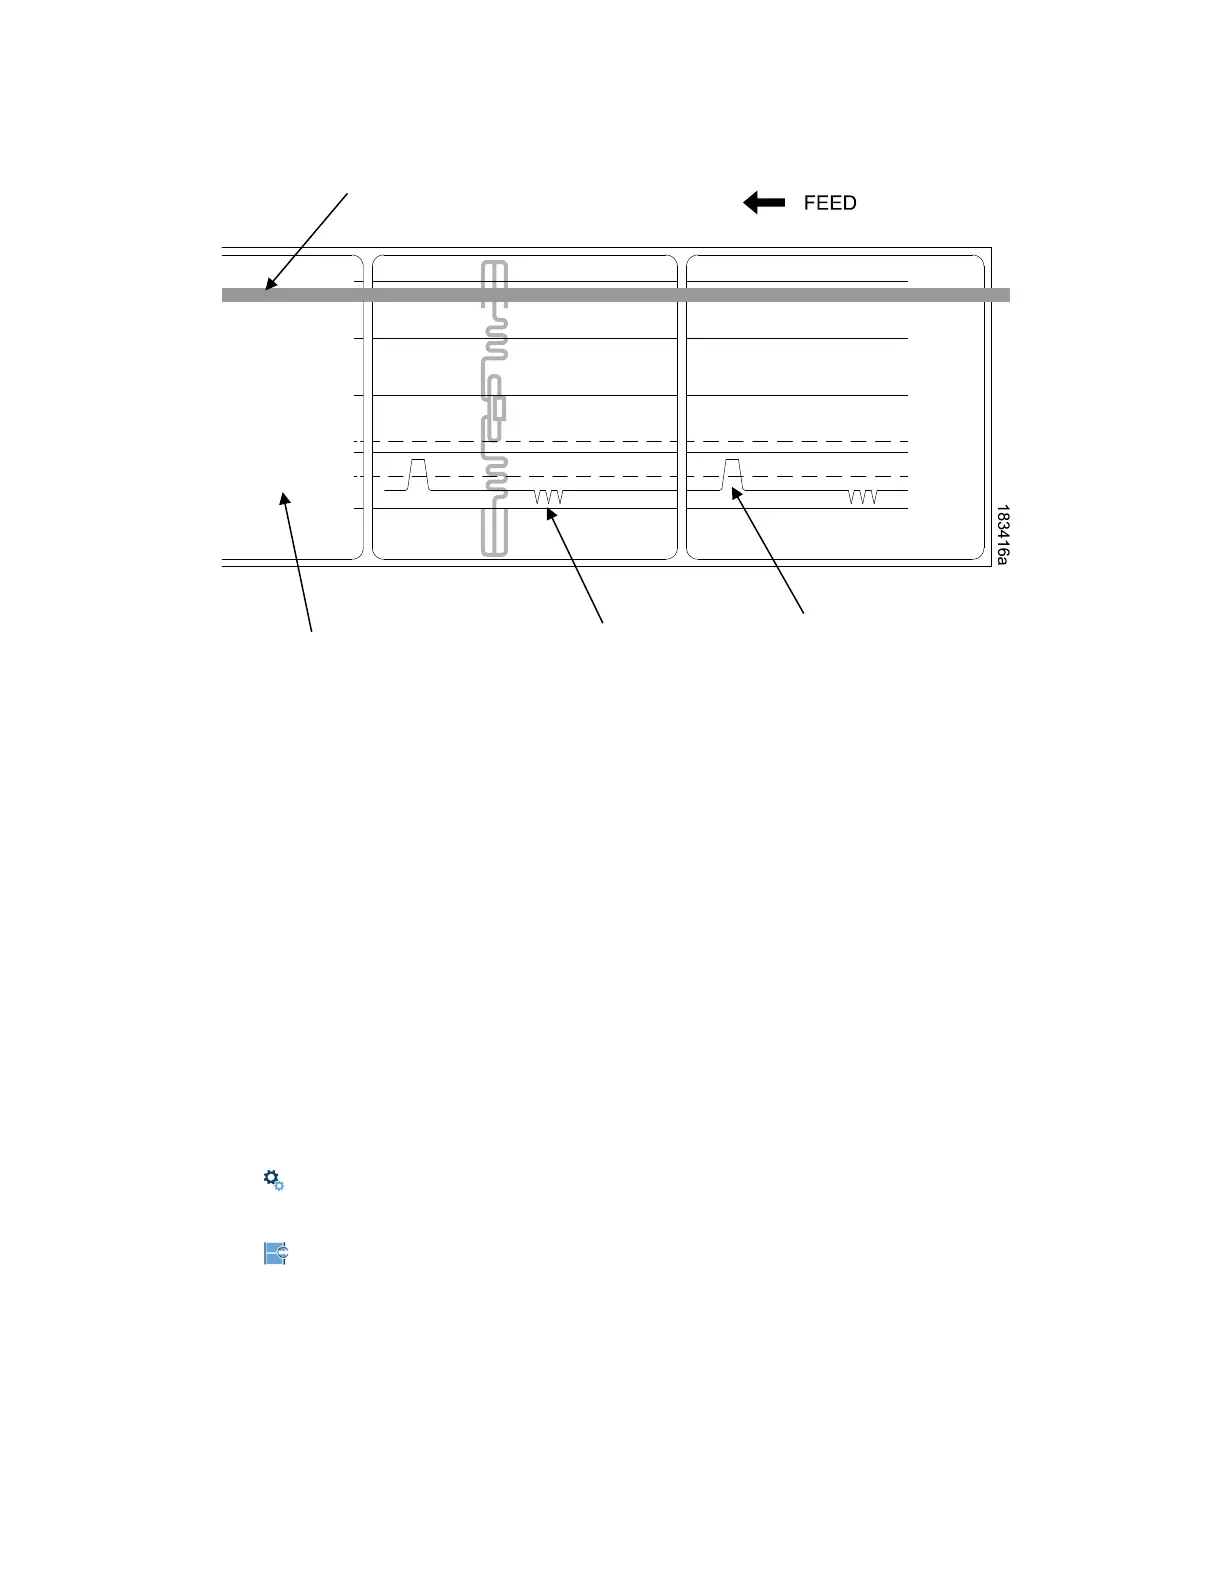
Indicates Type of Gap/Mark
Sensing Selected
Detected Amplitude
of the Antenna
Detected Amplitude
of the Gap