8-3
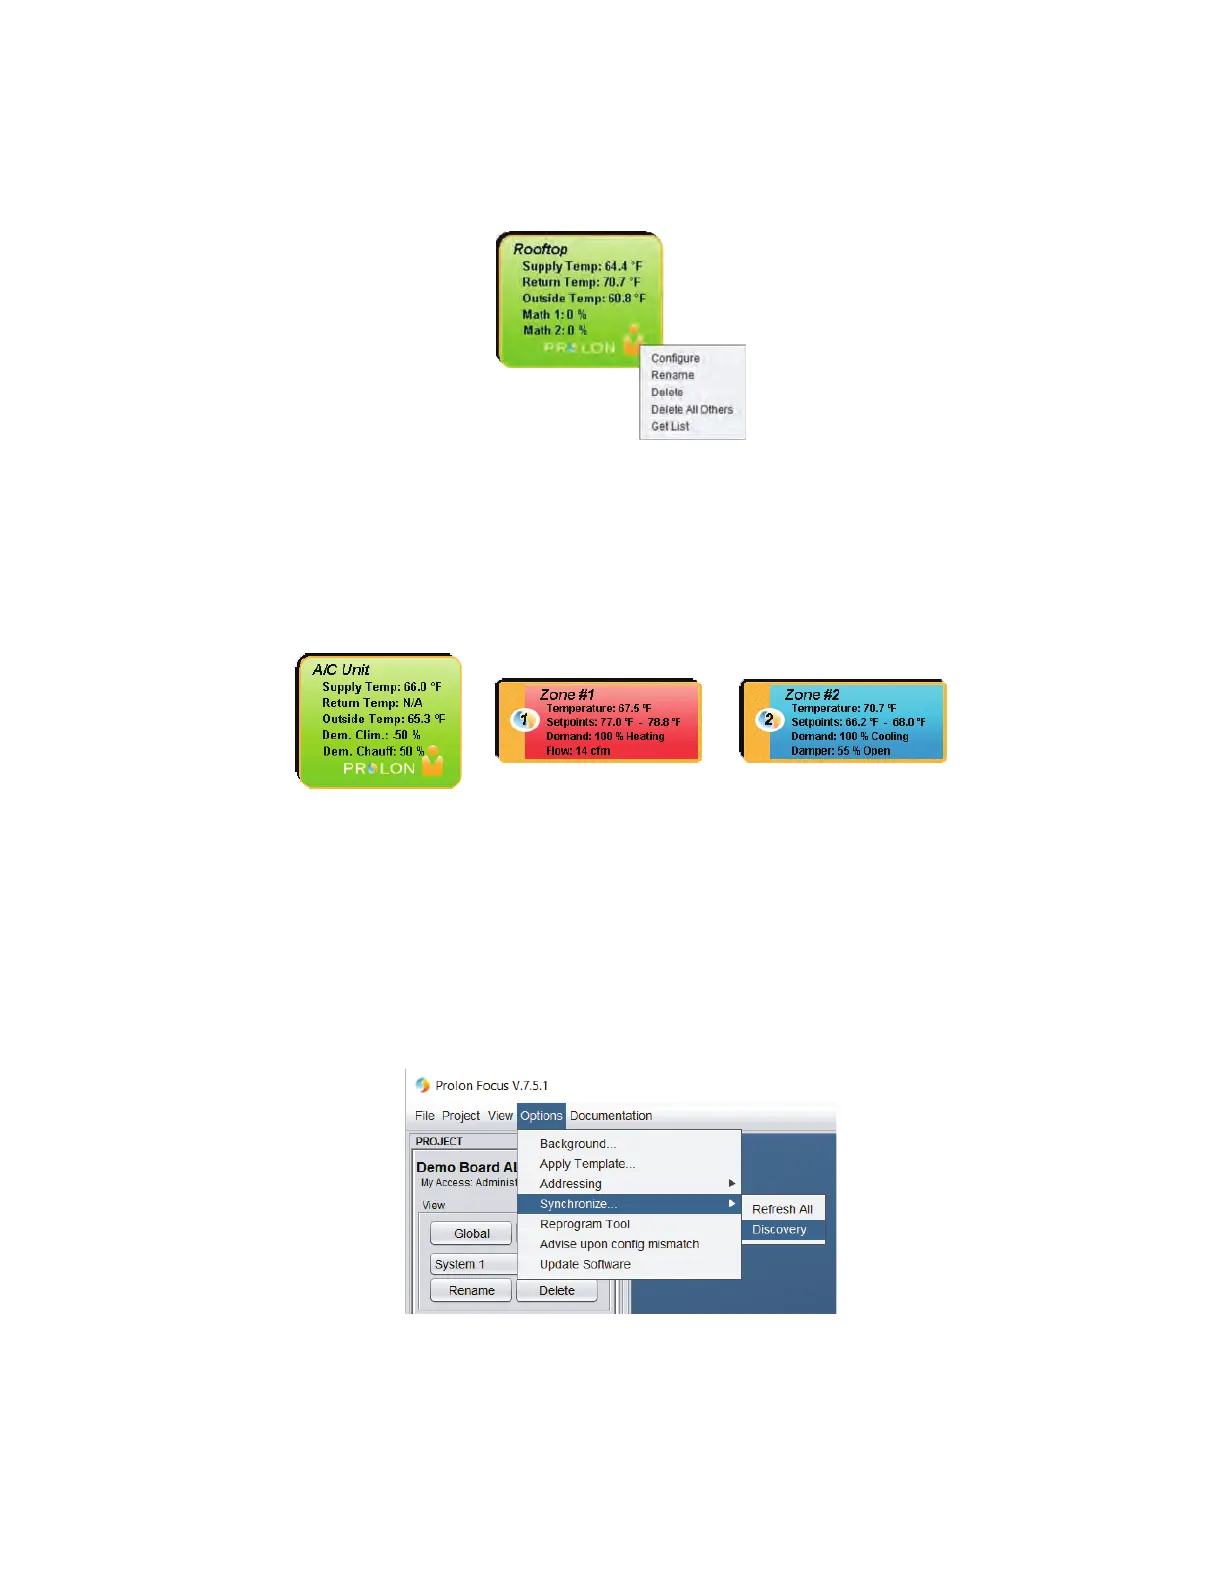
• A bright colored icon (green, red, or blue) will appear at the top of the screen, symbolizing the unit.
• If the controller created is a “Master”, such as the RTU, move the mouse’s cursor and point the icon, right-click on the
mouse to browse the command menu.
• Click on “Get List”, the unit controller will scan its’ network and update the list of zones under its authority, and the zone
icons will begin to appear on screen.
• Validate the list of zones, checking all addresses and making sure they have all shown up, according to the project’s
intended design. If some expected icons are missing, ensure that the controls are supplied with 24VAC. Check the
connection to the power supply and to the network (those connections are polarity sensitive) and last, check on the
controller card the status of the following blinking LED’s: hbeat, netrec and netsnd.
• Conrm that all the zones appear in one of the following three colors according to their request: green= satised,
red=heating, blue=cooling.
• Should an icon appear in grey, communication is lost to that zone.
Creating multiple systems (Auto Discovery)
• IfconnectingtoaNC-2000NetworkControllerinstead,Focusoersanalternatemethodofndingandcreatingmultiple
controllers (and systems) on screen.
• From the top of the Focus screen simply click on: “Options”, then “Synchronize” and “Discovery”. Clicking OK will allow
Focus to scan the entire network for controllers and pull in any device answering the call.
Conguring the controllers
• Eachcontrolleronaprojectmayneedtobeconguredwithsettingsdierentthanthoseprovidedbythefactorydefault
values.Itistheuser’ssoleresponsibilitytomakesureallcontrollersareindeedconguredpertherequiredapplicationand
controlsequence.(Formoredetails,pleaserefertoeachcontroller’sFocusGuide.)